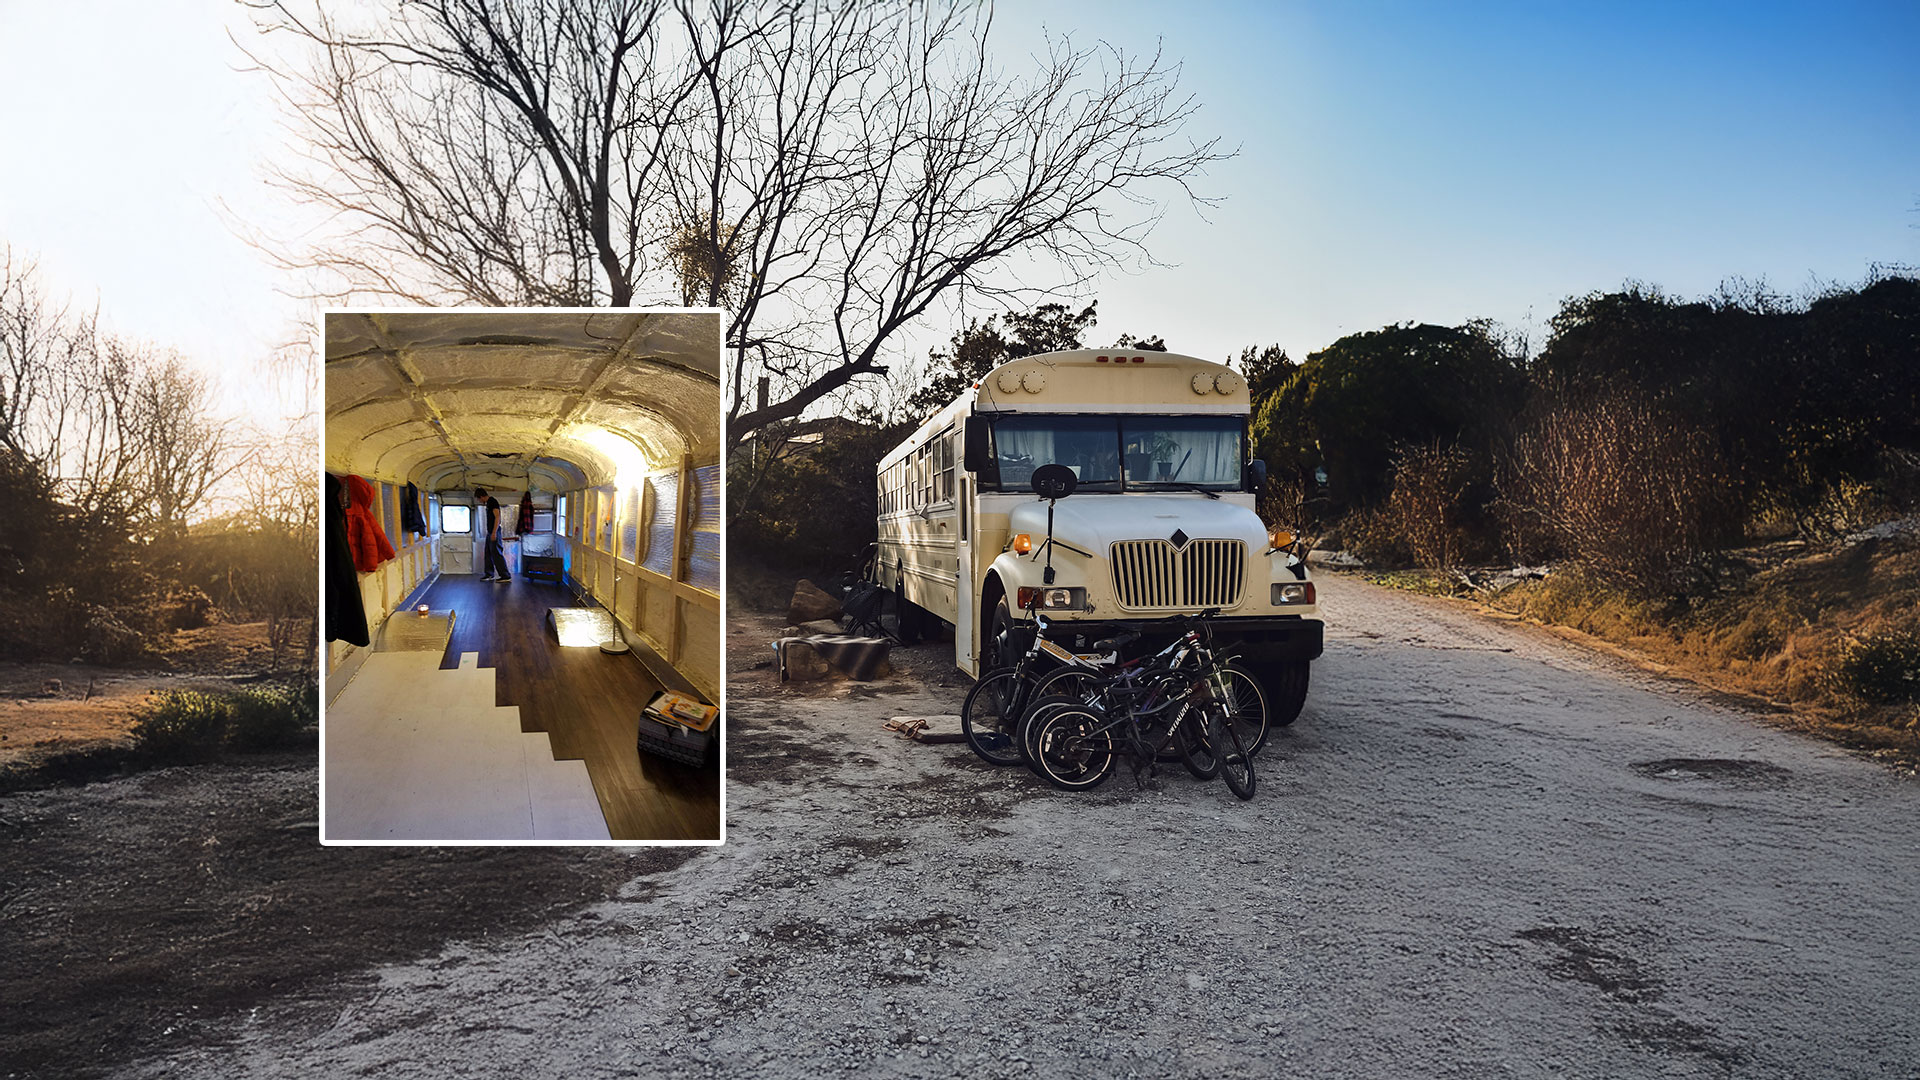
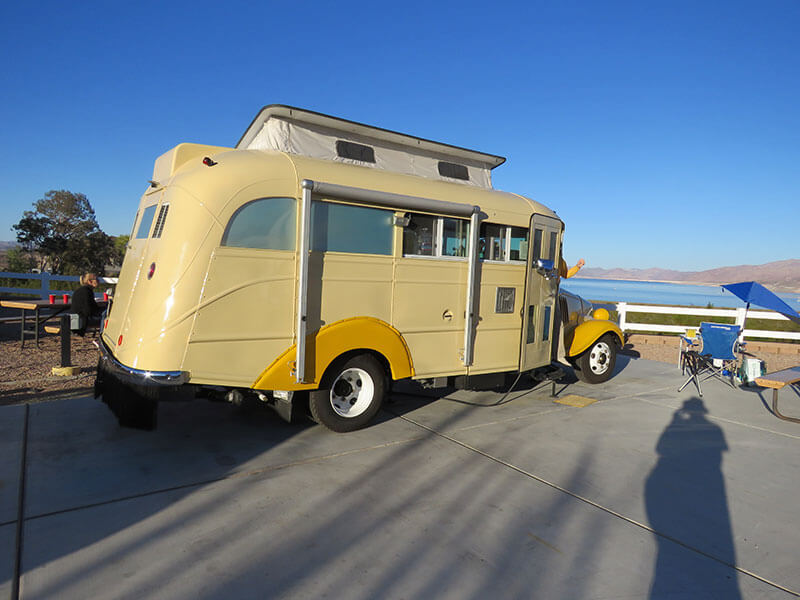
Honeysuckle Rose
We call her Honeysuckle Rose after Hoyt Axton’s Scenicruiser tour bus because she thinks she’s a hound but she’s really (a) Superior.
The initiation of this project and my subsequent elevation to the status of bus nut came hot on the heels of an unexpected Reserve Best of Show award at a large all-GM truck show where my stock-looking but highly modified ’71 Chevy Suburban stole the day. Needless to say, I could hardly wait to find another project to enter in a subsequent show.
Later that summer, a friend returned from “Hot August Nights,” a huge hot rod show and sale in Reno, Nevada with three Xeroxed colored pages of possible project candidates. Circled were pictures of Chevy Nomads, Ford T-birds, and other worthy vehicles, but what attracted my attention was the picture of a tired looking 1935 Chevy school bus. There it was. It was a Chevy. It was a truck of sorts and it was yellow just as the Suburban had been. Done deal—almost.
I contacted the owner of the pictured bus and arranged to travel the 825 miles from my Southern California home to Bend, Oregon to look the bus over. I liked what I saw so I called the owner who was out of town for the day and agreed to purchase the bus. The seller agreed to give me a week to arrange for shipping, which I did. When I called him to finalize the pickup date he informed me that he had sold the bus to someone else. Undaunted, I continued my search. With the help of Craig’s List, I found a 1936 Chevy school bus a mere 125 miles from home and went to check it out. There seemed to be enough of it left to work for me so I dialed the guy I’d talked to planning to complete the deal. The guy didn’t answer—his wife did and when she heard what I was calling about she screamed “The bus ain’t for sale!” and hung up on me.
Another Craig’s List find was located north of Bellingham, Washington a few miles from the Canadian border. After a long discussion with the owner, I was assured that the bus was drivable and would, with care, make the trip to California. At the time I was working three days on and four days off so I figured that I had enough time to do a round Robin 2650 mile dash for the bus. I talked a friend into helping me and we set off on a blustery January morning. My buddy and I took turns driving and sleeping, with him complaining about my adherence to the posted speed limit and how we would never get to the border at the rate I drove. I got the last laugh though when I awoke to see a large highway sign saying 50 miles to Lake Tahoe—that was a 200-mile error in the wrong direction, but I’m sure we got there in a hurry!
When we finally reached the storage lot the bus was parked in, it was immediately clear that the owner had no clue about buses or for that matter much of anything else. I managed to start the bus using the battery from the owner’s 1984 Dodge Diplomat ex-cop car. After much gear crunching the bus reluctantly climbed its way out of its ruts and moved a few feet. I stomped on the brake which not only went to the floor but completely through the floor and onto the ground! I wanted to be angry at the seller, but he was such a train wreck that all I could do was laugh. It was probably just as well that the bus wasn’t drivable as it snowed most of the way back to California and the bus had neither a heater nor windshield wipers. My co-pilot and I are longtime friends and we laughed ourselves silly the whole way home.
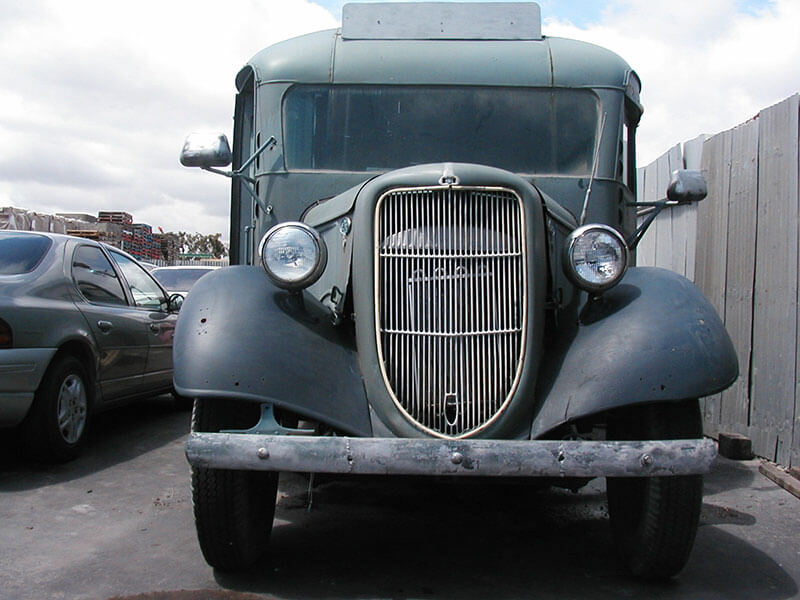
It was now March of the next year and I’d had no luck finding a bus. I had nearly given up when one evening while cruising Craig’s List and e-bay I found an e-bay ad for a 1935 Ford short school bus with a Superior brand body. I was able to chat with the bus owner and learned that he had owned the bus for 17 years have used it as a billboard for his antique shop in Sandy, Utah. During his ownership, the bus was used in the film “Topaz,” a documentary about the World War II Japanese internment camp of the same name. Prior to his ownership, the bus was used as a medical clinic on an Indian reservation and, of course, as a school bus in rural Utah. When I explained my plans for the bus he seemed happy with my intentions and when the bidding dust settled I was the proud owner of a ’35 Ford school bus!
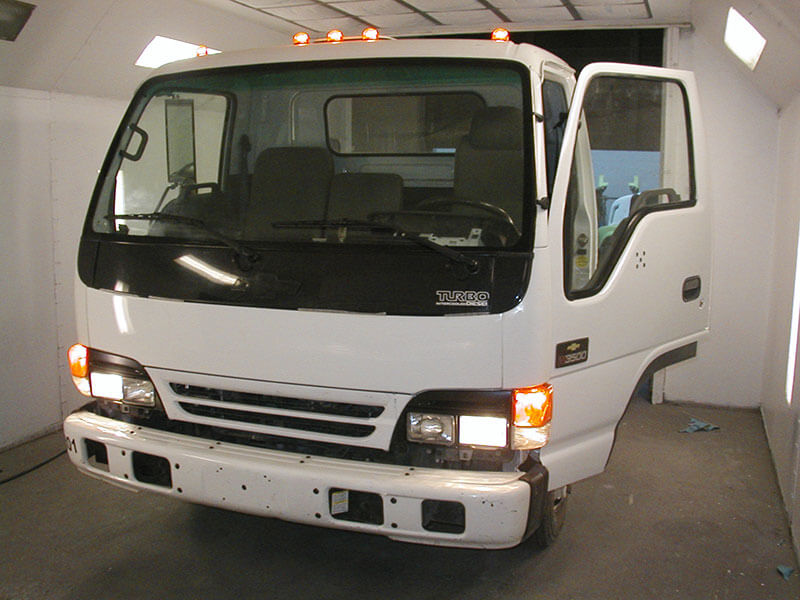
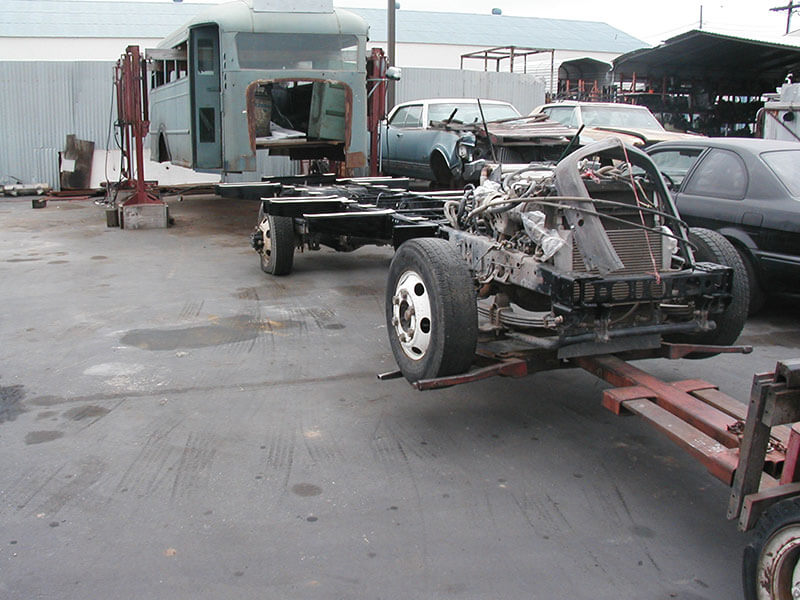
I still had my heart set on this being an all-GM project so I reviewed the Xerox sheets and found a 1935 Chevy 1-1/2 ton truck located in Reno, Nevada. I figured I’d take the bus body off the Ford Chassis, put it on the Chevy chassis, and then sell the Ford leftovers, which I did. I then began to worry about the mechanical brakes, closed drive shaft, and 2-speed rear axle on the old Chevy and came to the conclusion that placing the bus body and Chevy sheet metal on a late model frame would make the project highway safe to operate. In keeping with the all-GM notion I chose a 2005 Chevy W3500 turbo diesel tilt cab truck for the job.
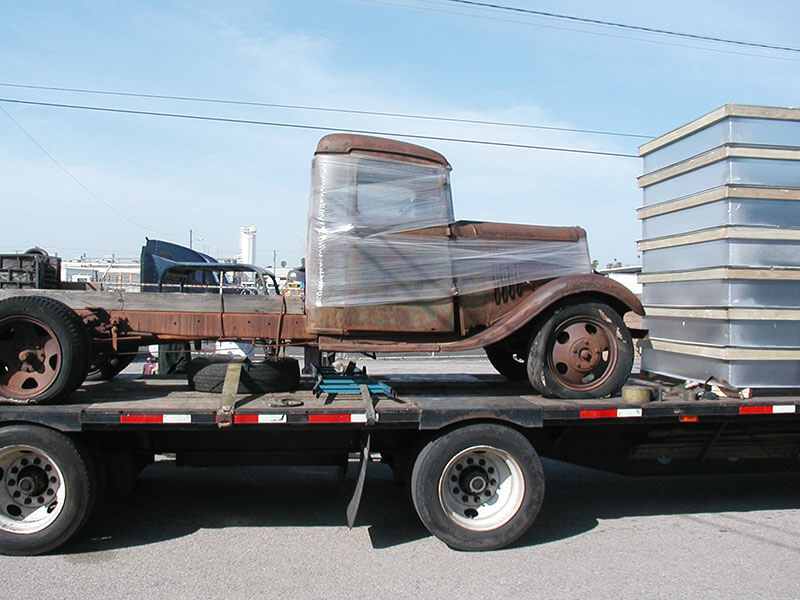
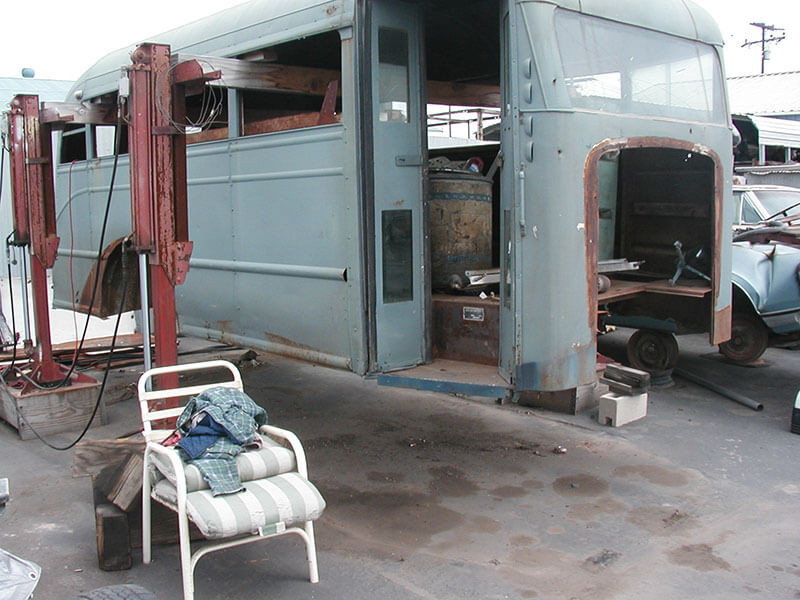
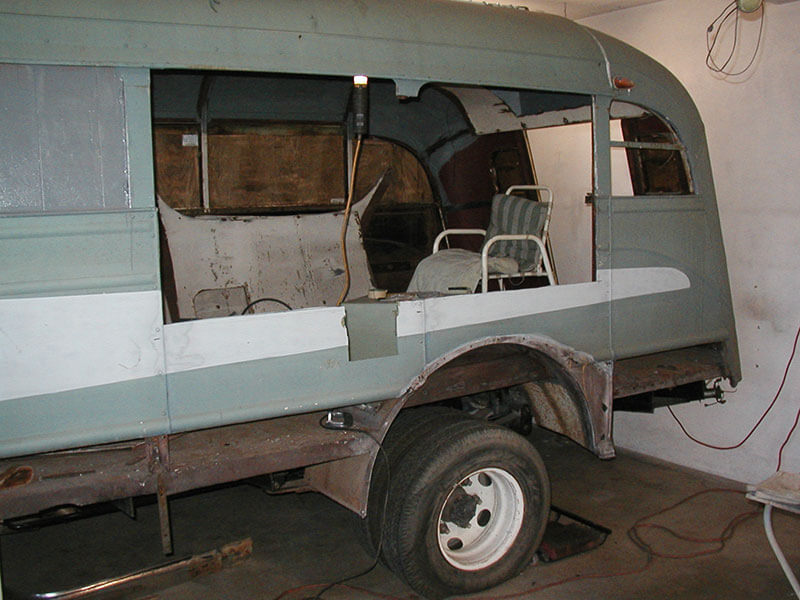
The first step in the build was to remove all of the interior sheet metal, all the windows, all the rock wool insulation, all the floor covering, and all the old wiring. That let me find and remove the ½” carriage bolts which held the body to the frame. I ended up grinding the heads off the bolts and pounding them down through the floor. I lifted the bus body from the frame using 4” X 8” X 10’ beams supported by heavy-duty hydraulic house moving jacks on either end of the beam, one beam through the rearmost pair of windows and one beam through the frontmost pair of windows. Once the bus body was lifted from its original frame and all measurements pertaining to the location of the body mounts on the Ford frame had been recorded, I was able to sell all the Ford gear to a fellow who was restoring an old Ford tow truck.
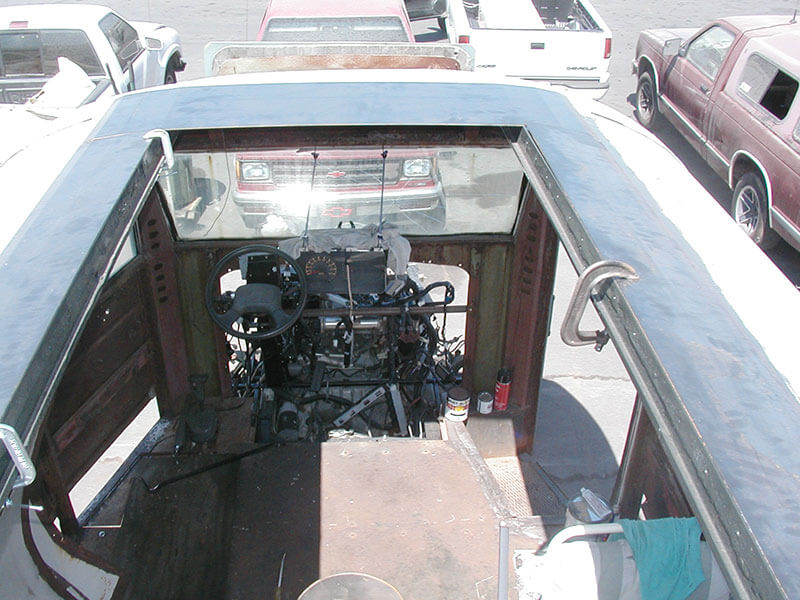
The next step was to lengthen the Chevy W3500 frame to match the wheelbase of the bus. This was complicated by the need to lengthen the drive shaft, fabricate double flared brake line extensions, extend shielded ABS wiring as well as lengthen whatever else went with a modern computerized drive train. This process took me several months as every step had to be tested for proper performance before the next step was begun. It was an exciting day when I was finally able to position the bus body on the completed frame—everything lined up!
My wife and I considered many floor plans for the 10’ X 7-1/2’ living area. We wanted as much counter space as possible and a comfortably large table to dine at. We knew that we would have to settle for a combination bath, sink, and shower (wet bath) and finally decided it would be best to put it at the rear of the bus. Because the back of the bus slopes down, the rear bath meant there would have to be a step down in the floor as well as a pop-up in the roof if I was going to be able to stand up in it. Once the bath was laid out, we were able to use masking tape on the floor to finalize the floor plan. That technique worked very well because it allowed us to design what was to be on top of the floor while considering obstructions that lay below the floor.
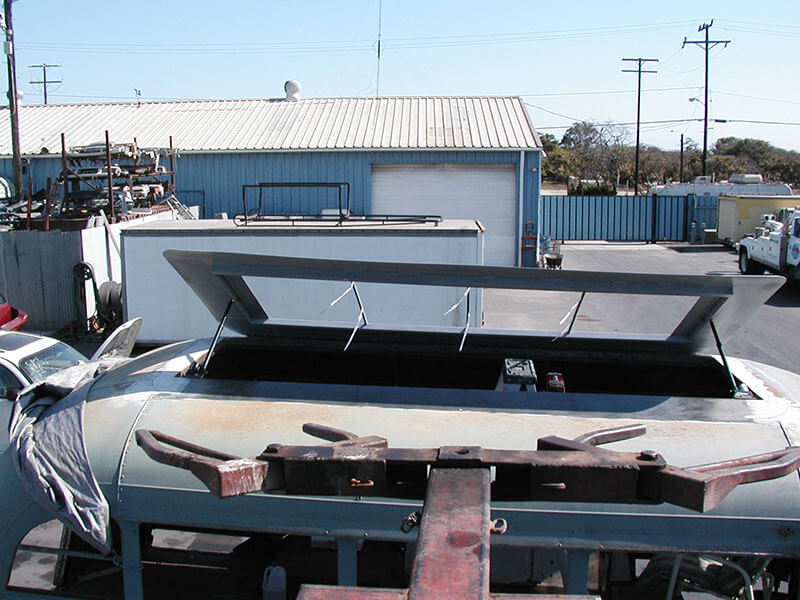
During this design time, it became clear to me that the 5’6” of headroom in the bus body wasn’t going to work for my 6’ height. Fortunately, the bus had been built with a 3’ wide 8’ long single roof panel lengthwise and in the center of the body. Even lucky was that there was a heavy steel frame surrounding the panel that made designing a pop-up roof pretty straightforward. I copied the design of the VW Westfalia pop-up except that mine opens via 12-volt linear actuators along the lengthwise axis rather than at one end.
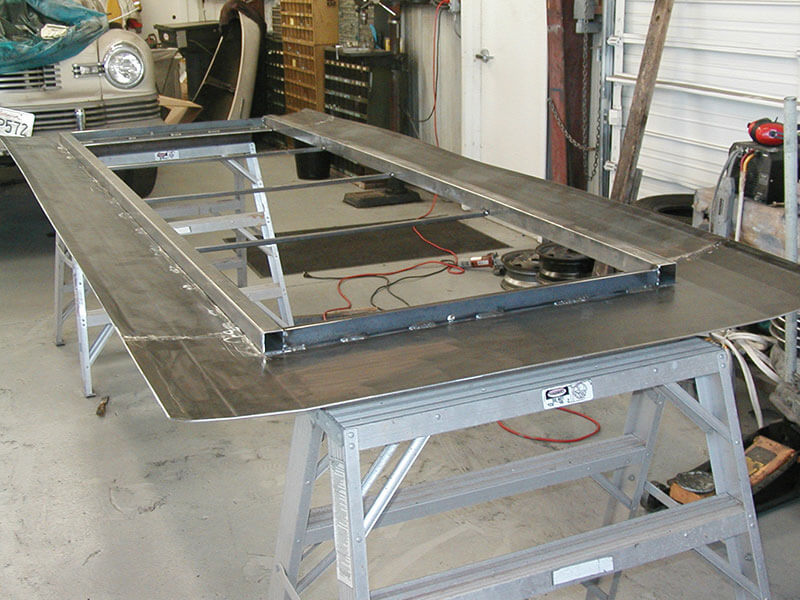
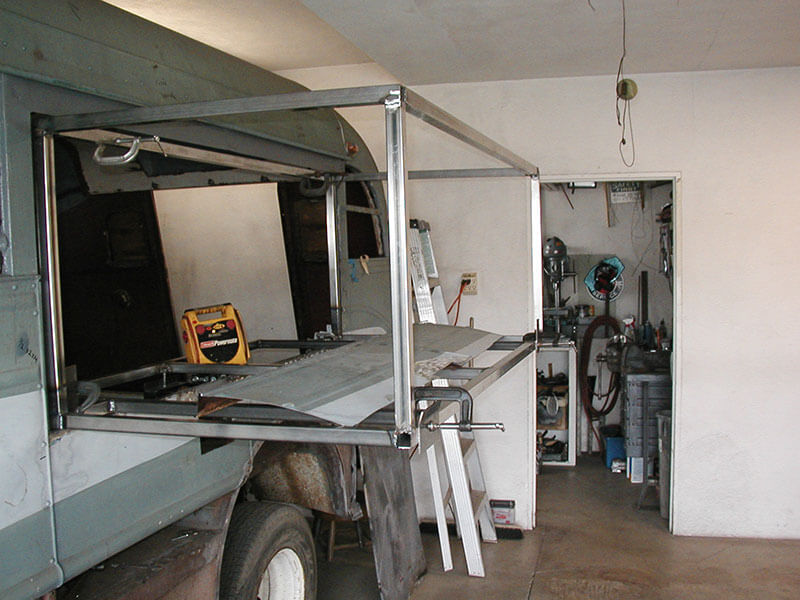
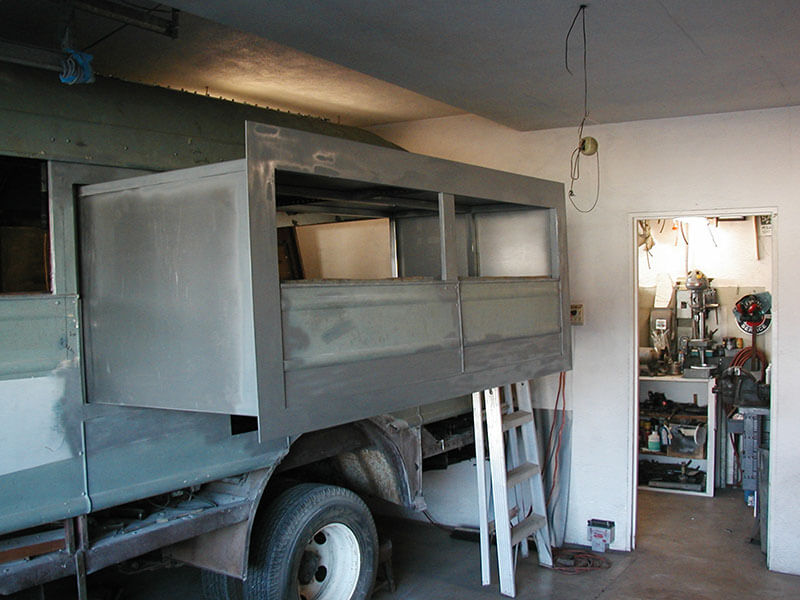
With most of the floor space being taken up by the counter, bath, and table, sleeping accommodations looked a little bleak. There was only enough room left for narrow bunk beds along the wall and neither of us liked that idea. A slide-out seemed to be the only answer, so I set about finding an electric drive mechanism around which to build a slide-out. I knew I had to cut a section out of the side of the bus if I wanted a slide out, nevertheless, the initial cut was a stressful experience.
I built the slide-out frame from thick wall square tubing and used sealed roller bearings as glides. The frame was covered with sheet metal on four of its six sides and by the original bus panel on the fifth side. The covered sides were insulated with 2” thick PolyFoam as was the rest of the bus. With the slideout extended, a queen-size air bed fits with room to spare. The portion of the bed that isn’t supported by the slideout rests on a frame that covers two, 30-gallon water tanks and a good bit of storage. With the bed extended there is 16” of walk space between the head of the bed and the kitchen counter.
The original entry door on the bus was of the bi-fold type with a half opening in and half opening out. The portion that opened did so up against the end of the counter, thereby rendering the end of the counter useless unless the door was closed. While vacationing in Yosemite National Park I spotted a bus door that seemed to step out from the side of the bus and then migrate along the side of the body leaving a completely unobstructed entryway. A little reading on the Internet taught me that these doors are called parallelogram plug doors because their path scribes a parallelogram. Most are pneumatically operated—I had to have one.
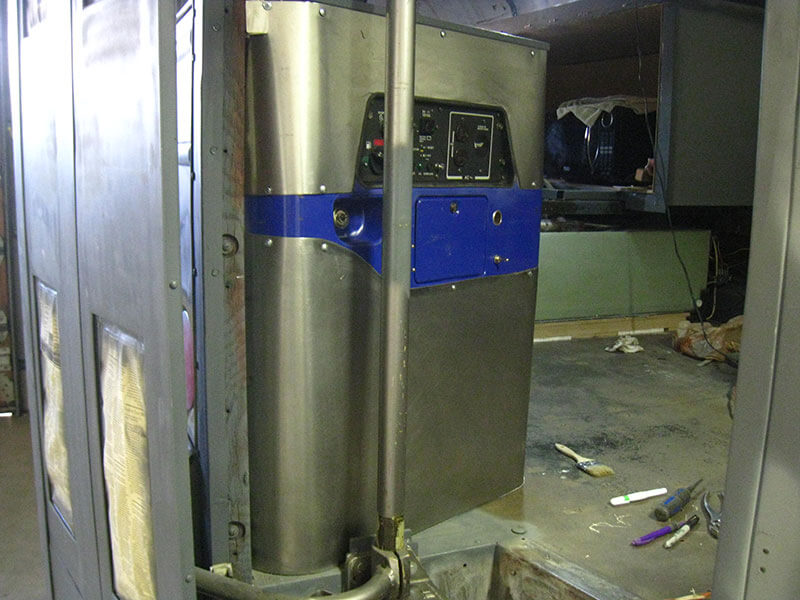
A local wrecking yard had a junk airport shuttle bus with the proper door and sold it to me for $150 including everything related to it. I got the compressor, air tank, actuator, door, hinge pole, switches, emergency release, wiring, and entry light switch—all I had to do was remove it myself which I did with much gusto. It took me a couple of weeks to cut down the size of the various components to make them fit my little bus. The door is without a doubt one of my favorite mods on the bus. It works flawlessly and opened up the end of the kitchen counter as a location for the electrical system including shore power, generator power, inverter power, and circuit breakers.
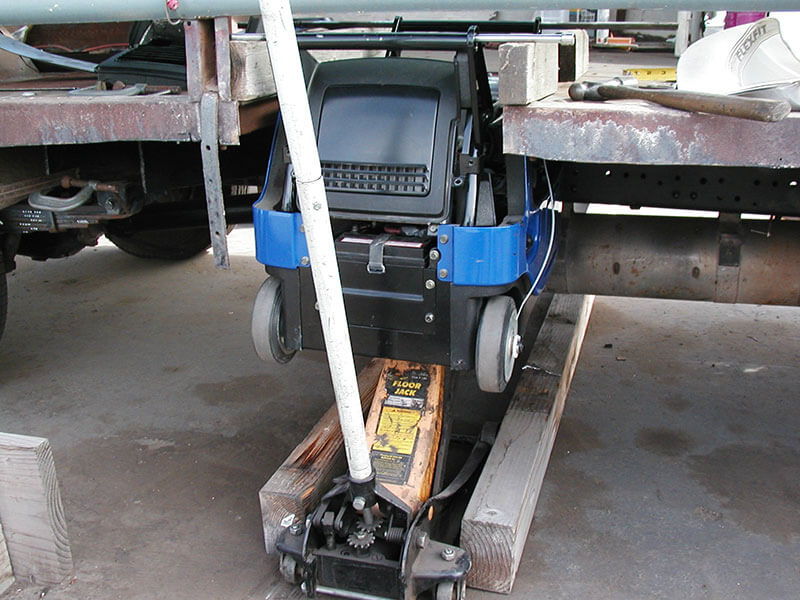
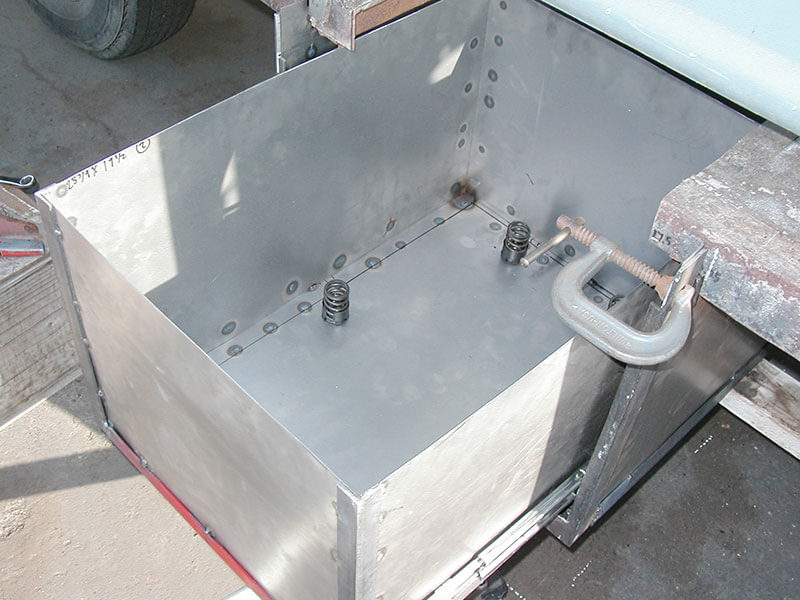
Finding a spot to house the 3K Yamaha inverter generator was made simple when I decided to use the Genny face plate and controls as the end of the counter made available by the pneumatic door. I put the genny in a roll-out drawer under the floor along the side of the bus and added sound-deadening material and forced air cooling for the motor. Next, I moved the generator’s computer into the area just behind the face plate at the end of the counter as a precaution against overheating.

At this point, I was ready to install insulation, rough plumbing, and both 12-volt and 120-volt rough electrical systems. I fabricated the counters and cabinets from ½” square thin-wall tubing and covered them with directly applied Formica. Built into the lower kitchen counter are a dorm-size fridge, a propane gravity heater, and an RV 4-burner propane stove and oven. Where the counter abuts the bathroom wall at the back of the bus, I installed a small microwave oven, and directly above it, and supported by the roof, is a 6K BTU air conditioner.
For hot water, I used a propane-fired tankless water heater that is housed in a sealed metal cabinet that gets its fresh air from under the bus and exhausts through the top of the bus. Tankless water heaters will only operate when there is both sufficient water flow and pressure. To prevent the heater from cycling on and off each time one opens or closes a spigot, I installed a solenoid valve that allows water to circulate from the freshwater tank through the heater and back to the holding tank when the heater is turned on. This also reduces water waste as you wait for hot water to arrive at the spigot.
With the body, drive train, and interior more or less figured out it was now time to decide what to do with the front sheet metal. The Chevy trucks of the time all had what is known as “butterfly hoods.” To raise them you twisted a handle on the side of the hood and lifted the butterfly wings to access the engine compartment. No doubt without exception, at one time or another a mechanic would lose his grip on a handle and a partially extended wing would come crashing down on the fender leaving its tell-tale mark behind.
To avoid this and to make the engine compartment more accessible I built a tilted front end that rises from the cowl and tilts forward. The entire hood, radiator shroud, and front fenders move as one. It was such a simple idea but it took me a month of sliding a paint stir stick mock-up back and forth on the garage floor before I understood how the mechanism would work. I added an electric winch and a few pulleys and now with the press of a button the front end tilts open and closed like magic.

With the front end done I set my sights on making replacement panels for the bus body sides below the floor height as these panels were very rusty. I talked to the owner of a local metal fabricating shop and learned how metal stamping dies work and how they are made. Armed with this new knowledge I built my own dies and was allowed to use the shop’s huge metal press to stamp out my own panels—too much fun! With the replacement panels welded in place, I was down to basic bodywork and a paint job—both activities I enjoy.
Having finished the paintwork and the various systems I was left with tail-end tasks like installing linoleum in the kitchen, carpet in the cockpit, and window shades and screens.
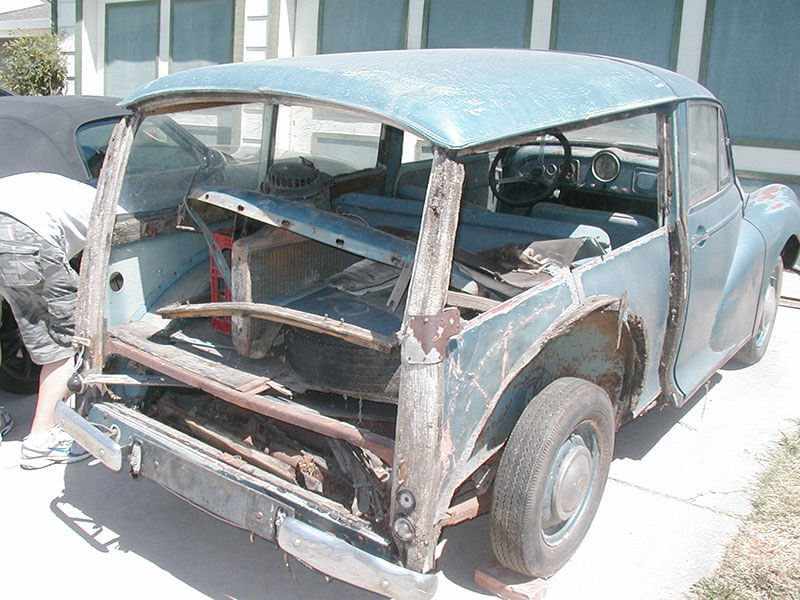
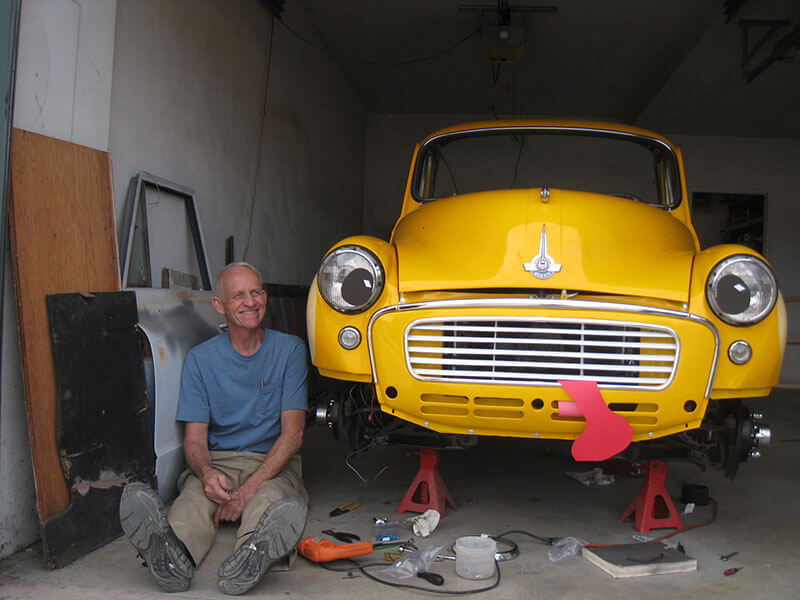
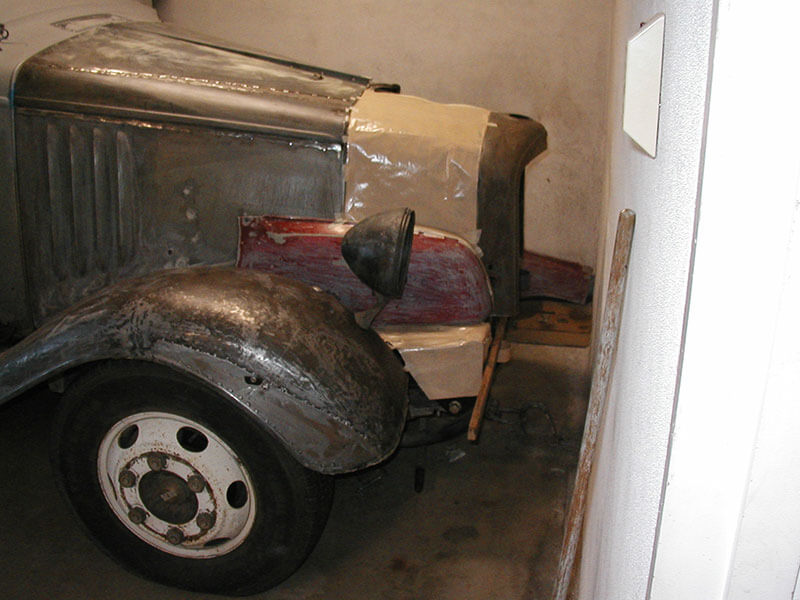
My story about Honeysuckle Rose would be incomplete if I neglected to mention her TOAD. His name is Clarence and he is a 1959 Morris Minor Traveller woody wagon. He was chosen as the TOAD because of his general body shape and styling—teardrop fenders and lots of round surfaces. In keeping with the (nearly) all-GM theme, Clarence has had his chassis exchanged for a Chevy Geo Tracker 4X4 chassis and running gear with fuel injection and all. His paint scheme is the reverse of Honeysuckle Rose and the pair caused quite a stir.
Honeysuckle Rose has been a joy to use and has led us to meet many interesting and talented people. I’m sure that in the years to come that pleasure will only increase.


Related reading: Saguaro MCI DL3-45 conversion, bus camping checklist for skoolies, lessons from full-time RV living.
My wife Lorna and I both started out as Biologists. Although originally trained as a scientist, my affinity for problem solving led me through multiple careers, including teaching, research, housing development, automotive reconstruction and a final gambit as a police officer, before finally actually “retiring”. We camped out of Suburbans for many years and a “sticks and staples” had no appeal, so when we wanted more comfort, a bus just seemed the natural next step. Problem one: it had to fit into our garage. Problem two, no such bus existed. Therefore I built Honeysuckle Rose. Q.E.D.
to open the company's website.