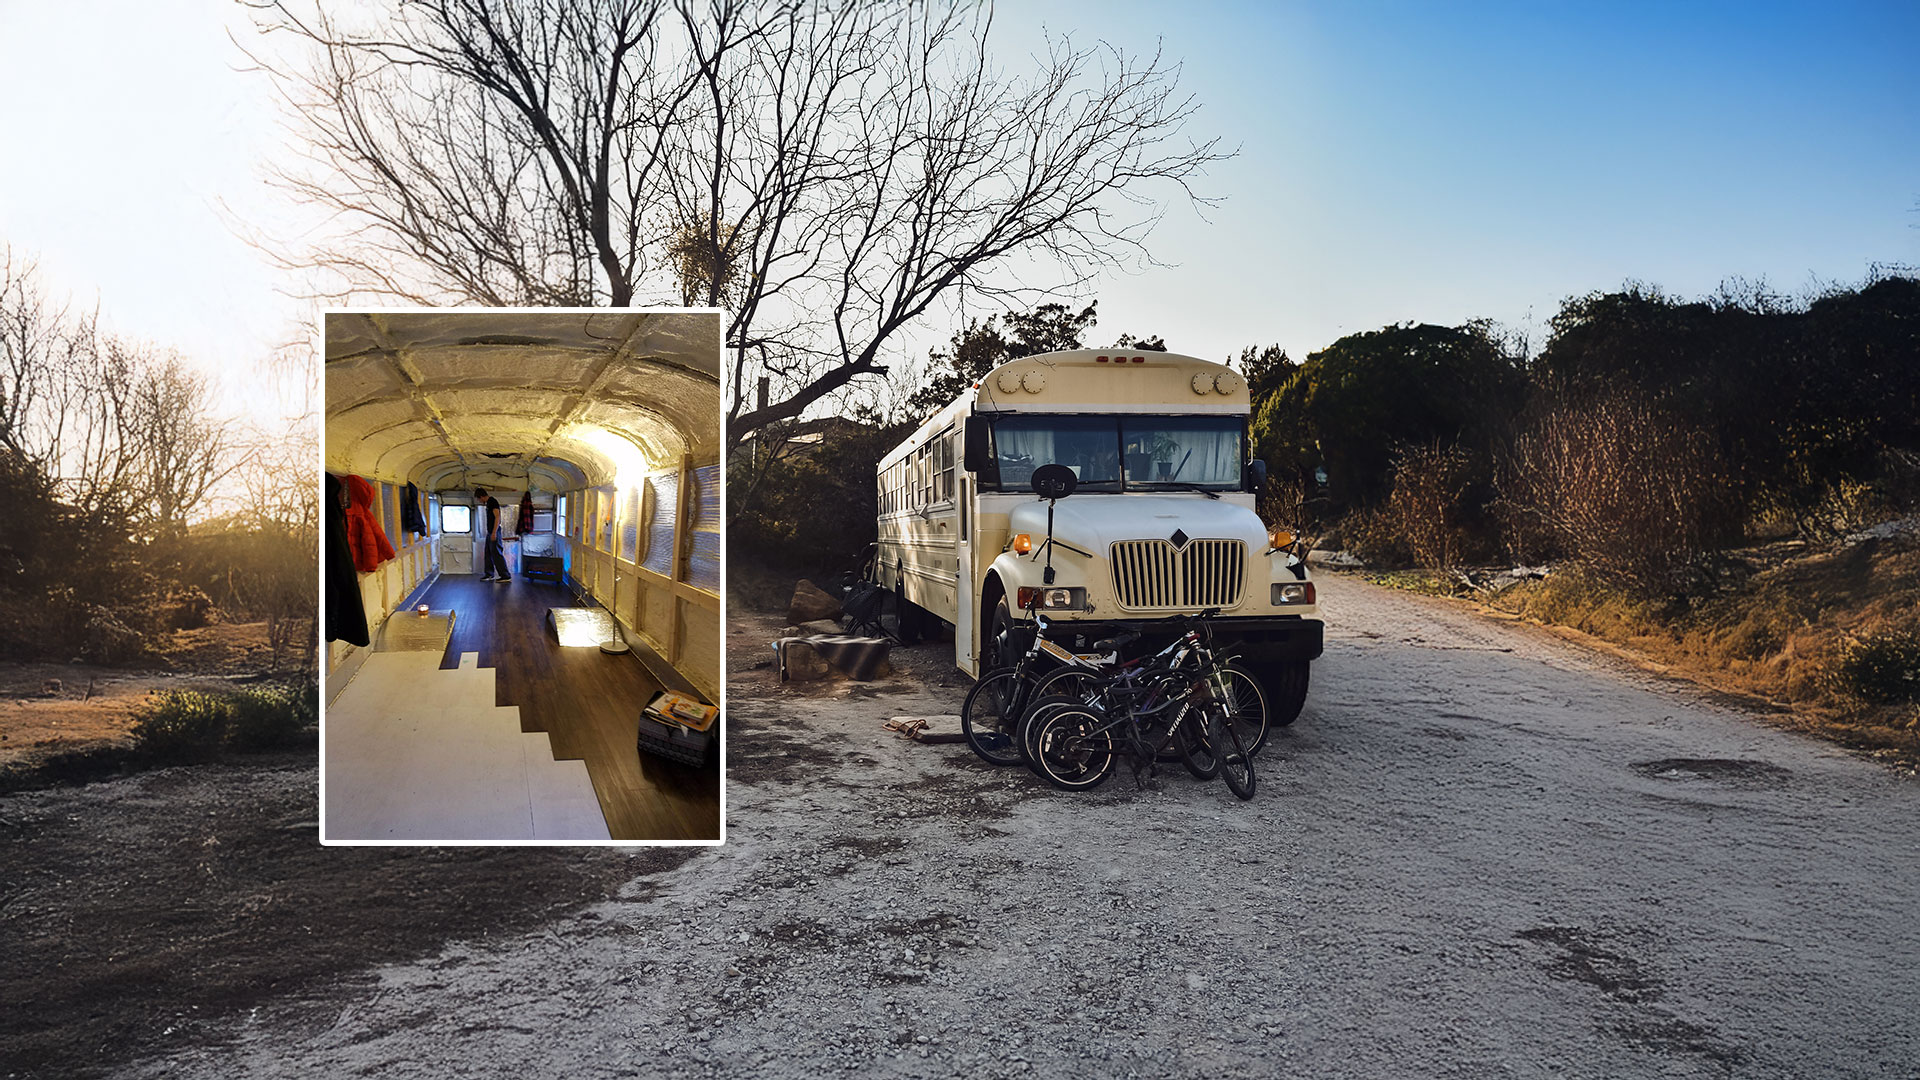


Converting a 16’ – 2023 Ford E350 Box Truck
Ford E350 Box Truck Conversion is a focus of this bus conversion article. Below you will find practical guidance, builder insights, and community tips about ford e350 box truck conversion.
So, why a box truck? Good question! It all started in 2017 when a friend told me she was considering selling her house and going to live in a van. My immediate response was, “You can’t do that! You have a cat!” Oh, silly me! Of course, she laughed and told me I had to watch some guy’s videos who talked all about living in a van. She was talking about Bob Wells of CheapRVLiving, the king and guru of van life. That was it! I was hooked!


The year before that, the company I had worked for eliminated my job, which gave me the perfect opportunity to retire early. At the time, I owned a few acres in central Illinois, where I boarded horses. During the previous eleven years at the farm, which my son had lovingly named “Hope Ranch”, I buried seven horses. Not all mine, but each one took a considerable chunk out of my heart.
At the time Bob Wells came into my life, so to speak, I no longer had any horses and just knew I couldn’t go through burying another one. It’s just too hard on my heart. I needed to find a new path in life. Being a bit of a “nomad” and someone who had traveled a fair amount while in the Marine Corps and working at said large company, the idea of living on the road really appealed to me. My biggest concern was that I had three cats.
Thus began my mission to find a suitable RV where I could comfortably live, and my kitties wouldn’t go crazy. Once again, Bob Wells to the rescue (I really hope I get to meet that man someday!). He had done an interview with a gal who owned a 27’ Class C Lazy Daze. That was it! That was the RV that I was looking for! I looked at thousands of RVs but didn’t find any that fit what I wanted: an open-ish floor plan and many windows.
Lazy Daze is the one RV brand that is mostly windows, but they are also built incredibly well. I needed windows for both me and my cats. But I also greatly appreciated the build quality, aircraft-grade aluminum shell, real wood cabinetry, and great floor plans they offered.
Having identified which RV I was looking for, I went hunting! I had no idea how difficult it would be to find a good pre-owned Lazy Daze RV. Since their inception in the 1960s, Lazy Daze were always built to order, though if one got lucky, they could buy a floor model. They were never sold through dealers, only directly from the manufacturer in Montclair, California. It is believed that Lazy Daze was the original Class C designed RV. Sadly, the company closed its doors in May 2022. Now, pre-owned units are even harder to find.
Back to my hunt! After several months of searching, I found several Lazy Daze RVs I thought might work. The only problem was that they were hundreds of miles from me and from each other. So, it was time for a road trip! The first I looked at was in Mobile, Alabama, a lovely and rare rear-kitchen model that I loved. Sadly, so did the owners, who decided after showing it to me that they really did still love their little Lazy Daze. I completely understood.
From Alabama, I drove to an RV dealership in Lubbock, Texas, where they had a very old unit on their lot. It needed more work than I was up for, especially since I knew nothing about RVs at the time.
From there, I drove to Alamogordo, New Mexico. There she was! A beautiful 2004, 31’ blue Lazy Daze with less than 60,000 miles and a hard to find rear-twin bed floor plan. She was perfect…except for one thing. I really didn’t want an RV that long. However, I couldn’t pass her up. On March 13, 2018, for my 57th birthday, I drove back down to Alamogordo to bring her home; it was the best birthday gift I’d ever gotten myself.

I’ll reminisce just for a moment. I remember waking up the first morning when driving her back to Illinois. I had stopped at a country museum/truck stop the night before and opted to sleep on the couch that first night to see how comfortable it was. I woke up that next morning with a huge smile on my face…and every inch of my body in pain! It was wonderful. I sat up, looked out the big, glorious “living room” windows, and saw the hills of North Texas/New Mexico. It was such a gift. And a great lesson…next time, sleep in the bed! Ha!
Once I got her back to Hope Ranch, the work began to make her livable for me and my three kitties. Bear in mind, until then, I had never camped or traveled in an RV. For that matter, I had only “camped” twice in my life. Before driving my Lazy Daze home, I had never driven an RV aside from a 15-minute test drive for my friend when she had found her RV but wasn’t comfortable test-driving it. I came into this lifestyle as unschooled and inexperienced as one could be.
On October 6, 2018, I had an auction and sold everything I owned except for what fit inside my Lazy Daze. It took several months to close on the property, but on January 18, 2019, I left Illinois between snowstorms and went full-time on the road. I lived and traveled in my Lazy Daze until a few days before Mother’s Day 2023, when I moved into my box truck, which I had been building since November 2022.
So, now back to the original question, “Why a box truck?”
Simply put, although I loved the Lazy Daze, it was just too long and sat too close to the ground for my liking. Thirty-one feet was just way more space than I needed, and like most RVs, it was too low. I like to have more ground clearance so I don't drag on the ground, a better view out the windshield to see over the cars ahead of me, and having RV higher off the ground. Plus, I was down to two kitties by then, so I didn’t need as much room for them.
I had wanted to go shorter and higher off the ground for quite some time. Vans are okay, but I don’t like how most taper in at the top, which can feel uncomfortably confining and cramped to me. I also wanted something that sat higher than a van or RV, had straight walls, and a flat open floor space without wheel wells to build around. So, I decided a box truck was the best option for me to convert into an RV, based on how and where I wanted to travel, and the design I had in mind. Also, since most box trucks come in several lengths, and generally have plenty of ground clearance, that meant I just needed to find the right box length for my conversion.
I spent several months trying to find a good used box truck. I looked at used U-Haul trucks, Penske trucks, and others owned by individuals; I even considered buying and converting an ambulance. But none of them gave me the inside height that I wanted - I wanted a tall ceiling as I don't like to feel squished.
Lastly, I wanted a vehicle that I could mount a suspended rear deck, push-up awning, and a rooftop deck to so I could sit on top of the truck and enjoy the view around me. That left me with a straight truck, cube van, cutaway van, box truck, and cargo truck…I’ve learned there are several names for the design of these trucks.
After having no luck finding a used truck that I was comfortable buying, I decided to buy a new 2023 Ford E350 Cutaway DRW (a box truck with dual-rear wheels). It has a 16’ box (158” wheelbase) with an overall, bumper-to-bumper length of 24’. I had wanted a 14’ box, but apparently, those are very difficult to find new nowadays. My truck came with a 7.3L V8 gas engine and an electric 6-speed transmission with tow/haul capability. The total cost was approximately $57,000.

Some may wonder why I didn’t buy a smaller RV or something already converted, or where I learned the skills to do the conversion myself.
To answer the first question, after looking at literally thousands of RVs, I did not find a single one with a layout that I liked—not one, not even remotely close to the layout I wanted. After living full-time in an RV for four years, I knew exactly what I wanted and didn’t want. And when I looked at other conversions, which are few and far between, I hadn’t seen one that looked like what I had in mind.
Many are absolutely stunning, but none seemed to have the open floor plan I had envisioned. Also, most used conversions have a lot of miles, leaks, or other mechanical drawbacks. None of which I wanted to deal with. That’s why I ultimately decided to buy a new truck right off the lot. I specifically wanted the warranty.
I also didn’t want to live with something I didn’t build myself, and thus may not know or understand all the ins and outs of it, especially for things like electrical, solar, and even plumbing, if something went wrong. Factory-built RVs are notorious for putting mechanicals, plumbing, and wiring in the strangest, most difficult places to access, and other custom builds would be a complete unknown. It's not that I couldn’t have figured them out; it’s that I didn’t want to.
To answer the second question about where I learned the skills to take on this conversion by myself. Simply put, I’m basically a farm kid from Iowa who grew up learning how to do wiring, plumbing, roofing, and to fix or build whatever needed fixed or built (though not so much on vehicles, especially the newer ones). Also, being a solo person for most of my life, I’ve learned how to do most tasks alone so doing the truck conversion by myself was only natural. Plus, I wanted to be the expert on every aspect of my conversion.
However, the one area that was utterly foreign to me was the 12V electrical system. Thankfully, during my first year on the road, I attended the in-person Basic RV Maintenance and Inspection course and multiple tech courses at the RV Training Academy in Athens, Texas. Going through their classes was the single best choice I’ve made since going full-time. With the skills and knowledge I gained there and what I already knew, I felt fairly confident that I could do the conversion myself. Plus, YouTube videos were always available!


Once I had decided that a box truck would be my base structure, my next big question was how I wanted it to look. I started with these basic requirements for building my own RV.
- I wanted to create as much open floor space as possible in an approximate 8’ x 16’ box.
- I wanted the build to be as “modular” and flexible as possible, with an open floor plan. I didn’t want interior walls, and I especially didn’t want a narrow walkway anywhere. I wanted to be able to easily change the layout later if the first layout didn’t work for me.
- I didn’t want drawers, kitchen cabinets, or tables sticking out anywhere.
- I didn’t want to lose space to a permanent bed.
- I wanted an on-demand water heater and a full-sized sink with plenty of counter space, a collapsible shower system, the ability to run almost any appliance without blowing fuses, a propane stovetop, and some type of oven/microwave.
- I wanted to be able to charge the batteries with solar, DC-DC charging, and shore power.
- With the two kitties, I also wanted to have as much light and openness as possible.
- Lastly, the vehicle had to have the structural capacity to handle a deck, awning, and rooftop deck. Other than that, I was open to whatever floor plan evolved.
I sketched things out roughly, primarily to determine the length of the countertop I’d need, the size and location of the folding table I’d mount on the wall, and, most importantly, the size for the electrical control center cabinet that would house all of my coach's electrical needs and a TV on an automatic lift stand. I wanted to minimize the required size, but I also wanted everything to be easily accessible for future potential modifications.
Some things were pretty easy to decide, like the number of windows and what to do with the back door. I wanted a window on each side of the truck, and I had a few options for where to place the windows. I knew I wanted one near the sink and stove to look out when cooking or doing dishes. Since I had no plans to install a stove vent hood, I knew I’d need something to help act like a vent when cooking. I centered the other window overhead where I had determined to place a table on the driver's side.
Though I spent considerable time thinking about what I wanted to do with the roll-up rear door, in the end, I decided to leave it as it was. I figured, when opened, it would give me the largest and best view out of the back of the truck, like a huge picture window. Plus, once I built the deck, it would be a great way to secure the truck but at the same time leave the back “window”, a.k.a. the roll-up door, open so the kitties would have the best view, whether I was in the truck or not.
I will now walk through the build process.
As I mentioned, I bought a new OEM cargo truck right off the lot, meaning it only had the rear roll-up door and cab access doors. I planned on doing the entire build by myself; however, there were items that I knew I’d need help with. Specifically, a side entry door would have to be cut in and installed, and I knew that was a two-person job. And not being a welder (and not having the time to become one), I also knew that I’d need to find someone to fabricate the rear custom deck, awning, and rooftop deck, the brackets I’d need for the outdoor under-storage boxes I was going to use, and I needed a custom-built hitch so I could tow my car.


Once the side door was in, I started the conversion in earnest; it was November 5, 2022, and the cold, harsh winter was rapidly approaching Iowa!

The first step was to remove the divider wall and sliding door between the cab and the rest of the box. While I liked the idea of the wall and door, they took up about 10” of space, which I thought I could better use for the conversion. The next thing was to remove the remaining side wall plywood and e-track rails so I could add insulation.

As I didn’t know what I would do yet to finish the walls, I kept virtually every scrap of wood I took out of the truck. From the coated wood that was part of the partition wall between the cab and the box to the boards on the walls, every bit of it was put away for future use. I ended up repurposing almost every piece of it.

Next came the insulation. After significant research, I decided on Havelock Wool. I had installed enough insulation previously to know that I didn’t want fiberglass insulation anywhere near my truck, nor did I want anything that would “gas off” or break down or lose its effectiveness over time.
I wanted something sustainable that wouldn’t itch, was easy to work with, and was fire, moisture, and mold resistant. Havelock Wool checked all the boxes. I was pleasantly surprised at how easy it was to work with, and I didn’t use gloves or a face mask for any of the installation. And much to my surprise, I LOVED the smell of it. It has a naturally fresh smell, as it is legit New Zealand wool. No worries, no barnyard smell, though! LOL!
The wall braces on the truck are only about 1.5” deep, so it worked well to simply spray the walls with adhesive and stick the insulation in place. If you notice the e-tracks on the walls, that was to help temporarily hold the insulation in place. When I did my calculations, I had thought I’d be insulating the ceiling; however, later, I decided I didn’t want to cover any of the natural light coming in from the ceiling, so I ended up with a fair amount of insulation left over.
Ultimately, I just doubled up the insulation on the walls and floor. Which gave me 4” of insulation instead of just 2”. I’m glad I did! I spent several winters in Iowa in the truck, and with temperatures often below zero and what seemed like gale-force winds, I was happy to have every square inch of insulation!

Once I had the walls insulated, it was time to finish the floor. I built a grid on the floor to not only hold the insulation in place but also to give me a structure to screw the floor panels to. Before putting the grid down, I added a layer of moisture barrier, just in case of a catastrophic water leak from the water tank. The grid was laid out such that I could place the 4' x 8' sheets of plywood down and have equal support under the sheet and have supporting wood to screw into.
I debated using a vapor barrier, but after weighing the pros and cons and talking to an expert tiny home builder, I decided it would be a good idea for my truck. So, once I had the floor insulated, I covered it with a vapor barrier and then put the wood in place. I used the plywood from the wall that had come in the truck. It had a good thickness and was sturdy, and I already had it.


Next, it was time to cut in the windows. In case you’re wondering why I didn’t cut the windows in first, it was because it was mid-December, the temperatures were dropping quickly, and I needed to keep the truck tolerably warm so I could work in there. I won’t lie; cutting in the windows was one of the first truly terrifying things I did on the truck. One mistake could have caused a lot of headaches.
My biggest challenge was cutting the rounded corners without cutting too much extra. I used a jigsaw to cut in the windows, and it can be tricky to cut metal at an angle using one of those. I built wooden frames for the windows to set on and latch onto, so to speak, as the walls are very thin aluminum. I used a ton of caulking around the windows to create a seal and fill in gaps, and thankfully, the window frame covered it all.


Since I was now over the fear of cutting holes into the truck, and the weather was holding, I decided to install the two MaxxAir vent fans in the ceiling. Like the windows, I had to box in a frame for the fans. I used Liquid Nails to hold the wood in place until I could get the bracket screwed on from the top.
On my first vent, I almost made a major mistake. Though I had measured twice and even made a pattern, it didn't feel or look right when I got ready to cut into the roof. To this day, I don’t know what I had measured or drawn the pattern around, but it was several inches too big. Thankfully, I did one final check and realized my error before cutting a giant hole in my roof! I installed two vent fans, one at the front driver’s corner and the other in the rear passenger corner, to allow for a cross-breeze.

Next, it was time to install the solar panels on the roof. This was another extremely challenging task as the roof is made out of 1/16” translucent fibrous vinyl material, which meant I couldn’t walk on it, nor could I screw anything into it. I spent some time figuring out how to mount the solar panels to allow air flow below the panels, yet be rigid and strong enough to handle the airflow at highway speeds.
Since I couldn’t mount the panels directly onto the roof, I had to find a rail/track system that would allow me to attach the panels to it yet not touch the actual vinyl roof. Like most commercial trucks, the roof has a slight convex curve for water to run off, so I had to find something high enough not to touch the roof itself but not stick up higher than necessary.
I stumbled across a Dee Zee truck rail system used on pick-up sidewalls to mount racks, etc. I found some that were 8’ long, the exact width I needed for my roof. The mounts that came with the rails were just high enough to clear the roof's curve. I made the solar panel mounts work by turning them upside down and attaching them to the rails using the rail hardware. I started with 800W of solar but have since added several more panels and now have 1,200W.


With the solar installed, it was time to get back to work on the inside of the truck. Of course, as with most things, I learned about another product I wanted to use on the walls after I finished insulating the walls. So, back down came the insulation to install the sound barrier material.
Thankfully, it was easy to peel the insulation down and stick the sections of sound barrier to the walls. Many types exist, but I opted for Siless Black 50 mil Sound Deadening mats. It was easy to cut to size and stick on the walls. By this time, the first snow had fallen, and the walls were sweating. I didn’t know if the sticky side of the mats would adhere, so I also used aluminum tape around the edges to add a layer of extra adhesion. I must say that I believe adding this product helped with sound deadening.
Also, as I knew I would have a lot of extra insulation left over, I furred out the walls using 1" x 3"s. This gave me a bit more thickness to stuff the insulation in behind, especially since it would now be 4” of insulation instead of the original 2”. Plus, it gave me the base to attach the wallboards to. I attached the furring strips to the wall ribs with stainless steel self-tapping screws, and then I drilled holes for the Rivnuts that I had installed on each wall rib for the e-tracks. In total, I installed over 100 Rivnuts. The cost of the installation tool was well worth it.

After the walls were reinsulated, I added a vapor barrier to the walls.


One area I haven’t discussed yet is the curve on the front edge of the box, as shown in the photo above. I spent a lot of time figuring out how to insulate and utilize this area. In the end, I used a lot of Gorilla tape, spray adhesive, and metal bands that I intentionally cut too long so I could bend them to create a convex shape to hold the insulation and vapor barrier in place.
After I finished the floor, it was time to install the entrance steps. Until then, I had been using a step ladder to climb in and out of the truck. I opted for the Lippert Solid Step over the also-common MORryde step system because I wanted the lift-assist function and the larger top step. Due to the truck's height off the ground, I needed the 4-step platform.
It was a pretty straightforward installation. I just had to ensure it was lined up exactly according to the instructions. I got it installed just in time for another snowfall. It sure made getting in and out of the truck easier!


It was time to begin the most challenging part of the build: the electrical system. As I mentioned before, the 120V part of the build was easy, as I have worked with 120VAC circuits before. It was the 12VDC system that was all new to me. Well, new to me as far as doing the actual wiring. Thankfully, I found several excellent YouTube channels to help me. Explorist Life, Lauren Lawliss, Will Prowse, Cheap RV Living (great ideas for products), just to name a few. My go-to’s were Lauren and Explorist Life.

Roughing in the wiring on the driver’s side.
Though most of the wiring was run along the walls and through the ceiling ribs, I did run a few lines under the floor at the back of the truck for outlets in the rear passenger quadrant and an outside outlet.
After running the wires, I wrapped them in protective sheathing and bundled them together. Once the wires were secured, I furred the walls out again to attach the wallboards and the e-tracks over them. The installation of the batteries and all the components didn’t happen until after I installed the walls, which was the next step.

Installing the wood on the lower walls was easy, as I could use a 4’ x 8’ sheet of plywood with minimal adjustments. The upper wall sections were a bit more challenging, as I had to cut the panels to fit, including curved edges on the top front. Since I was doing this alone, I had to figure out a way to hold the panels up against the wall while leveling them and screwing them in place. I used ratchet straps and large clamps to keep them elevated while I positioned and screwed them in.
While it was a bit of a pain, it worked out well, and the walls went up quickly. I rough-cut the window openings and then tweaked them once the walls were in place. The same applies to electrical outlet openings and holes for pulling wires through for lights, etc. I installed dimmer switches for each wall sconce, so I had to drill the right-sized holes to hold each of the four dimmer switches.

During this time, the outside temperature had dropped to brutally cold subzero temperatures, so I spent some time inside my dad’s shop building the stand for my Iceco 95L refrigerator/freezer and my kitchen counter.
Because of the design of my shower and because I wanted the items in my truck to be as mobile as possible, I built a rolling rack to hold my chest-style refrigerator, toiletries, some cooking appliances, etc. I used a few sections of ABS shelving often used in garages and cut down the legs to make it shorter. I also added wood to the underside of the bottom shelf so I could attach castors so I could easily move it around, as you will read about later.

For the kitchen counter, I opted for ACX Sanded Plywood. I couldn’t decide what I wanted my counter to look like, I just knew I didn’t want it to be bulky or heavy. So, I bought a 2’ x 8’ x ¾" sheet for $29. This was one of my three most creative and favorite things about my build. I stained the wood,but I hated the look when I was finished!
")
Then, I used blue craft paint with sparkles to cover the stain. I wanted to create an epoxy-flowing river look. However, I didn’t have time to learn how to do that, and I learned that to use epoxy, it has to be at least 70 degrees. I had to make a different choice since it was the dead of winter in Iowa, with temperatures routinely below freezing.
Instead, I splattered paint on the wood and did some free-hand brush swirls with a paintbrush. Much to my pleasant surprise, it created a beautiful pattern. I did this several more times until I got a look I liked. I used spray-on polyurethane to seal it, about ten coats in all. It created a beautiful, shiny, tough coating closely mimicking an epoxy finish.


For my counter structure support, I created a simple skeleton frame using ¾” conduit with connectors from Maker Pipe. I chose Maker Pipe because it was lightweight, and I could configure it however I wanted. It also satisfied my desire to keep the build design as flexible as possible for potential changes in the future. I had decided early on that I wouldn’t have kitchen cupboards or drawers, so this provided exactly what I needed. It was also an easy way to build the counter support around the 50-gallon freshwater tank I installed under the counter later.
I installed a Lippert 25 x 17 single-bowl ABS RV sink in the kitchen. Though the sink wasn’t designed to be mounted below the counter, I installed it that way. To mount the faucet, I drilled a hole through the wood and mounted the faucet through the countertop.
The stove is a Suburban propane slide-in stovetop. I have a separate oven / microwave / convection oven / air fryer that sits below the counter at the end. I have since started using a Nuwave single portable induction cooktop instead of the propane stove.
As I mentioned before, I put a 50-gallon water tank under my kitchen counter. I wanted it to be in a heated area, easy to access, and not be exposed on the outside of the truck. Though I didn’t build the truck with stealth in mind, per se, I tried to minimize the number of appendages outside the truck that would scream RV and would allow me to camp in more places. Box trucks can usually park in most places overnight undisturbed.
I installed a standard RV water fill and a city water hook-up port to fill my tank. For the drains, I drilled a few holes in the floor. One is for the sink drain, one is for the low-point drain for winterizing the system, one is to drain my little clothes washer/spinner machine, and one is for the shower.
I installed HepvO one-way waste valves on the kitchen and shower drains, eliminating odors from coming back up from the tank and pipes. I ran the drain lines to my gray tank under the floorboards outside the box. Not ideal, but workable. I don’t have a black tank as I use a composting-style toilet. The gray tank is a 20-gallon water tank, and rather than using the usual RV gate dump valve for drainage, I used a PVC ball valve. I painted the tank black using black rubber paint, so it’s almost undetectable.
")
For the inside plumbing, I used ½” PEX tubing and brass fittings. I ran a water line from the freshwater tank to the Excel on-demand water heater, which is mounted on the driver's side of the front section, below one of the MaxxAir vent fans. The hot water line runs back to the faucet. I also ran a line off the water heater with a quick connect, which I use for the shower head.
The 20lb propane tank is stored inside the truck in a modified 20-gallon water tank. Like the freshwater tank, I didn’t want the propane tank located outside where it was visible and accessible to anybody walking by, again, think stealth mode. Nor did I want to be messing with it outside in the elements. I had a propane company make several hoses with quick-connect ends. One hose has two connectors; the other is an extension hose I use to run my Camco Olympian Wave 3 - 3,000 BTU catalytic space heater. The hose with the splitter is used to run to the water heater and my stovetop.
For the shower, I installed a KickAss Shower tent. These are commonly used for outdoor showers and are typically attached to a vehicle’s rooftop storage rack. The tent is rolled up into a case permanently mounted on the wall above the refrigerator. To access it, I unzip the case and unfold the arms that support the tent. The tent folds out to a surprisingly large 41” square shower tent that drops to the floor. It has a separate piece with a drain for a shower floor.

The curtains aren’t quite long enough to reach the floor, so I use a 12” tall folding dog pool and set that inside the shower floor. The curtains drape inside the pool. I drain the water into the shower drain, which drains into my gray tank.
I forgot to mention that the shower drain is under my refrigerator, which is one of the reasons why I built the refrigerator rack with wheels so I could roll it out of the way to use the shower. The water heater is next to the shower, so using a quick-connect adapter, I attach the hose to the heater and drape the shower head over the top of the tent walls. Even though I don’t shower in my truck often, it works well when I need to use it.
Some may say having an On-Demand Water Heater inside a vehicle is dangerous. Some are, some aren’t. The model I chose is designed to be used inside. But, to make sure, I located it specifically under the MaxxAir vent fan to draw out any fumes if there were any when it is operating.
For the plumbing, I installed a Seaflo 3.0 GPM, self-priming water pump and pre-filter.

I also installed an IRVWPC (Intelligent RV Water Pump Controller), which significantly reduces the sound a water pump makes. It also eliminates the need for an accumulator tank, which helps to address uneven water pressure or a pump cycling on and off, especially when the faucet isn’t open. It also has some safety features that I like, it protects against run-dry issues, such as a pump running continuously due to a very slow leak, or a dripping faucet, or if the water is on full throttle for more than 10 minutes, which could indicate a major leak. These features are all adjustable.
")
Once the walls were in place, it was time to assemble the electrical control center. Before any electrical design and layout, I performed an audit to determine how much power I would need and/or want. I decided on a 3000W inverter, two 12V 206Ah SOK lithium batteries, and, in the beginning, 800W of solar power (BougeRV 200W rigid panels).

I also added a 30A DC-DC charger. About one year later, Victron released its 50A Orion XS DC-DC Charger, and I replaced my 30A charger with the smaller, but much more efficient 50A unit. All of the components were made by Victron, except the batteries.
I used a combination WFCO AC/DC Distribution panel to have only one location for all the fuses. Keeping in mind the thought of stealth camping, my RV plug-in outlet for shore power and the additional 20A outlet I installed in an all-weather junction box under the back edge of the truck. This was done so that there are no power outlets on the outer walls of the truck. This also protects the outlets as they are mounted on the underside of the box and out of the elements.

In addition to being the electrical closet for the batteries, etc., I also built the cabinet to house my TV on a lift stand. I have a remote control that lifts the TV, automatically opening the cabinet top so the TV can come out. It’s one of the three most creative setups inside the truck.


The last item installed was a fold-up table with some shelving space inside. I mounted it to the wall rather than set it on the floor, as the window was a lot higher than the table. I may change this in the future.


The only thing left to finish on the inside was the ceiling. I thought long and hard about what I wanted to do with it. As I’ve mentioned before, I didn’t want to lose the natural light from the translucent roof panels, but I wanted to tone it down a bit. And I needed to incorporate some insulation for the ceiling, so I opted to use several layers of bubble wrap.
Yep, plastic bubble wrap. I had used that before on the windows of my old farmhouse, and it did a great job of keeping the cold and heat out without blocking the light. I used spray adhesive to hold it in place. I then put up several panels of PVC lattice. Through the lattice, I wove multiple strands of greenery and flowers. Basically, I wanted to live in a gazebo. 😊


The floor is carpeted with 24” x 24” carpet squares from the local Habitat for Humanity ReStore. When I was converting the truck, I had two kitties; one was elderly, had four deformed feet, and couldn’t comfortably walk on hard surfaces. So, I put down a layer of wood fiber underlayment to help add another layer of insulation, albeit minimal, and then I loose-laid the carpet squares on top of it. That allows me to remove the squares if they get stained or damaged. Plus, the kitty could walk on it without any issues. Having the carpet helps to keep the floor warmer and quieter. It also captures so much more of the dust and dirt that gets in the truck. And I’d much prefer to vacuum the floor rather than sweep it.
Regarding storage inside the truck, since I had no cupboards or drawers, I had to find a way to store clothes and other items. I utilized the curved part on the front of the truck and installed wire closet shelving and track shelving storage from Menards. That holds my canned goods, coffee, supplements, etc. I found e-track baskets for storing smaller items like silverware, small containers, storage baggies, etc. I also use foldable storage bins for clothing, yarn, knitting needles (most important!), and other assorted items.
I store boxed food and miscellaneous items in under-shelf storage baskets that slide into the spaces on the ceiling's PVC lattice. Stretched netting holds items in place while traveling.
I used four e-track products for the back walls from DC Cargo. They are heavy-duty storage units attached to the e-tracks. They have fourteen large pockets, two smaller pockets, and a top that can be zipped closed. These are perfect for everything from tools to clothing. Lastly, I draped a net between the tops of the two walls, but below where the door rolls up, where I store other items.

On the outside, I added four 14” x 16” x 24” metal Buyers Steel Underbody Truck Boxes for lockable storage, the custom hitch I referred to above, and my favorite part of my truck: my custom-designed and welded aluminum suspension deck, awning, and rooftop deck. Huge shout-out to Whitey and Pierce Brothers Welding in Indianola, Iowa!
It took a while to figure out how to design the rear deck. I didn’t want a solid deck as I wanted to look out through it like a screen door when folded up. It needed to be accessible only from the inside of the truck, as I wanted a secure way to have the back door rolled up and the kitties contained inside. And I didn’t want anyone to be able to open the door from the outside. It also needed to be lightweight enough to raise and lower by myself. Lastly, I didn’t want support legs to mess with. I wanted it to be a suspended deck so I could lower it anywhere without needing support from the bottom. I used right-sized right-sized vehicle towing cable for this application to hold the deck level.
The rear awning is raised by simply pushing it up from the inside. Two gas struts make lifting and keeping it open easier. I want to add struts to the deck, too, to help when I lift it, but I haven’t figured that one out yet. Does anyone have any ideas? The rooftop deck requires a ladder, too, which was intentional. I believe the suspension deck and awning are the most unique aspects of my truck conversion. 😊


As for air conditioning, a small household A/C unit is placed on the floor in place of the diesel heater and vents out the back door for those hot days. I open the roll-up door about 20" and then drape clear plastic sheet panels that are velcroed in place to the top of the door frame (they block the rain from coming in, but allow the light to come in) and insulated curtains are placed around it. I tilt the A/C up a little so it can drain out the back. I can do this with or without the deck being lowered. It works amazingly well.
It took two winters and into Spring to get almost everything finished. I moved in before it was done, but it worked out okay. Since completing the build, I have traveled quite a bit in the truck. In addition to the multiple trips between Iowa and Illinois over the past few years, I also made several trips to Baja, Mexico, where I spent most of this winter.
One thing I haven’t mentioned about the truck is how it handles and drives. What can I say? It drives like a cargo truck, and the factory seats are atrocious. These trucks are designed to make short trips delivering stuff around town. I’ve been pleasantly surprised at the mileage, though. It averages around 9.5 MPG, including towing a Jeep Cherokee over hills and dales and all over Baja.
I had some aftermarket changes done on the truck this Spring. After a month-long trip to Baja with Gary Hatt (owner of BCM), which was a brutally uncomfortable drive due to the terrible road conditions and less-than-adequate OEM items on the truck, he encouraged me to go to the Big Tent in Quartzsite and talk to the folks at Redlands Truck and RV. I am so glad he did! They installed new Koni Shocks, Sumo Springs, a Safe-T-Plus Steering Stabilizer, a rear track bar, and six new nitrogen-filled tires with dually valve extenders. I also bought a Roadmaster Tow Defender to help protect my car from rocks and road debris when being towed.
I could not believe the difference those aftermarket items made to my truck. I was truly shocked. Not only did the potholes feel like pebbles under the tires, but the ride was so much quieter—so much so that in the beginning, I kept tugging at my ears to see if they needed to pop.
When I returned to Baja a few weeks after having all the changes made, I felt like I was driving an entirely different vehicle. I found myself saying, “Oh, these roads aren’t so bad.” They were. The potholes were still there, and the roads were just as bad. Several thousand miles later, the difference is still shocking to me.
I just want to say that everyone at Redlands at the Big Tent was fantastic to work with. The same goes for the folks at Roadmaster. I can’t speak to how well the Tow Defender worked except to say I don’t have any rock chips on my toad, so I’d say it did a great job! And it’s easy to hook up and use, which is a huge plus!
If you happen to see me on the road, I’d love to chat. This truck is an ever-evolving project so who knows what it’ll look like down the road. If you have any questions about the build, please don’t hesitate to contact me. I quite enjoy talking about all the many options and ideas for builds.


| General | |
|---|---|
| Year | 2023 |
| Manufacturer | Ford |
| Model | E350 |
| Vehicle GVWR | 12,500 lbs |
| Total Weight Converted | 10,300 lbs |
| Fuel Tank Capacity | 40 gallons |
| Miles Per Gallon | ~9.5 |
| Engine | 7.3L Gas |
| Transmission | Electric 6-speed with tow/haul functionality |
| Overall Length | 24' |
| Box Length | 16' |
| Overall Width | 9’1” |
| Overall Height | 11’3” |
| Solar Power | 1,200W |
| House Batteries & Electrical | |
| Batteries | Two 12V, 206Ah SOK lithium batteries |
| Electrical System | 120V and 12V (mostly Victron components) |
| Shore Power | 30A |
| Inverter | 3000W Victron |
| External Equipment | |
| Fresh Water Tank Capacity | 50 gallons |
| Black Water Tank | N/A (compost toilet) |
| Grey Water Tank Capacity | 20 gallons |
| Tank Material | Polyethylene |
| Water Heater | Excel On-Demand |
| Plumbing Materials | ½” PEX |
| Propane | One removable 20lb tank stored inside truck |
| Internal Equipment | |
| Stove | Suburban Slide-In 3-Burner propane stovetop |
| Microwave/Convection Combo | Aeitto (includes food dehydrator and oven) |
| Refrigerator | 95L Iceco chest-style refrigerator/freezer |
| Air Conditioning | 5,000 BTU window unit |
| Heating | Electric radiator, Vevor diesel heater, Wave 3 propane catalytic heater |
| Ceiling Fans | Four 12V fans (clip-mounted) |
| Generator | None |
| TV | Samsung 42” QLED |
| Internet | MobileMustHave RoamLink 100GB & Starlink 50GB plan |
| Bed(s) | One twin-size folding cot/bed combo |
| Interior | |
| Wall Material | Wood panels |
| Ceiling Material | PVC lattice and greenery |
| Flooring Material | Loose 24x24-inch carpet squares |
| Insulation | Havelock Wool |
| Cabinets | None |
| Countertop | ¾” ACX Sanded Plywood |
| Window Coverings | Stringless light-blocking accordion shades |
| Lighting | 12V wall sconces, multiple rechargeable options |
| Miscellaneous | |
| Owned Since | October 2022 (bought new) |
| Conversion Work | Self-converted (except welding and side door installation) |
| Time to Complete | 7 months initially, continued work during second winter and spring |
| Total Cost | ~$90,000 (including truck) |
| Notable Features | Shower/water heater, TV/electrical cabinet, kitchen counter, ceiling, suspended deck, awning, rooftop deck |
| Afterthoughts | Would simplify electrical with Bluetti/EcoFlo, lighter step system, would choose a smaller vehicle next time |
Related reading: lead-acid and lithium batteries for bus RVs, bus and skoolie camping checklist, 1994 MCI DL3-45 Saguaro bus conversion.
In 2017, Phylana came to RV living via Bob Wells of CheapRVLiving. Though she’d never camped or traveled in an RV, she knew immediately that the nomadic life that Bob talked about was her calling. On Oct. 6, 2018, she had an auction and sold everything she owned except for what fit into her first RV, a 31’ Class C Lazy Daze motorhome, and began her full-time life in an RV.
In 2019/2020, Phylana attended the National RV Training Academy’s Basic Maintenance and Inspection program and all of the tech courses offered at the time. The knowledge and skills gained there, coupled with her own experience in wiring, plumbing, etc., were instrumental in helping Phylana convert a 2023 Ford E350 Box Truck into an RV by herself.
Phylana has led a number of charitable projects, from building three Habitat for Humanity WomenBuild homes, to being the Wagonmaster several times for the Escapees Chapter 8 Mexican Connection RV rally, leading folks into Baja, Mexico in their RVs.
She is also a Marine Corps veteran and is retired from Caterpillar, Inc. Phylana has one son, an Emergency Medicine doctor, a smart and beautiful daughter-in-law, and two incredibly adorable and energetic grandsons aged 1 and 2-½. Phylana knows she is blessed to have a family that understands her wanderlust. She currently lives and travels full-time in the truck with her kitty, Krysta.
For more information on Phylana's Box Truck conversion, you can reach her at phylana@live.com.
to open the company's website.