


No products in the cart.
Ron Stevens
March 3, 2024
286 views
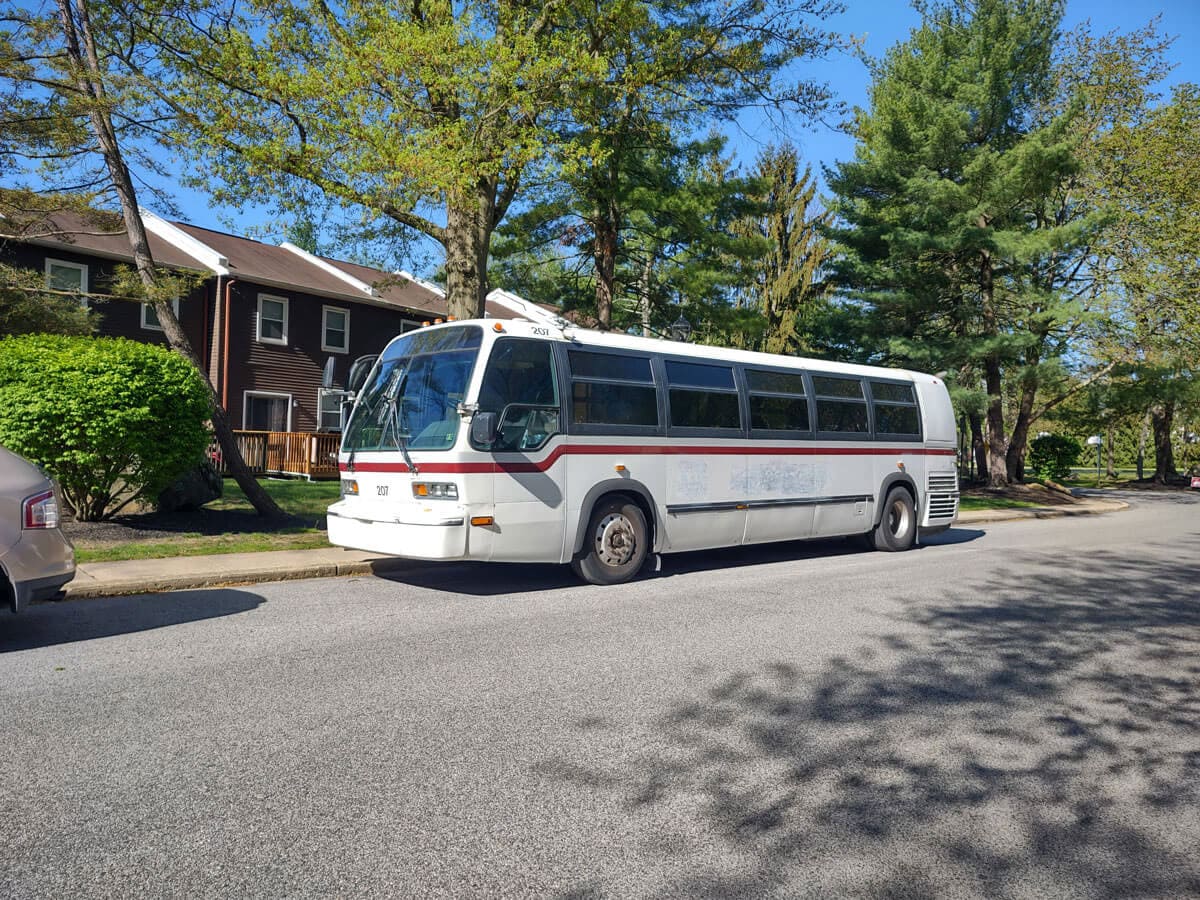
A 2002 Nova RTS Family Road Trip Bus Conversion
I always wanted to own a bus. Not a fancy sports car, or a motorcycle, but a bus. Such a thought can either be the starting point for a fantastic adventure or an unrealized project that sits around for years until you decide to get rid of it, potentially at a financial loss. I certainly did not want to end up with a fourteen-ton lawn ornament. But first, let me back up a few decades.
My Childhood Beginnings with Buses
My grandfather was a trolley operator in my hometown of Lancaster, Pennsylvania. When buses arrived and the trolleys were retired, he drove those as well. My parents did not own a car, so I grew up on public transportation. I rode buses everywhere; school trips, vacations to visit family in Massachusetts, dentist appointments, and back and forth to high school every day.
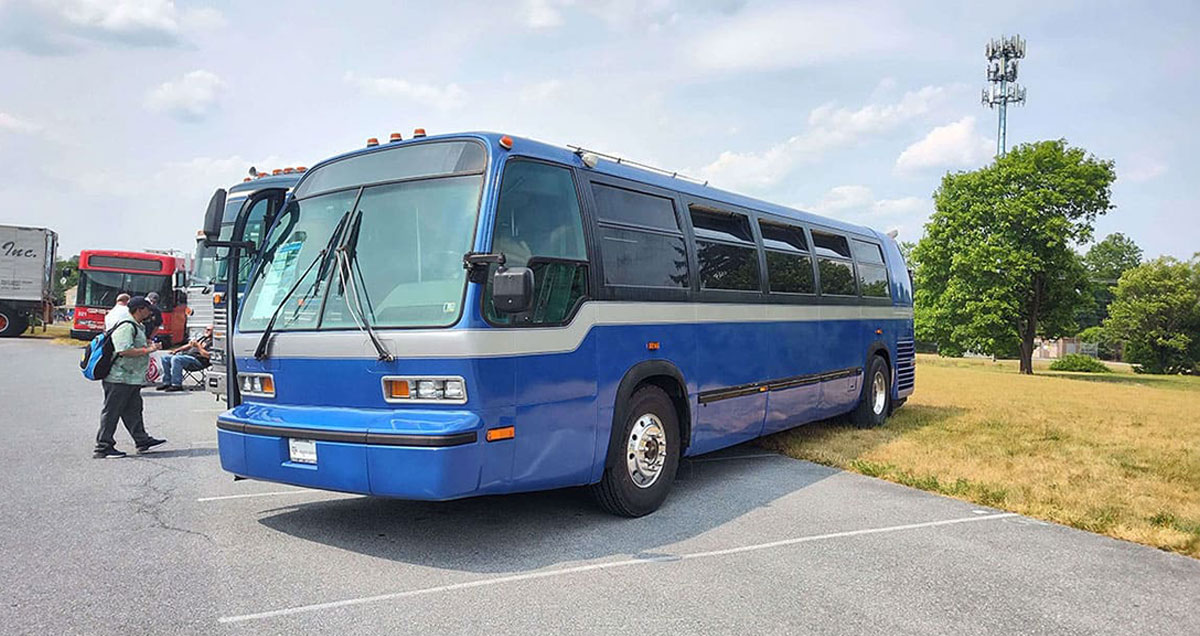
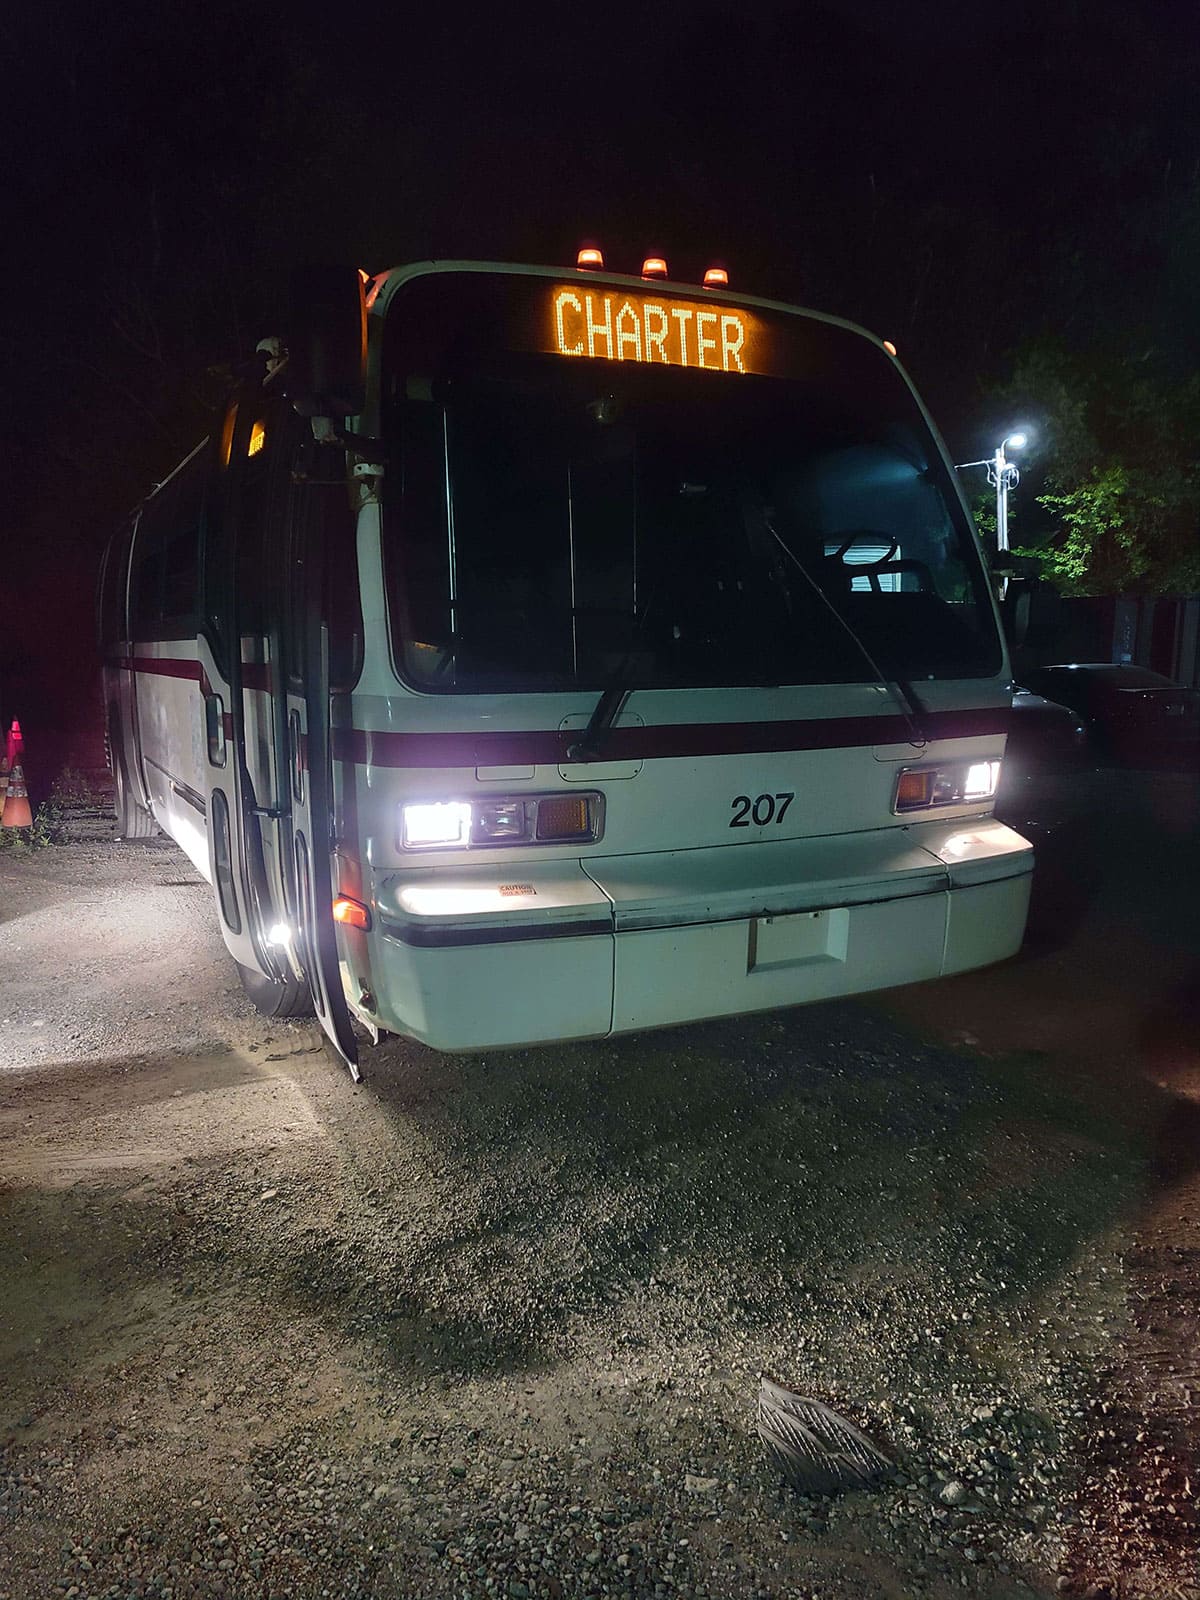
I got to ride in some classic, memorable motorcoaches such as an Eagle 05, GM 4104, MCI 7, 8, and 9s. But the most memorable bus was the GMC RTS transit bus that I would ride every day. These were the early Series 03 models with the “Slant back” rear. I thought they looked futuristic, and some of their unique features, like the plug-style doors and touch bar stop request, made them innovative and attractive, at least to my 13-year-old mind.
I also was attracted to unique vehicles. I had a Tonka Winnebago, and I had even seen a magazine where somebody made a camper out of a Volkswagen Beetle. I had bought a Beetle plastic kit to try and copy it, but I think I was around eight years old, and it just did not work. But I did have a conversion van kit that was quite detailed.
When I got older, I learned more about conversion vans and how you could take a clean slate like a standard cargo van, make it into something special, and not even break the bank by doing so. But the most important thing was that you could design it however you wanted to, customized to your own needs and desires.
The Search
I can’t say when the thought of owning a bus started to appear in my head, or what triggered the notion, but it was probably around 2018. I started looking online at buses for sale and slowly started educating myself on what it would be like to own a bus. I quickly learned that there were several types of buses available for sale; Units just out of service that were being sold by a private company or auction house, fully restored models, and RV conversions.
These three types usually demanded a higher price, except maybe at the auctions. But then there are two additional types: the worn-out units, or the ones where somebody started a project, and then abandoned it, and was trying to unload it. There were (or should I say is) a lot of these last two types available. I was determined that I wanted to have a working, operating bus. Not something that sits around. I wanted to drive it. Often.
I was still drawn to my favorite bus, the RTS. But it was 2018 now, and the height of production for the RTS was decades ago. But I continued my search. Within the next two years, I would find a few for sale in varying conditions. I even bid on a couple, but when I was outbid, I decided to let them go instead of pursuing them. Every time I looked up buses online and read articles, I learned more and more about the pros and cons of owning such a vehicle.
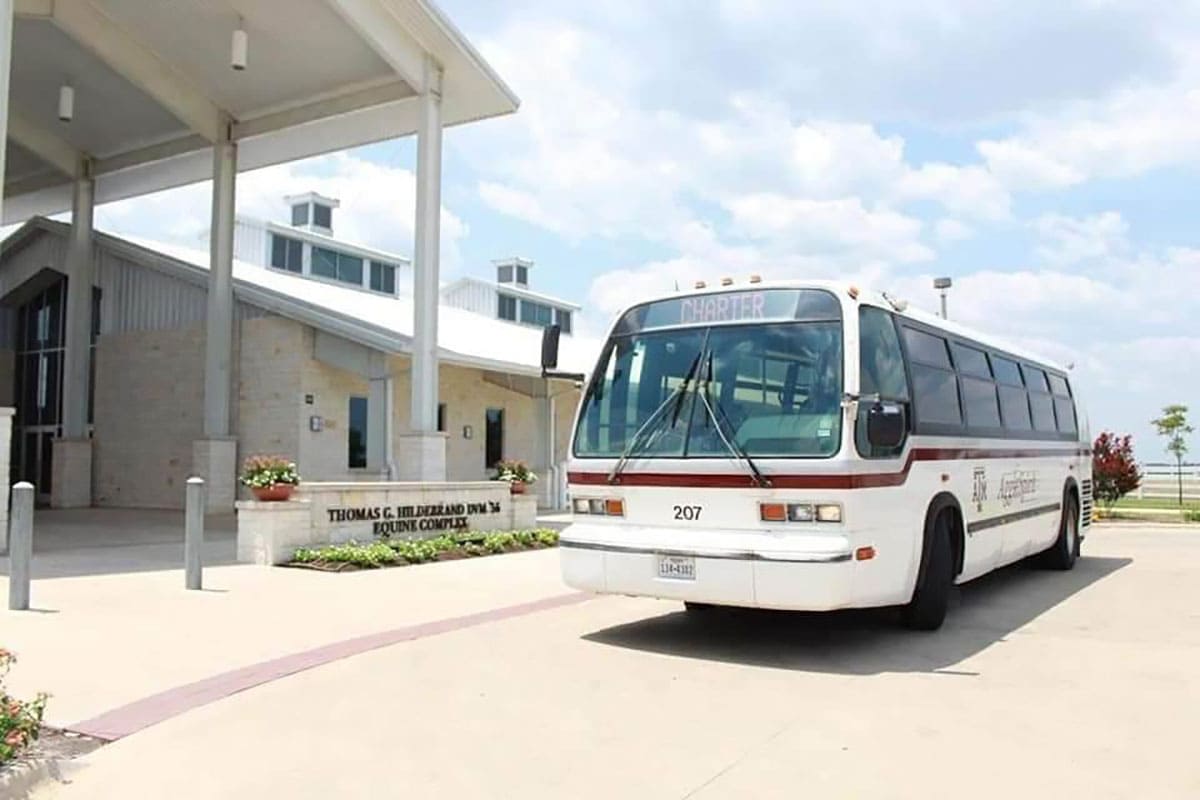
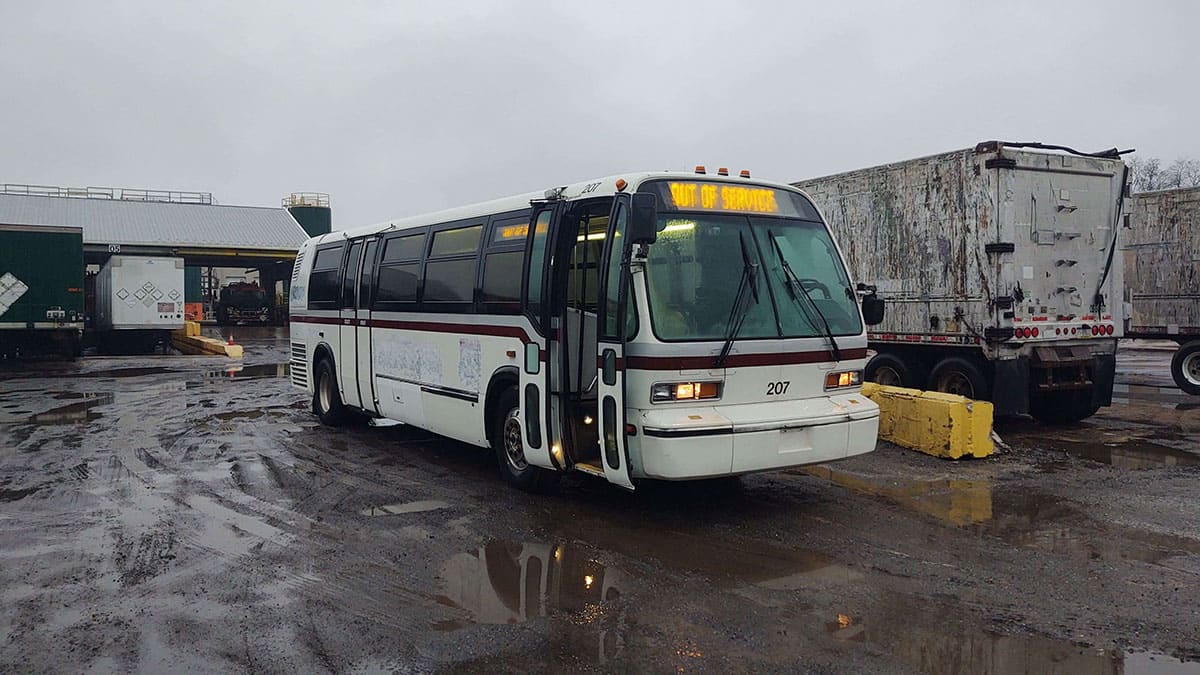
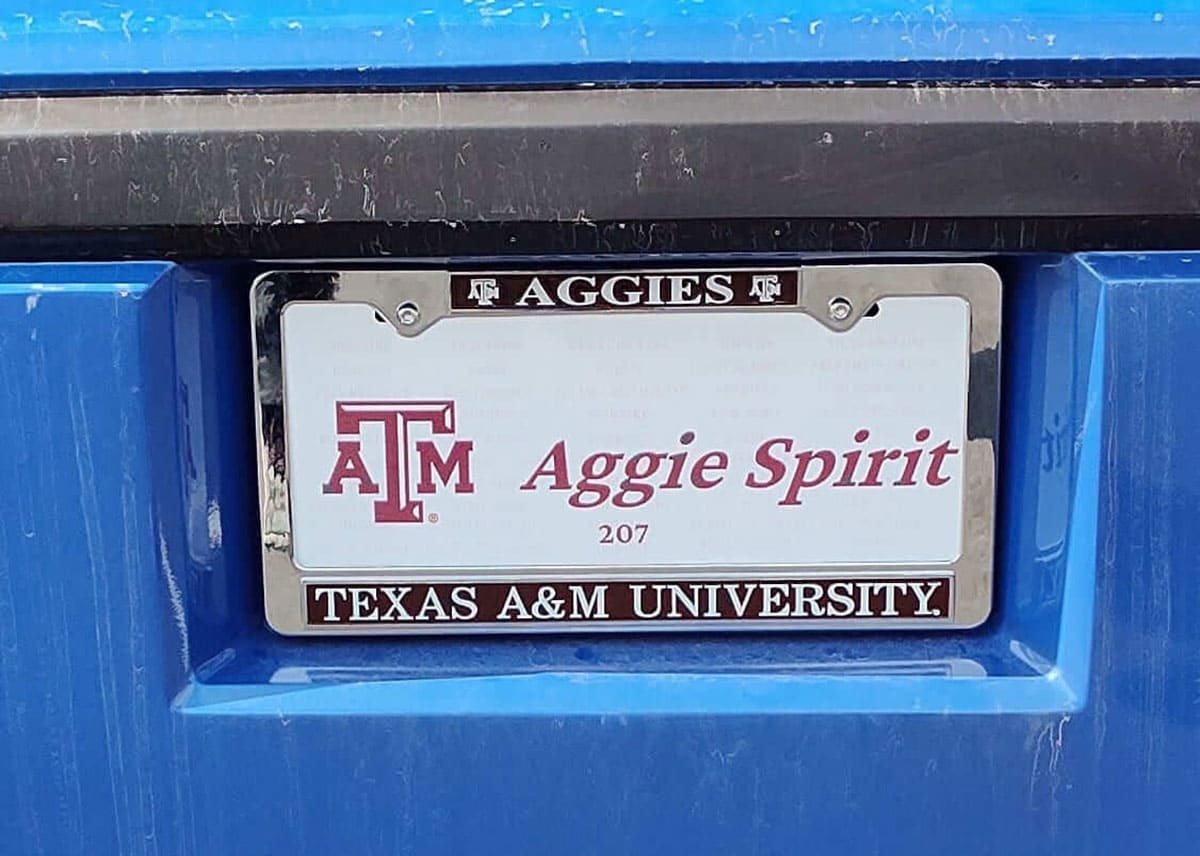
I had almost given up on finding an RTS like I wanted to buy. They just weren’t around anymore. But then one day I searched, and a couple were being offered at auction from Texas A&M University. These buses had been in service since 2001 and 2002 and were being replaced with newer models. I ended up bidding on a 2002 model. Surprisingly, I ended up being the winning bid. Now I had to get the bus from Texas to Philadelphia. But first, I had to tell my wife about my purchase.
We were planning a big family trip to Walt Disney World. But thanks to COVID, we ended up delaying it until February of 2022. There were six of us going: My wife and I, our daughter, and her husband, and our two granddaughters. We had discussed our various options for traveling the 1,000 miles from Philadelphia: plane, train, drive in two cars, or rent an RV. Each had their pluses and minuses.
I came home from work and said to my wife, “You know how you bid on an auction, and you don’t expect to win, but you do anyway? Well, I won something.” Then I handed her my tablet with the auction picture of the bus. She asked, “You won a rental?” to which I replied, “No, we own it.”
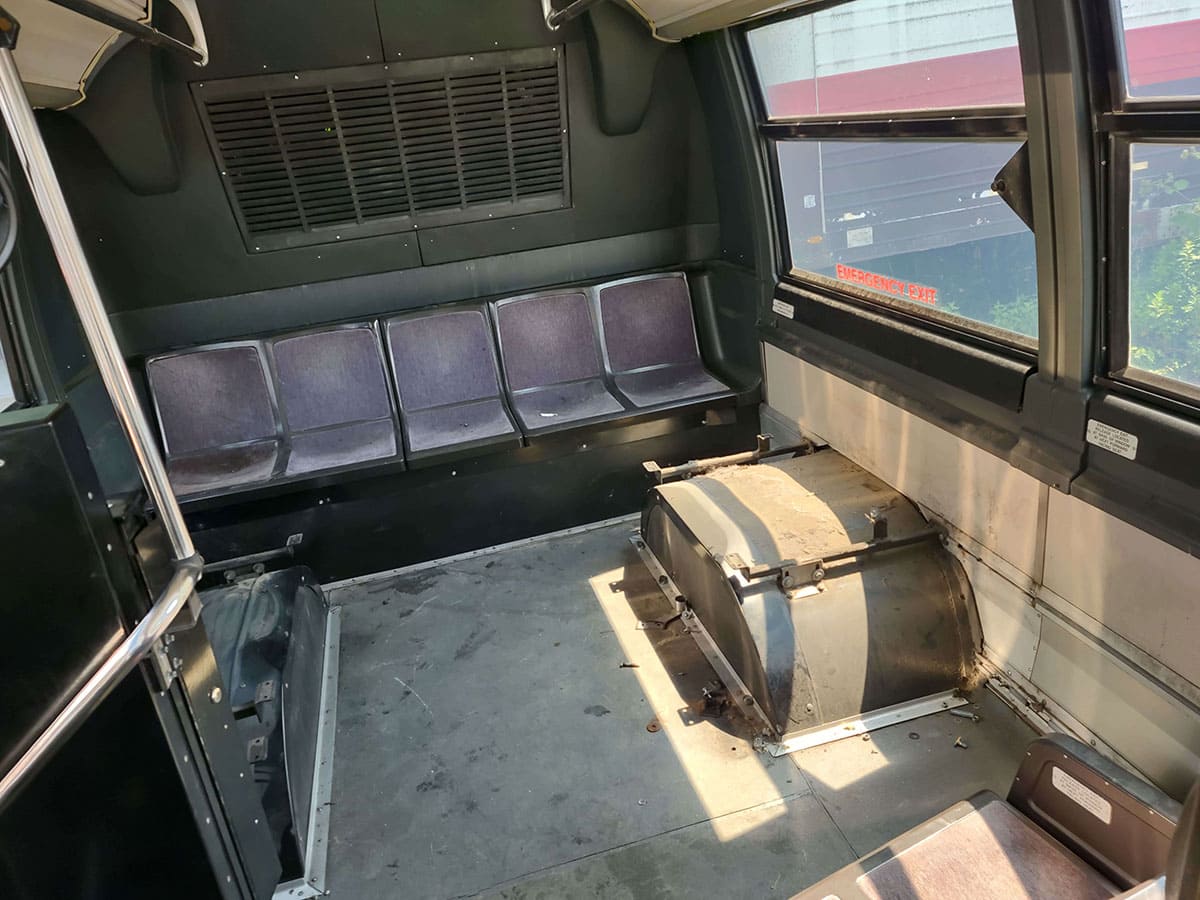
After the initial shock, she looked at the pictures and asked me if I was going to fix it up, or at least “do something about those (hard plastic) seats.” I told her absolutely, and then I had to start designing what was going to be done. I had a little less than one year for it to be ready.
The First Plans – Address Any Mechanical Issues
(Eleven months until the Florida trip)
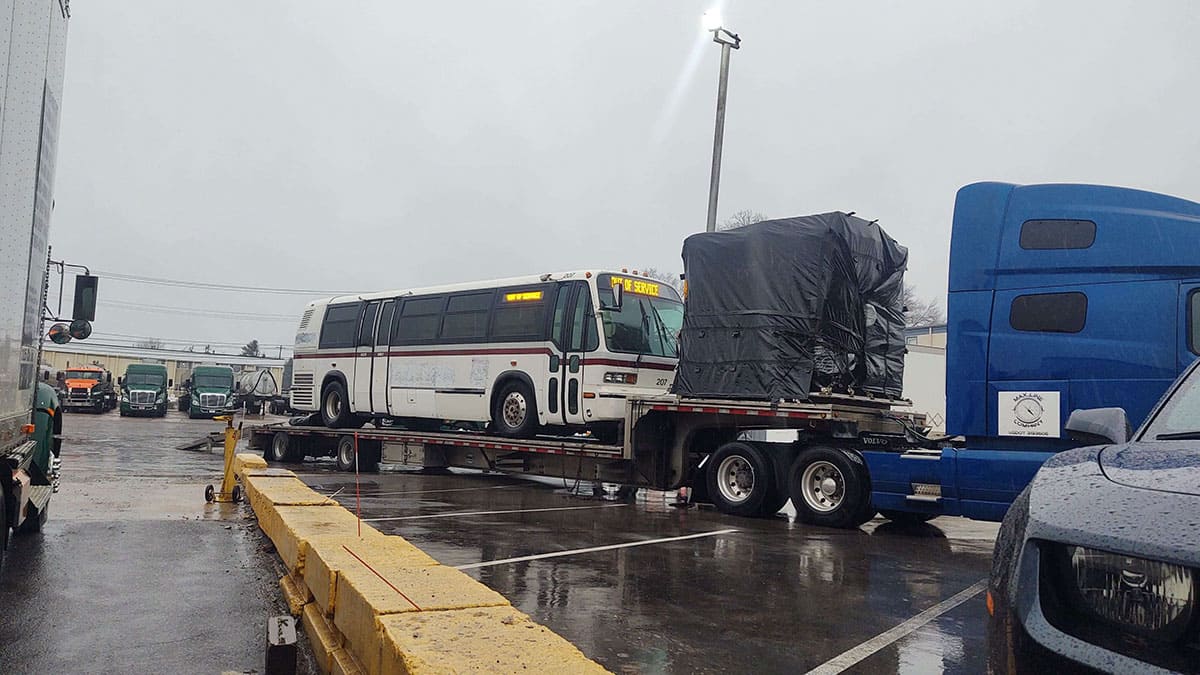
My initial problem was that I now owned a bus that was 1,600 miles away from me. I knew it started and ran, but that was about it. I had no idea if I could make the journey home with it. I ended up deciding that I would have the bus transported from Texas, and then have my mechanic do a complete inspection on it.
I thought this would be a better solution than attempting the trip, and having it break down, forcing me to trust an unknown mechanic along the road. While arrangements were being made for it to be transported, I knew I needed a part for a major modification, and it would be hard to find.
As a transit bus, it is built for city driving. Most of its life is spent going 25 miles an hour or less. But I wanted to go a lot faster. I would be a safety hazard on I-95 if I was only going 60 miles an hour if everybody else was driving 80 miles an hour. I had to change the gearing. Which meant finding a new rear gear for a V-drive vehicle. I contacted a Detroit Diesel service company to assist me.
They had a representative from their branch near Pittsburgh who specialized in drivetrain issues, and he started the search. After a bunch of pictures were sent showing the housing, the angle of the driveshaft, along with the plate on the rear, we were able to find a different gear ratio.
The change from my factory's 5.13 ratio to a 4.10 ratio would raise my top speed from 63 miles an hour to 78 miles an hour. Then, I could cruise between 65-70 mph without running at the tachometer red line the entire time. We made the arrangements, and the work began.
The Detroit Diesel Series 50 is a fine engine. A four-cylinder engine, compared to the six-cylinders in a Series 60, it is smaller, but shares many common parts. But it has a common issue: The balance shaft tends to develop cracks and can instantly turn a running engine into a pile of junk while you are driving.
I felt that the best thing to do was to have the balance shaft inspected while I was waiting for the rear end to be rebuilt. It was a good thing, as several cracks were discovered. I had the balance shaft replaced to ensure that my bus was going to be able to last for years to come.

What To Do About the Interior
With the blank slate of a bus conversion, one can be very creative. You can do almost anything that you want to do if it fits into the space available. My wife and I discussed how we would use our new vehicle so that we could design it to fit our specific needs. We looked at various conversions at bus shows as well for ideas.
From our research, we determined one of the biggest differences between a bus and an RV. A bus is designed to get you from Point A to Point B. An RV is designed not only to get you from Point A to Point B, but once you reach your destination you remain in the RV. An RV’s comfort is maximized when the vehicle is parked.
We wanted our vehicle to be comfortable while in motion, and once parked it would be unoccupied. We would sleep overnight in hotels and eat at restaurants. Longer trips would have frequent stops, about every four hours. Not only for driver relief, but my city transit bus did not have a fuel gauge, and I wanted the fuel tank to stay topped off.
The lack of a fuel gauge was quite common for a vehicle that might only drive 100 miles a day and return to its garage each night to be serviced and refueled. After assessing our needs, we came up with a short list of requirements: comfortable seats, a dinner table, and bunk beds for use while in motion. We also determined what we did not want or need to have.
Because we would not be in the vehicle while parked, there would be no need for auxiliary air conditioning units, generators, or shore power hookups. Eating at restaurants would mean no need for a refrigerator or any cooking equipment.

My wife was adamant that she did not want a restroom on board. I was concerned that one might be needed, but our frequent stopping schedule determined that we would be okay. I insisted that we get a portable camping toilet just in case of emergencies since we would be traveling with our grandchildren.
My initial thoughts were to only remove a few of the original seats; just enough to give us room for what we wanted to add. But those plans were quickly changed. First, the way the state of Pennsylvania registers buses is that they charge by the seat. So, the more seats that you have, the higher your registration costs are. This is the same for both privately used buses, as well as commercially used buses. Since my registration was going to remain as a private bus, I needed to remove as many original seats as possible to lower our registration costs.
How much? My first year’s registration was before conversion and was $530. After I completed the work and sent my request for a modified title, as well as to request the special license plate for a personal use-only bus, my registration cost for the second year dropped to $125, which is close to the cost of registering an RV in Pennsylvania.
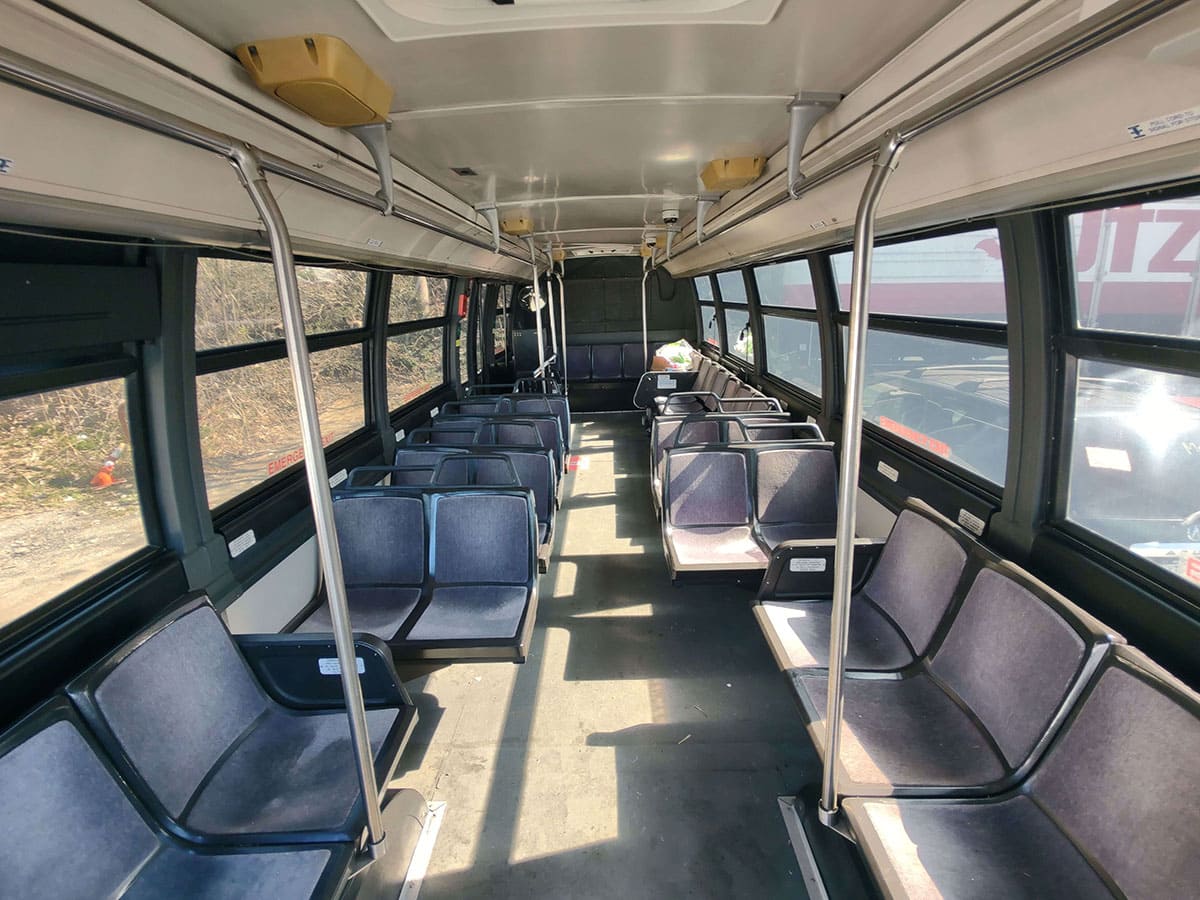
Second, the main area of the bus is between the front wheel wells and the rear door. Since I purchased a thirty-five-foot bus, that meant that this area was only ten feet long. In the end, all the original seating was removed. However, I did save one section of seats and made them into a bench.
The month the bus was in the shop getting the new highway gear installed and the engine repaired was spent doing a lot of searching online. Searching seat manufacturer websites, reading spec sheets, and drawing various floor plans repeatedly. My wife helped me with choosing our various options; I would send her different seat choices, and she would let me know if they were good, or looked ugly.
But it was up to me to design the floor plan. Initially, my thought was to get the widest seats possible, and then offset the center aisle by having a pair of seats on one side, and a single seat on the other side. I would have a longitudinal pair of non-reclining seats over the curb side wheel well, and the rest would be forward-facing reclining seats, except for one set that would be rearward facing, with a table between them and a forward-facing pair, like the tables on the old Trailways Golden Eagle buses, as well as the business class cars of some trains.
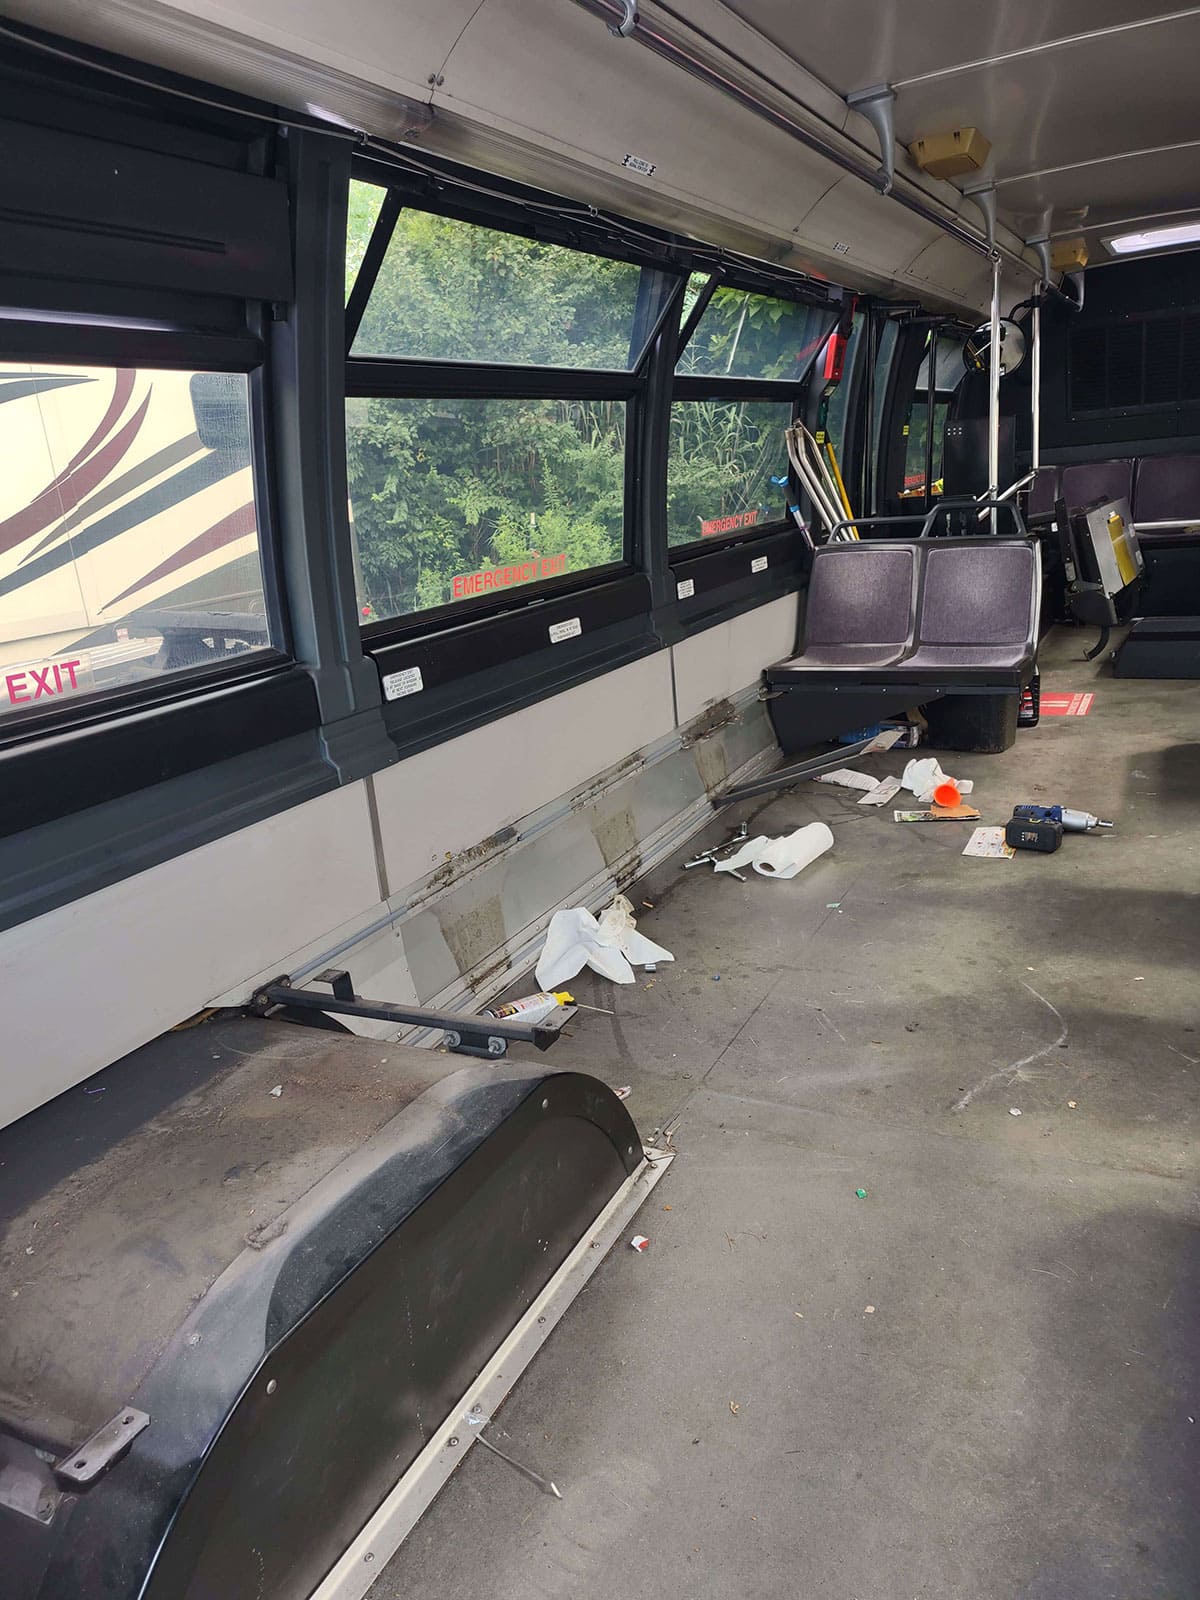
There were many different floor plans created, as well as discussions with seat manufacturers. The original transit seats were mounted in a cantilever fashion along the wall, and the new seats would need to be mounted to the floor.
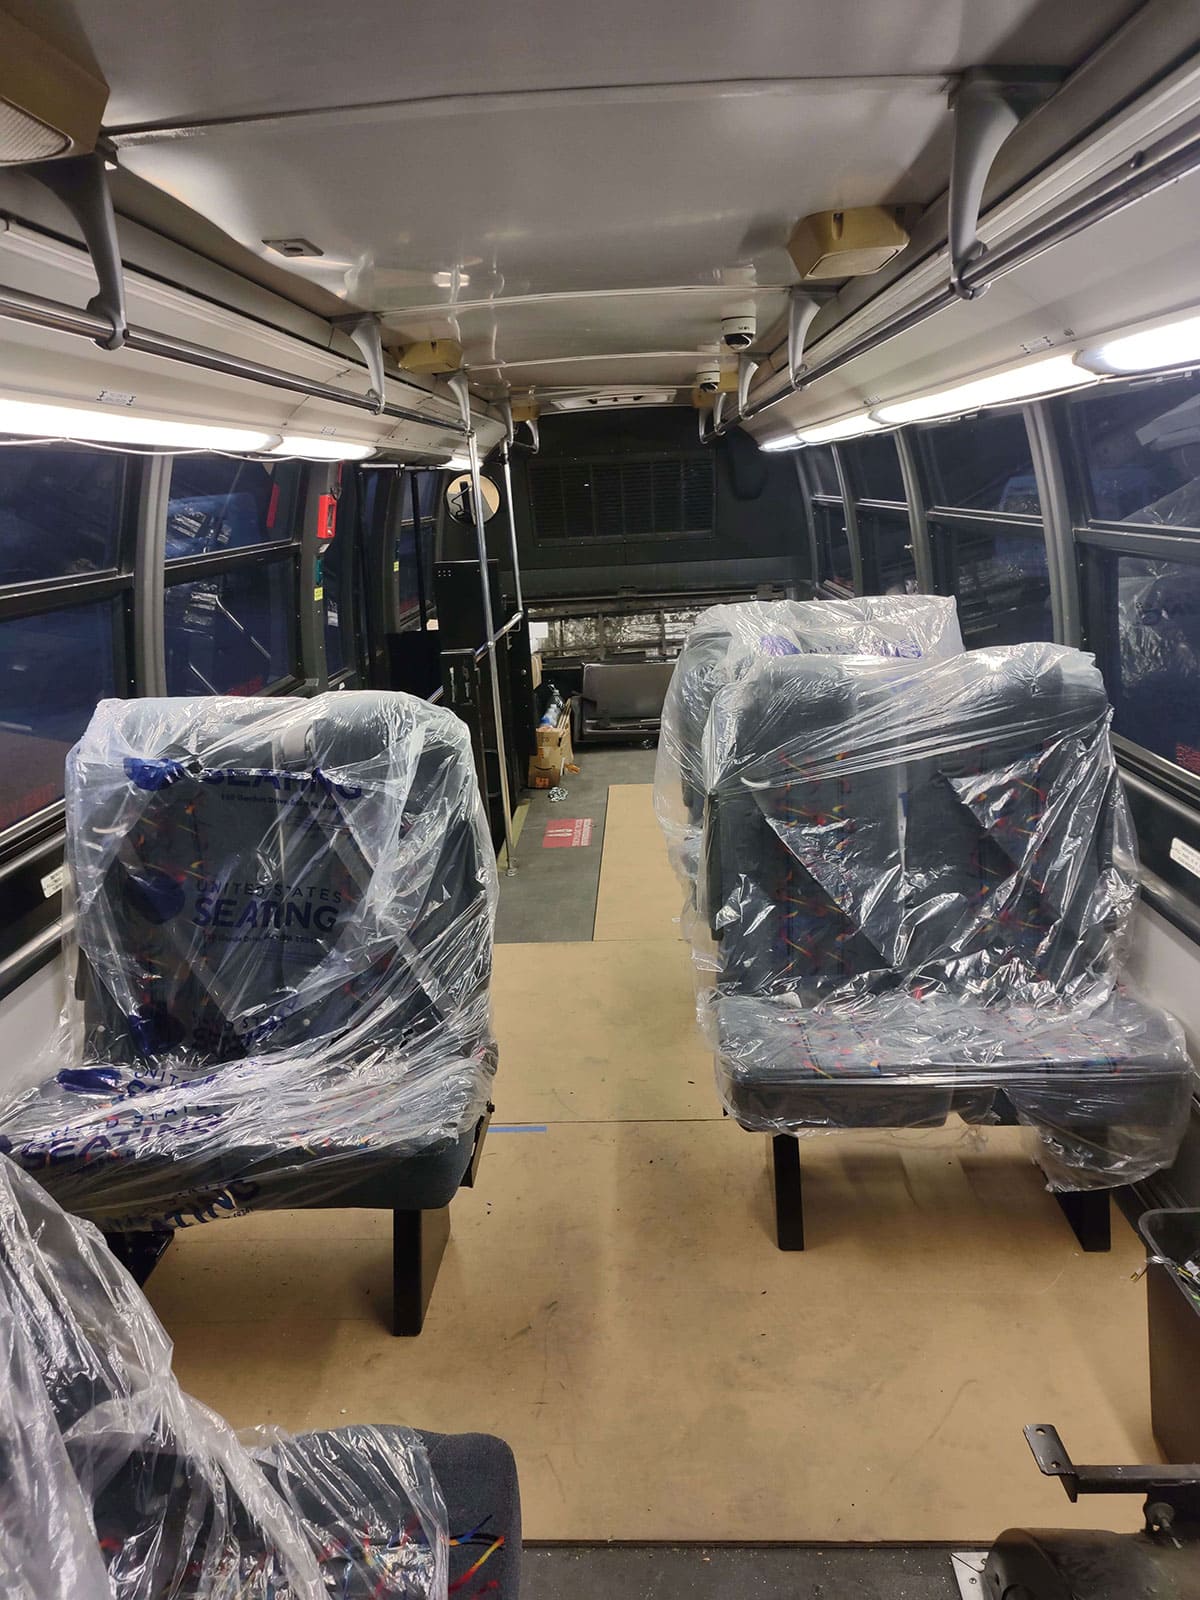
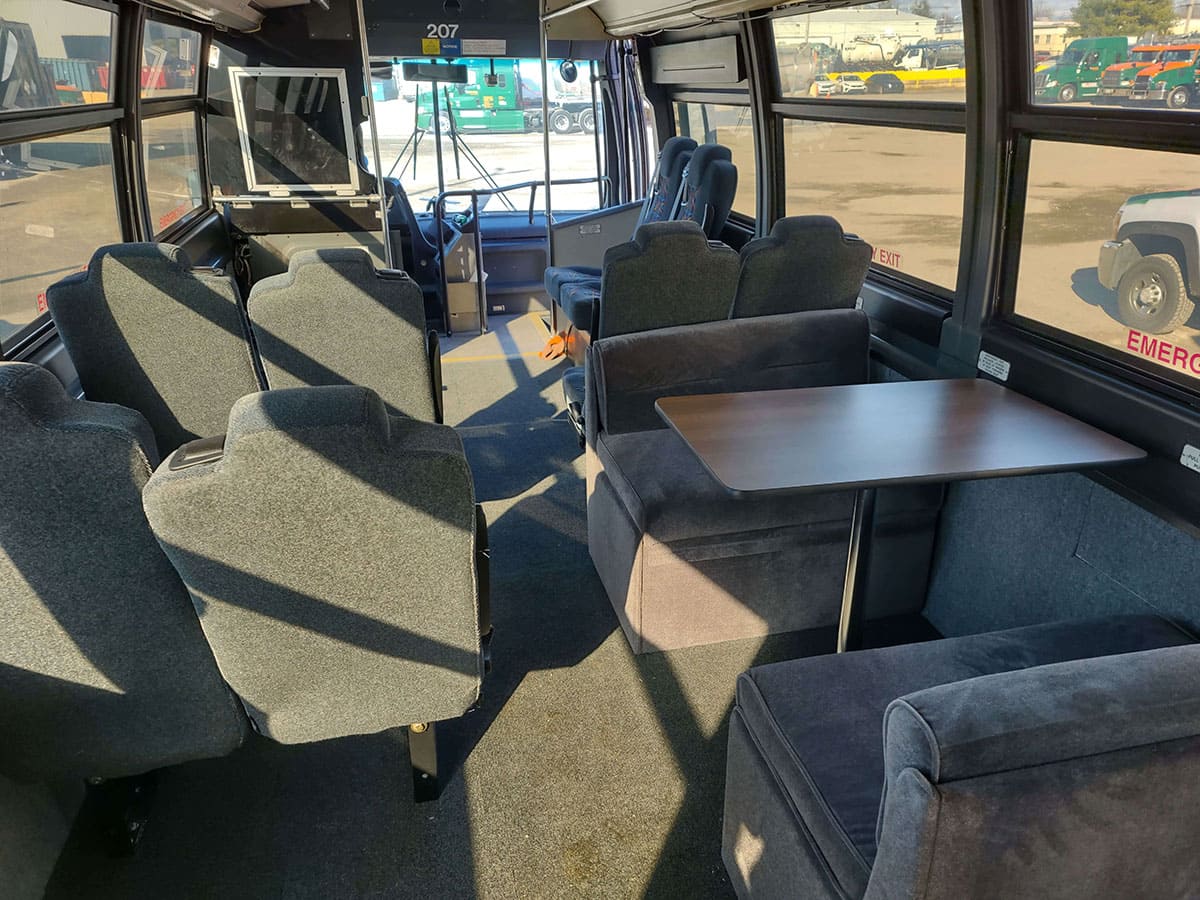
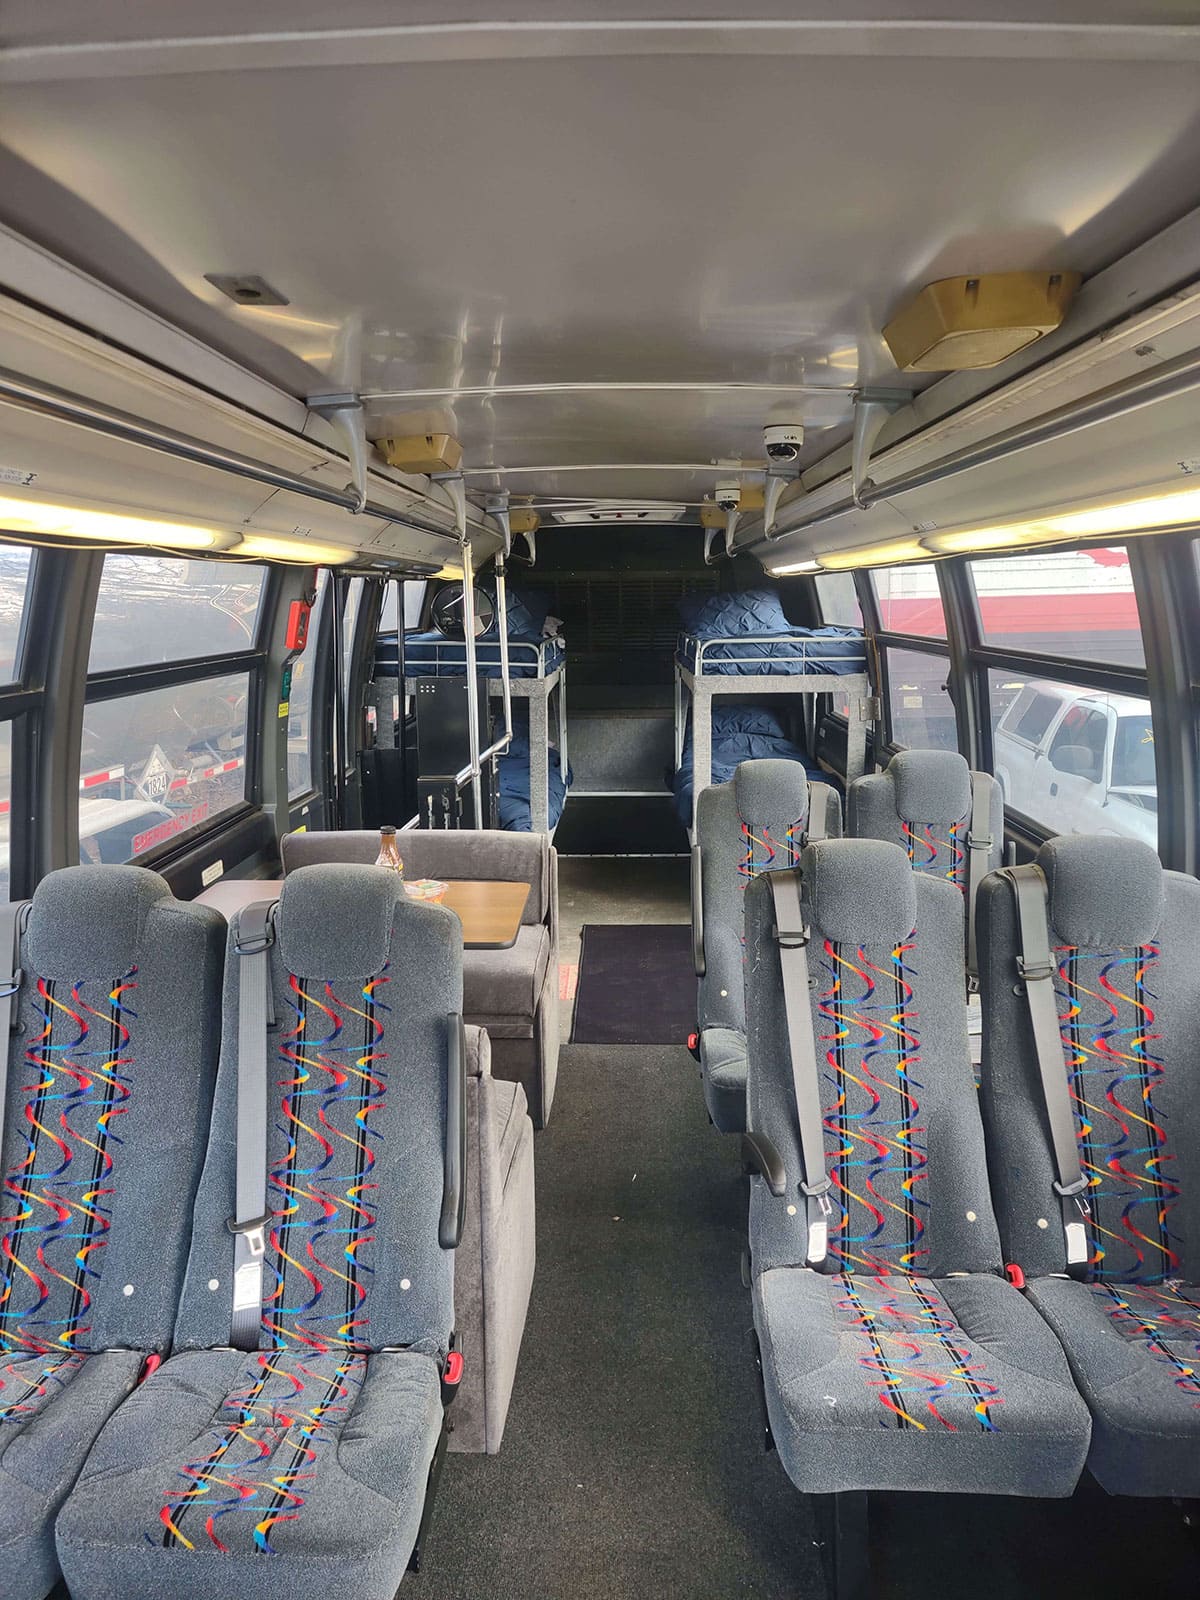
My wife and I also changed our original direction and went with the standard width seats, and pair of seats on both sides, so people could sit next to each other instead of alone. We also ditched the idea of the rearward-facing seats and a table and went with a standard RV dinette set.
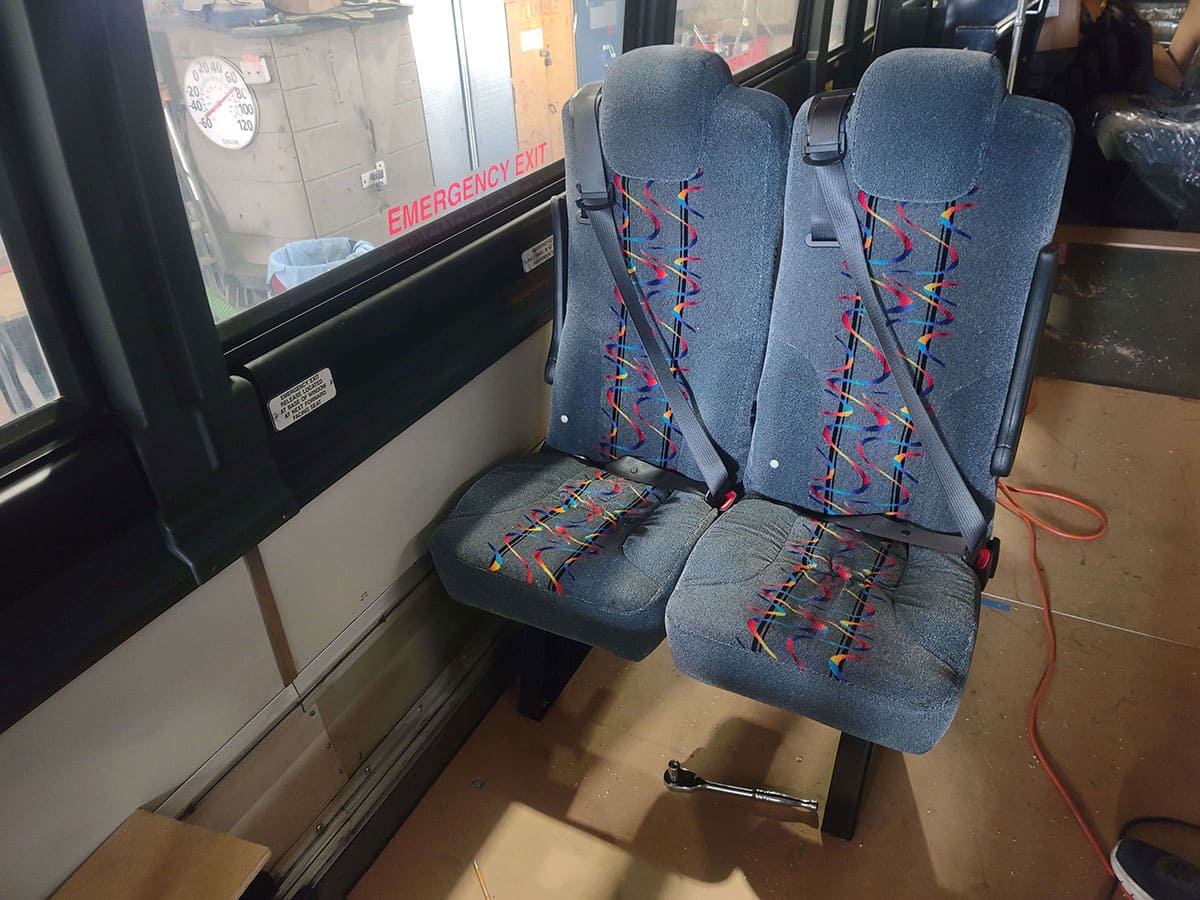
The remaining seats were three pairs of reclining seats. These seats, as well as the longitudinal seats over the wheel well, had a premium cloth finish, armrests, three-point safety belts, and child seat tethers which securely fasten a child seat in place. There was a six-to-eight-week delay before the seats would ship, and the dinette was a four-month wait.
Since I had not removed any of the original seating yet, this gave me a two-month period to get the seats removed, and things ready for the new seats to be installed. Until then, we used the bus for several short weekend trips, as well as a camping trip. There was plenty of room to store all our camping gear. Even with the original seating, the trip was comfortable considering we were not scrunched in an overpacked car with no room at all inside.


Interior Construction
(Six months until the Florida trip)
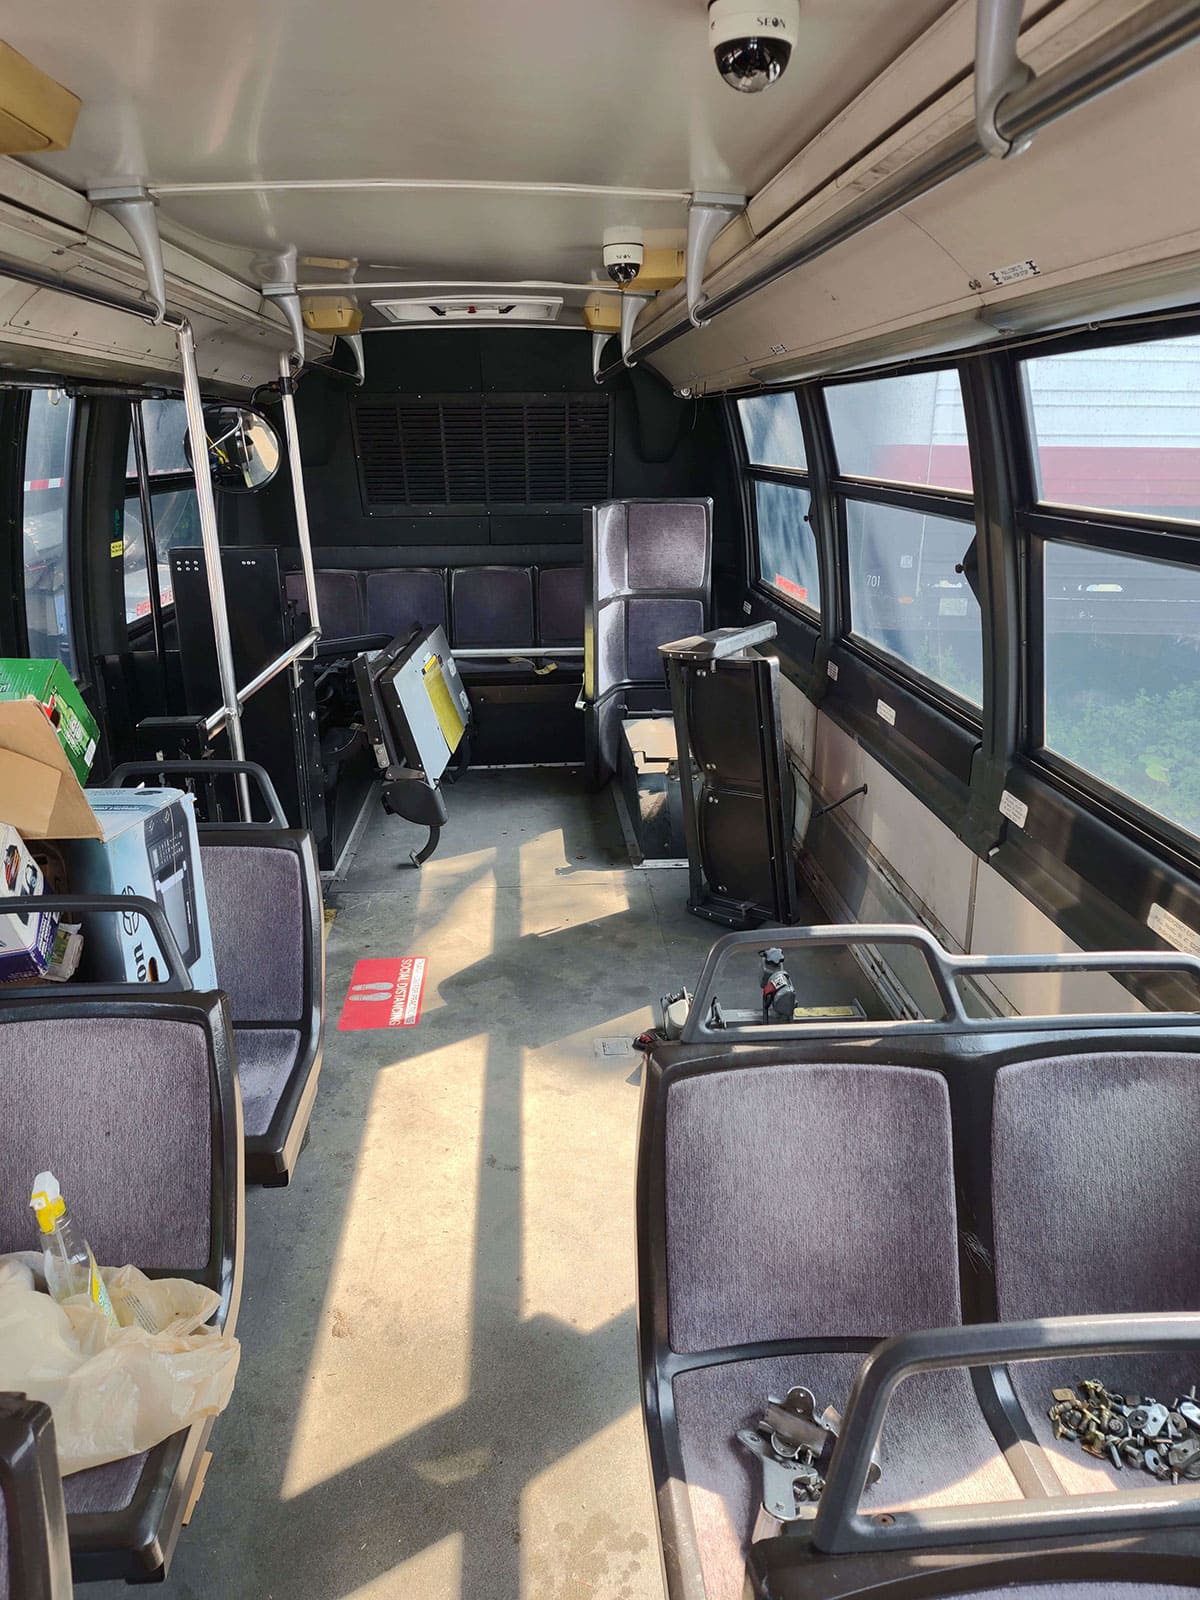
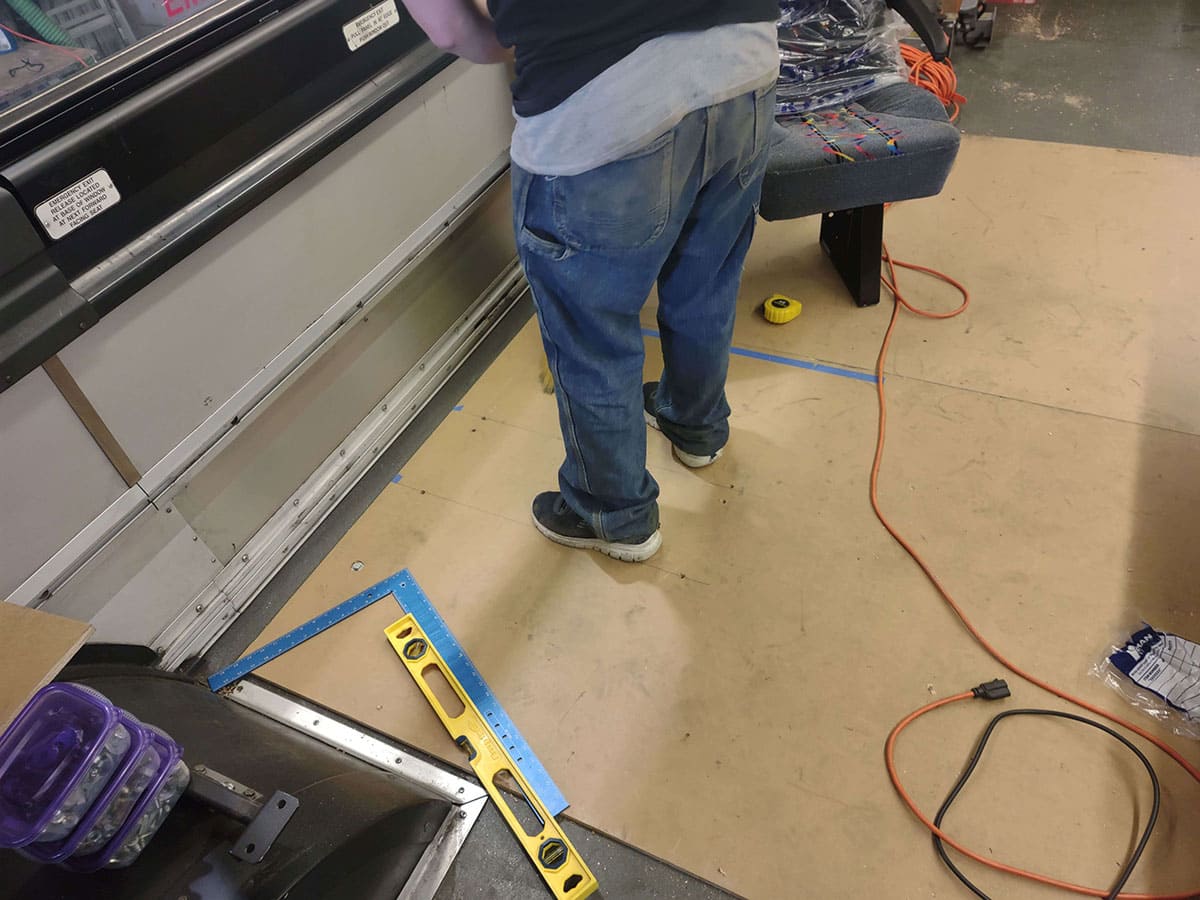
Removing the seats was a lot easier than expected. Since they were mounted to the walls, all the hardware was on the interior of the bus. A socket wrench took care of everything, and luckily nothing had to be torched off.
With all the seats removed, everything received a good scrubbing and was cleaned up. Then, I laid a sheet of half-inch plywood on the floor and secured it in place. With this, plus the original ¾ inch-thick, original floor, I knew I had a strong enough base to mount the new seats.
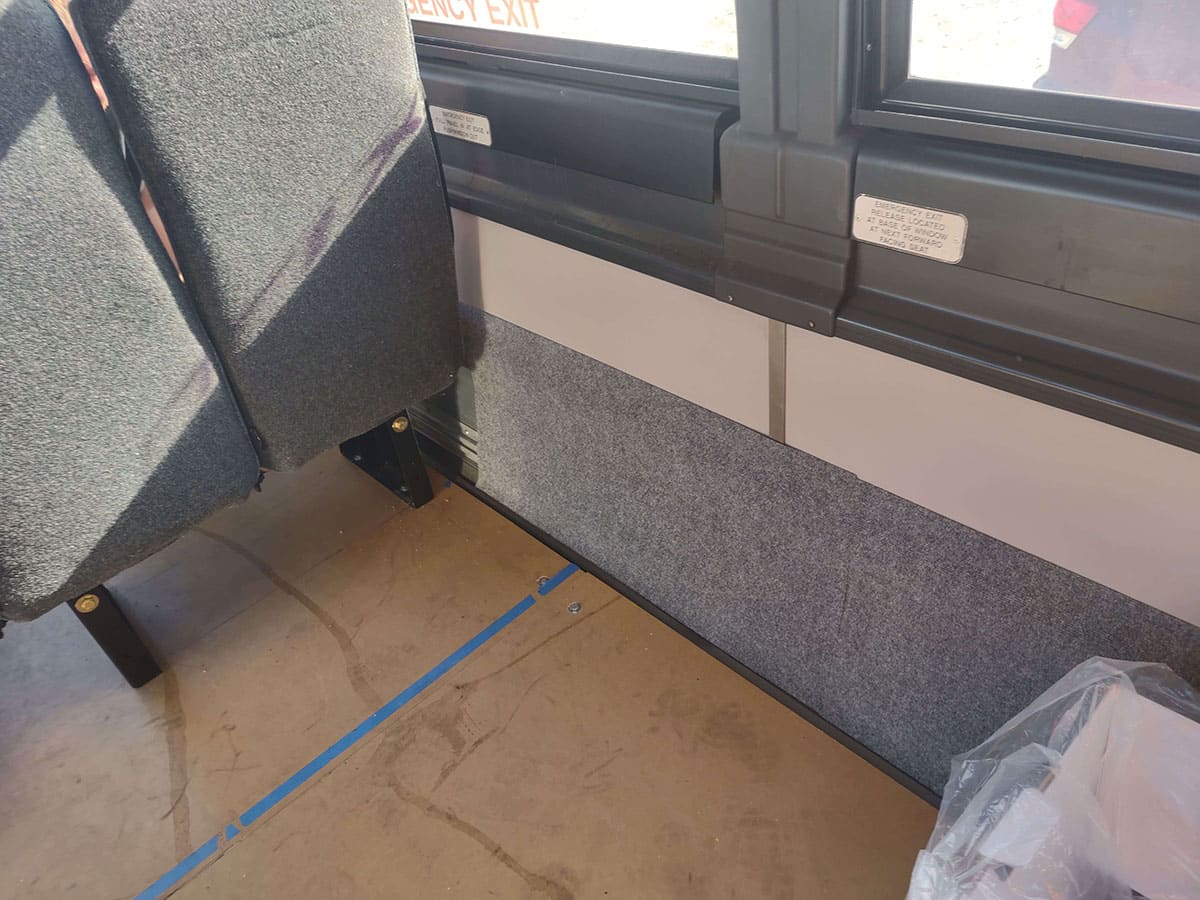
Everything was then measured and taped off. Due to the location of the fuel tank, I ended up making a minor change to how the seats were arranged to make sure they could be firmly secured. Once everything was where it needed to be, I used stainless steel bolts to secure the seats. The one set that was to be installed over the front wheel well needed some adapting done to the brackets that I had in place, so I had a shop take care of the welding for me.
Once all the seats were in position, I could put the carpet in place. To make it easy, I used carpet squares so I could easily cut around the supports for the seats. I also placed carpet on the sides of the interior walls to help hide the old seating track. This greatly improved the look of the interior. My dinette set, as well as the new driver’s seat, were still waiting to be built, and would not arrive until the beginning of December.
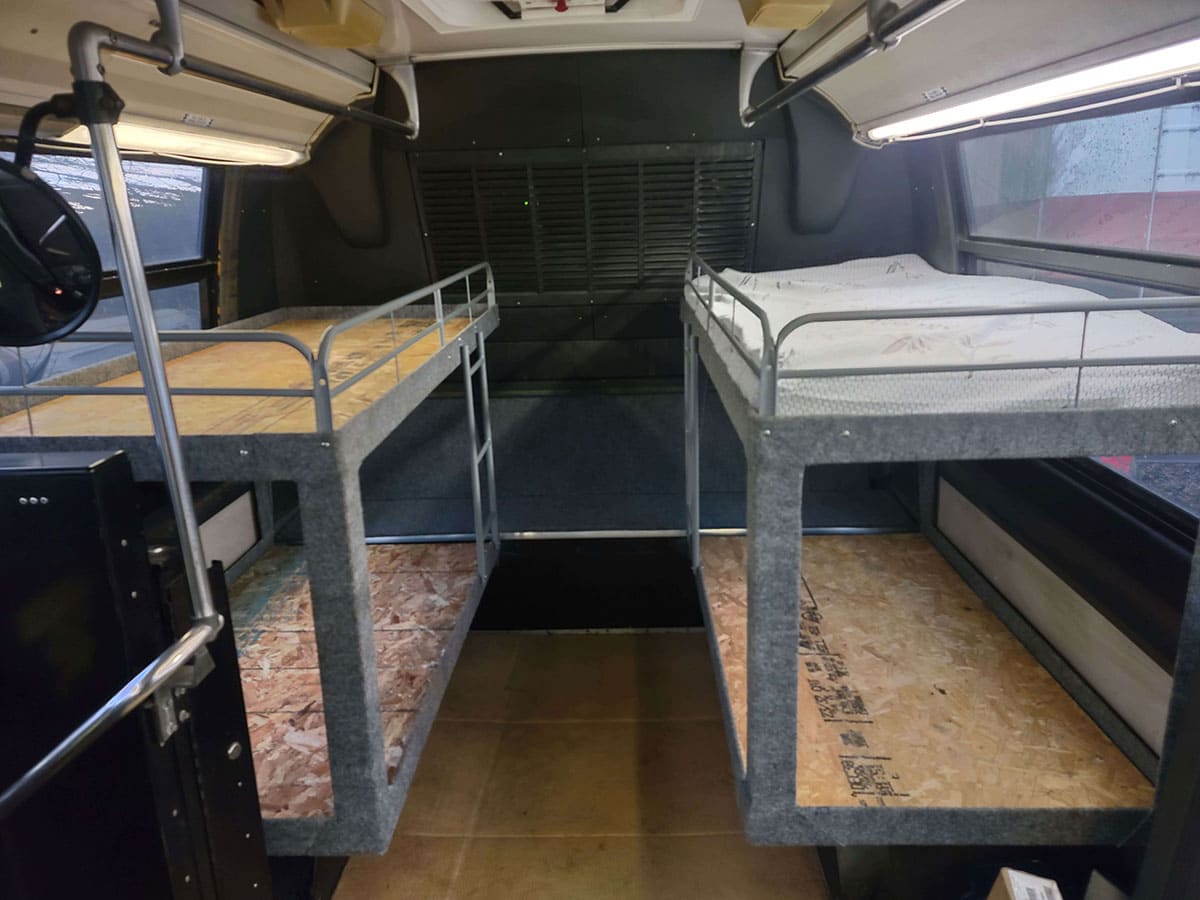
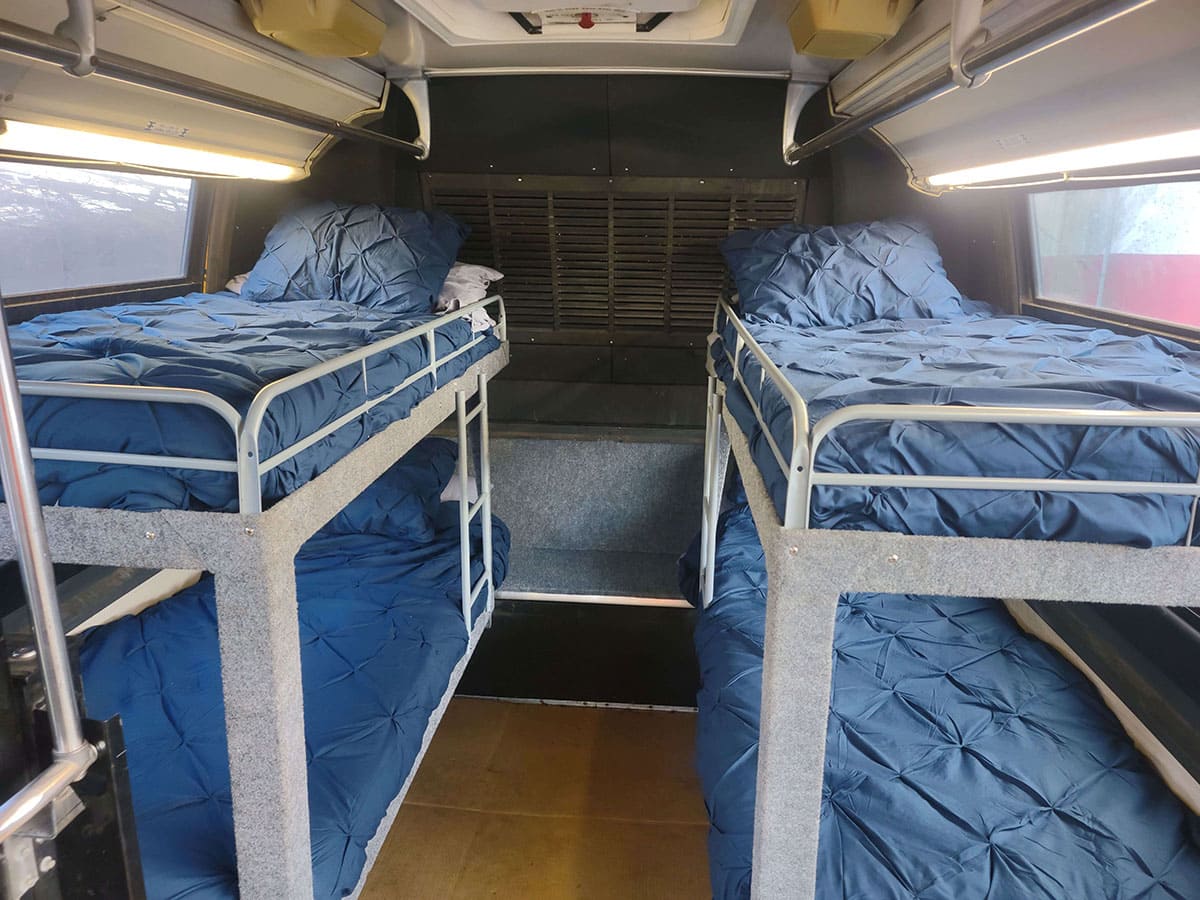
What to do about the Beds
(Two months before the Florida trip)
All this time I had been looking at various methods of building the two bunk beds that I wanted over the rear wheels. In addition to trying to decide what materials and method to construct the beds, I wanted to do something that was giving me difficulty in solving:
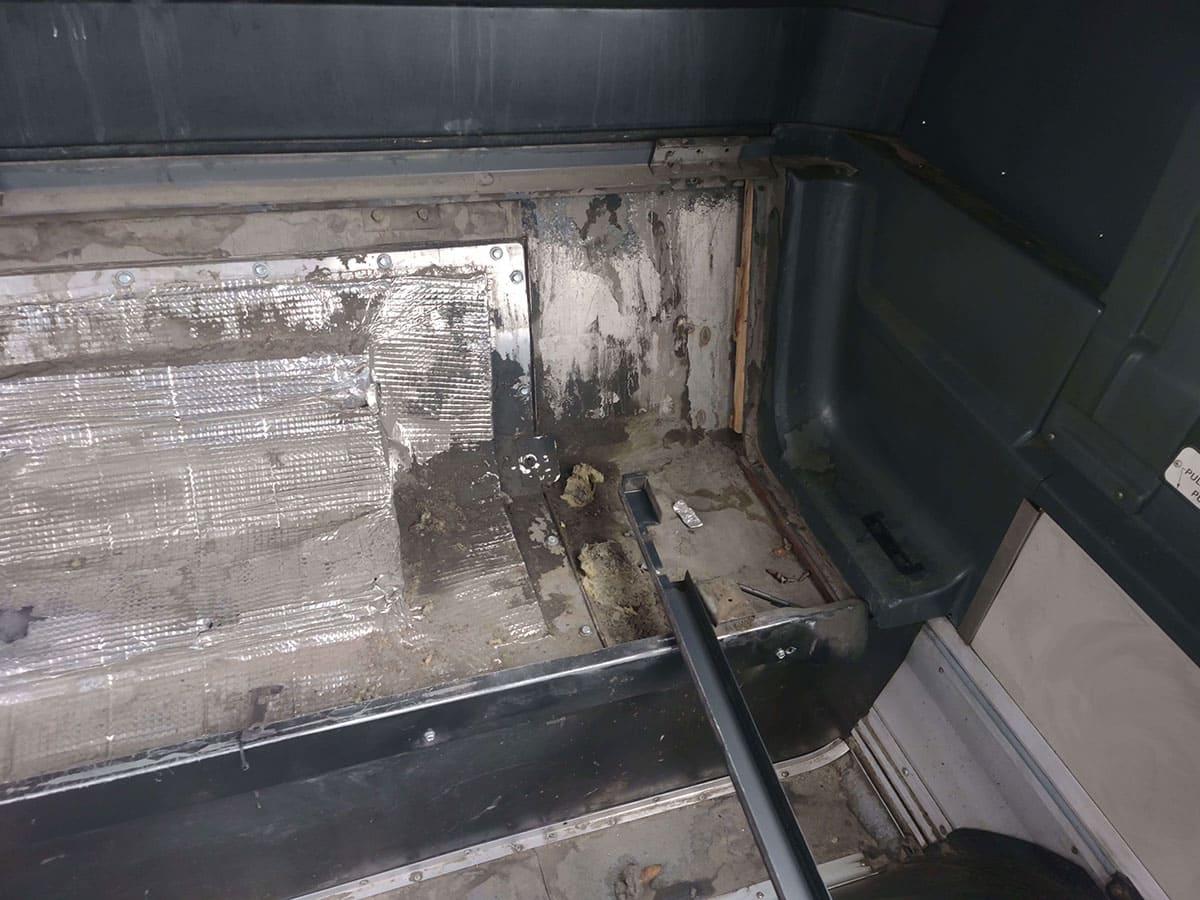
The RTS has a transverse-mounted engine, with a “V-Drive” driveshaft that is on an angle. Like other buses with a transverse-mounted engine, the rear seats must be moved to get to an access panel, which when removed will allow a mechanic to access the side of the engine that is not accessible otherwise.
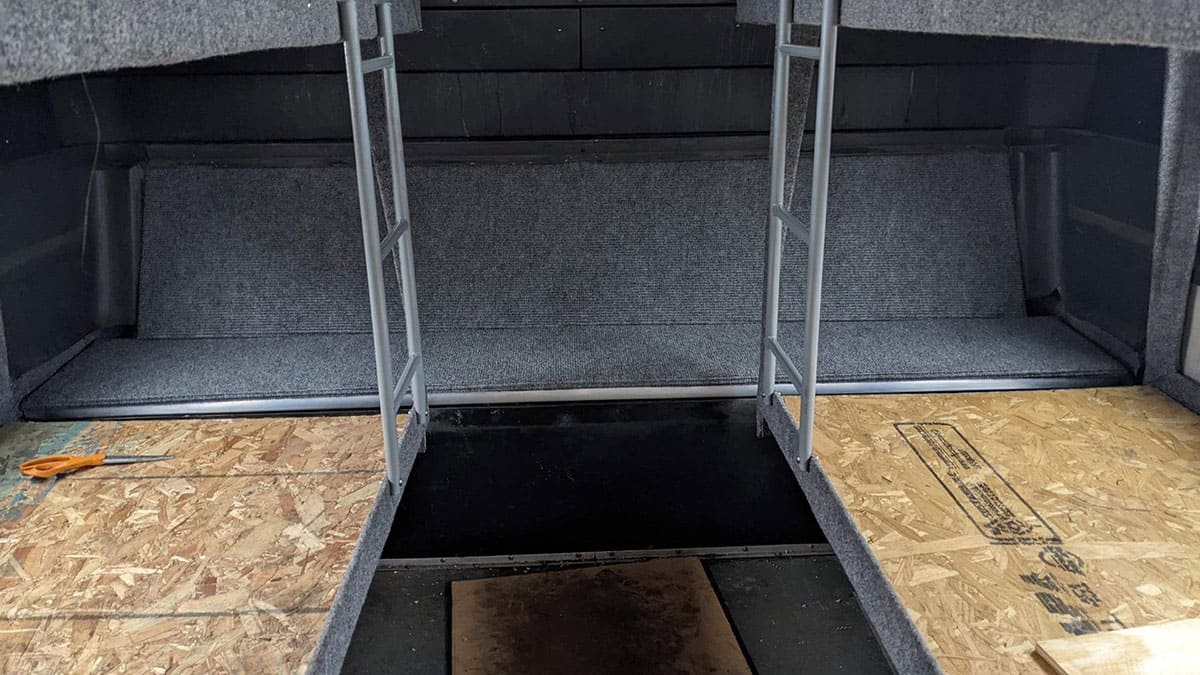
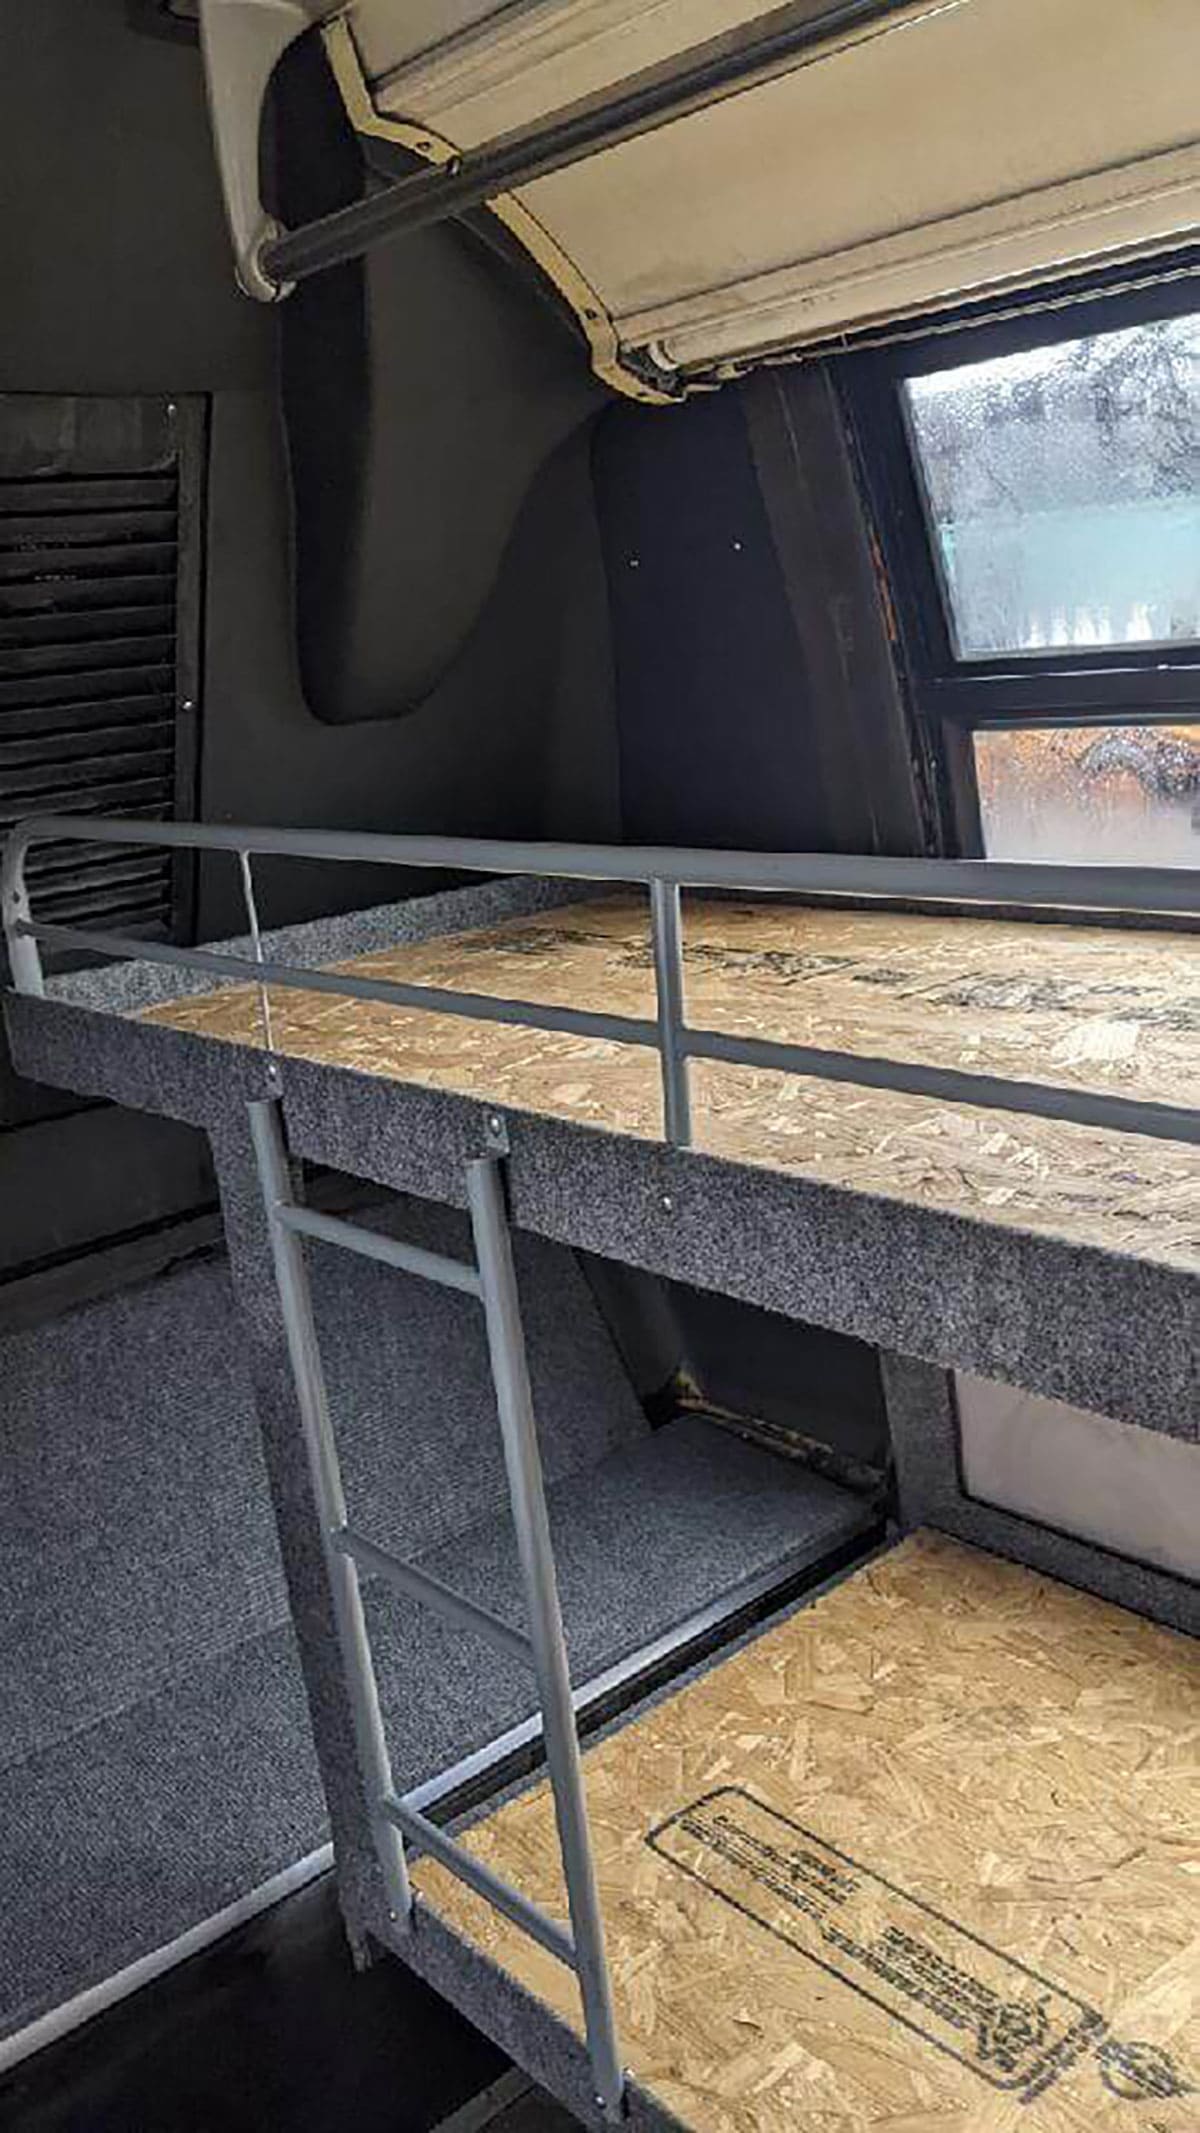
I did not want to block off this panel just in case sometime in the future, a mechanic would need to access it. I tried several different mounting options, but I did not like any of them. Since I was running out of time before the big Disney trip, now only two months away, I decided to outsource that job. I asked a mechanic who had worked on my bus if he might be able to build bunk beds for me, as he had some in his conversion bus.
I explained everything that I wanted, and he said that he could do it and gave me a reasonable estimate that I could live with. Finished shortly before we were leaving for Disney, the beds were solidly built and met my requirements. The interior was ready to leave for Disney with one week to spare. I would have to wait until after we came back to get one additional big item taken care of.
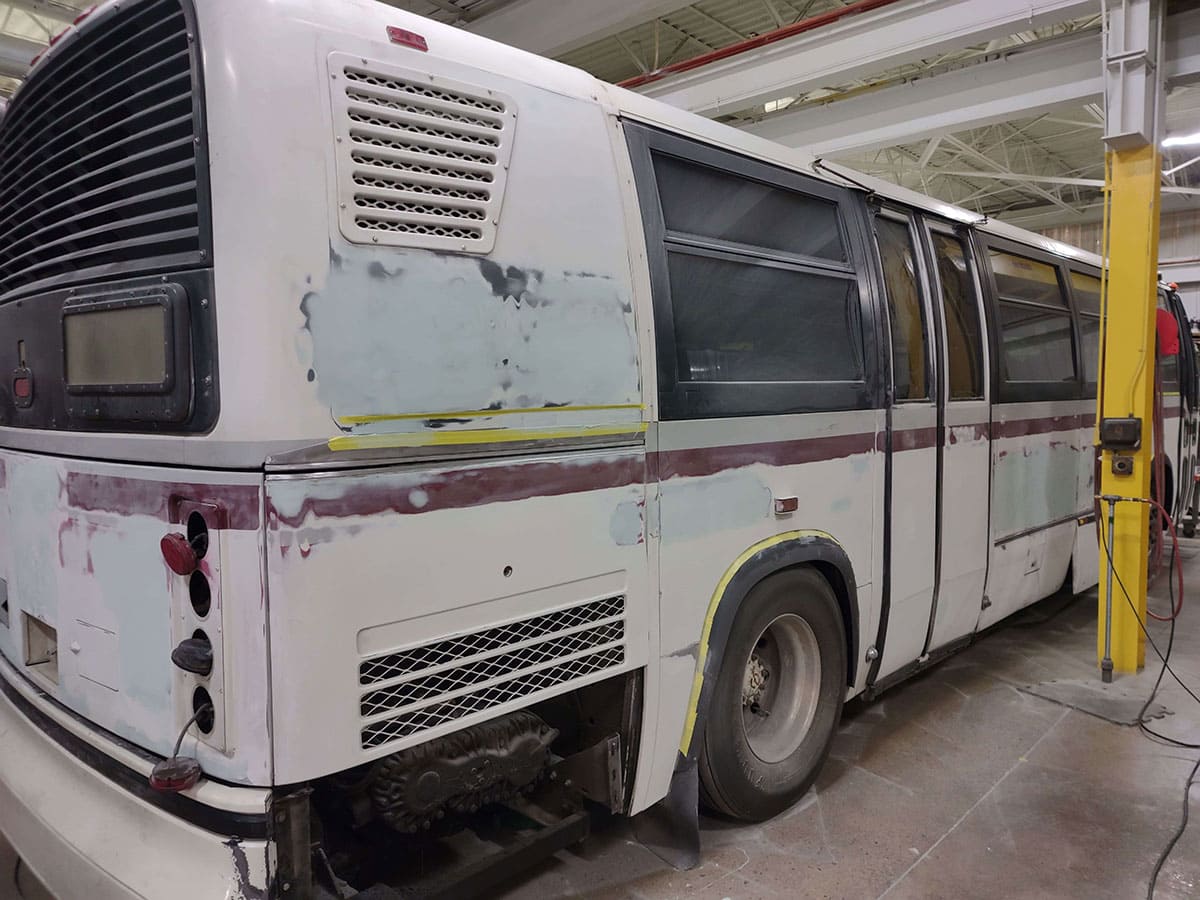
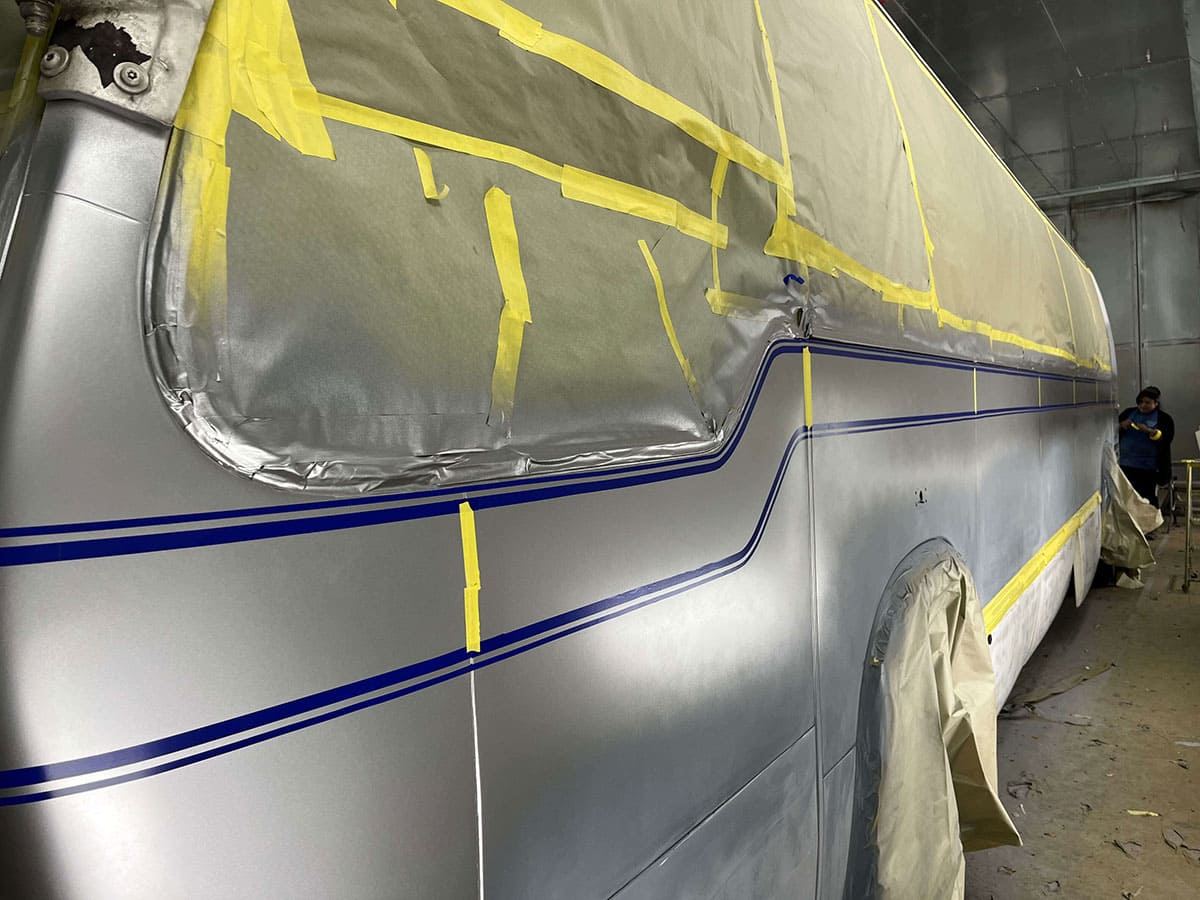
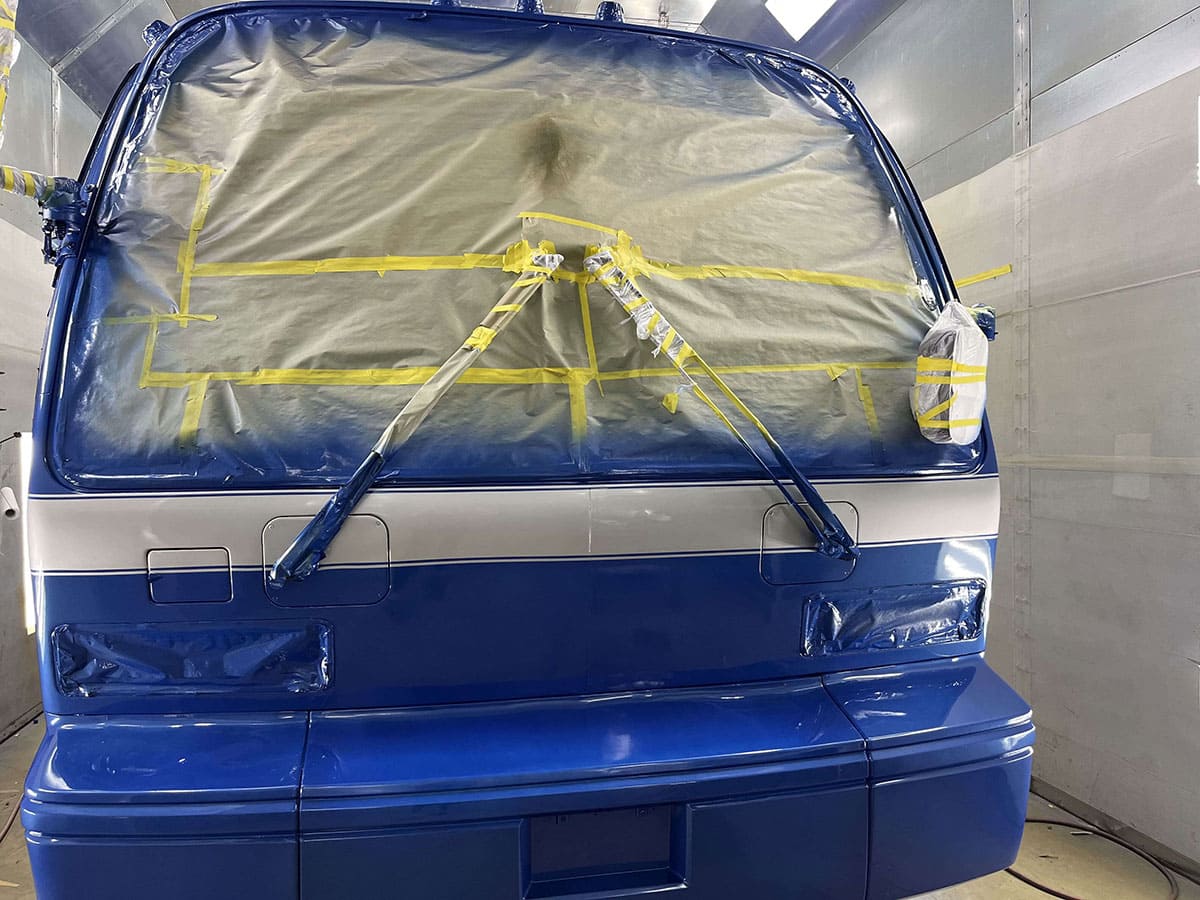
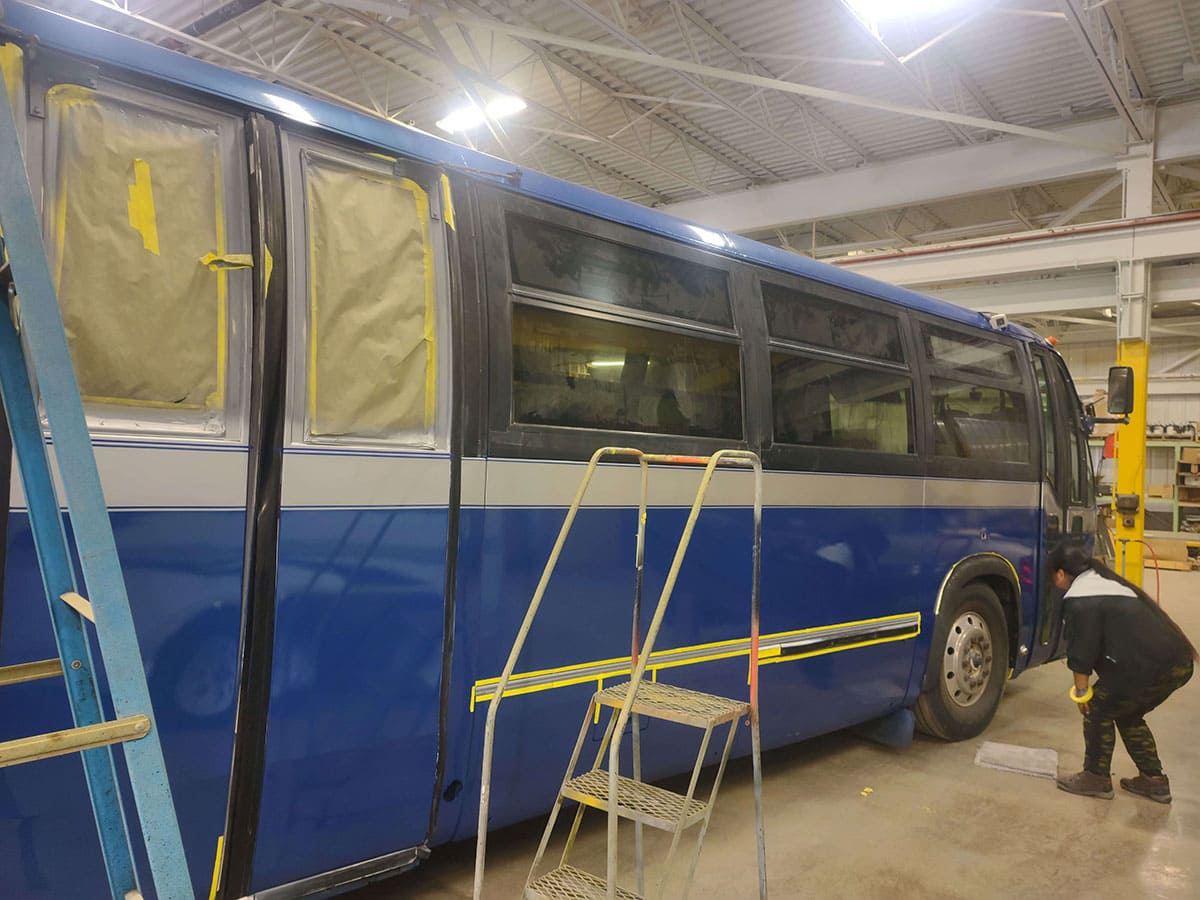
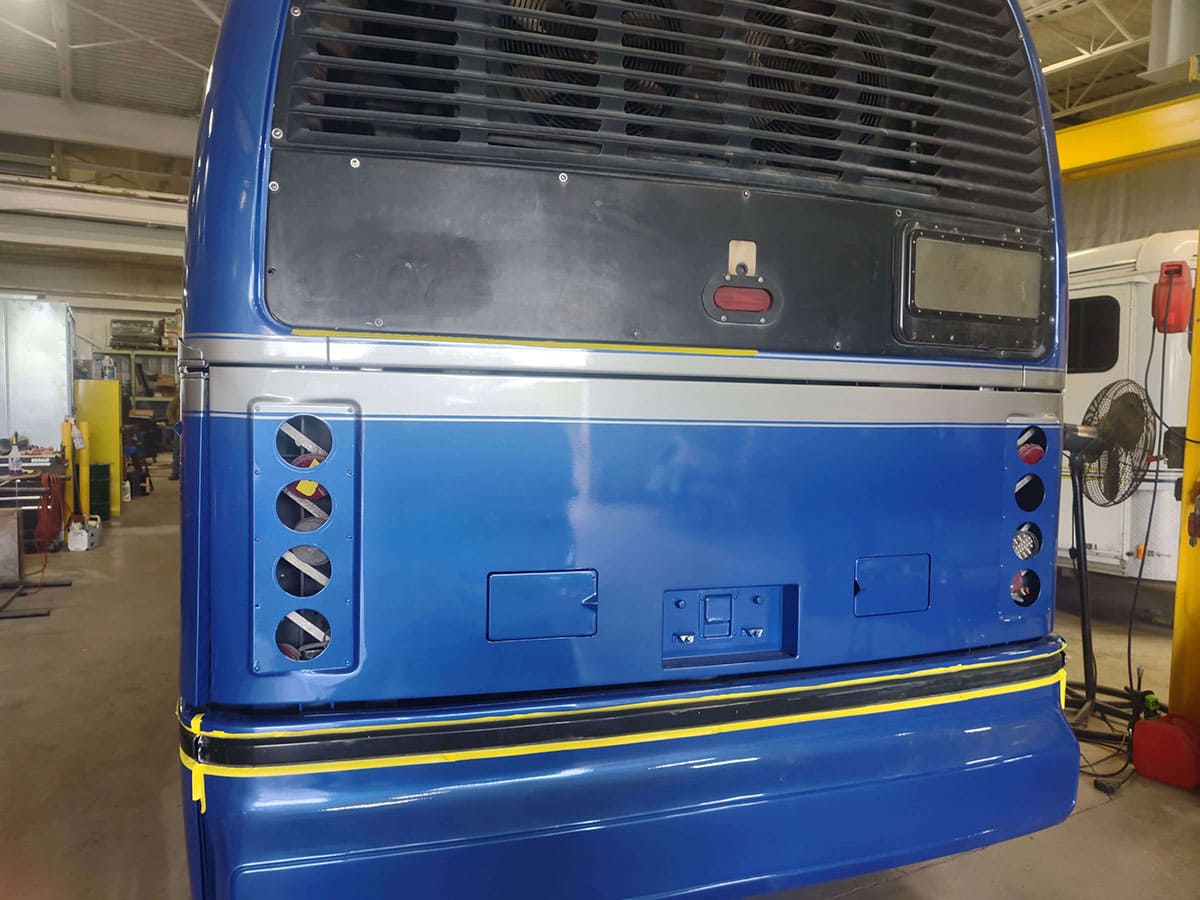
The Final Big Task: The Exterior
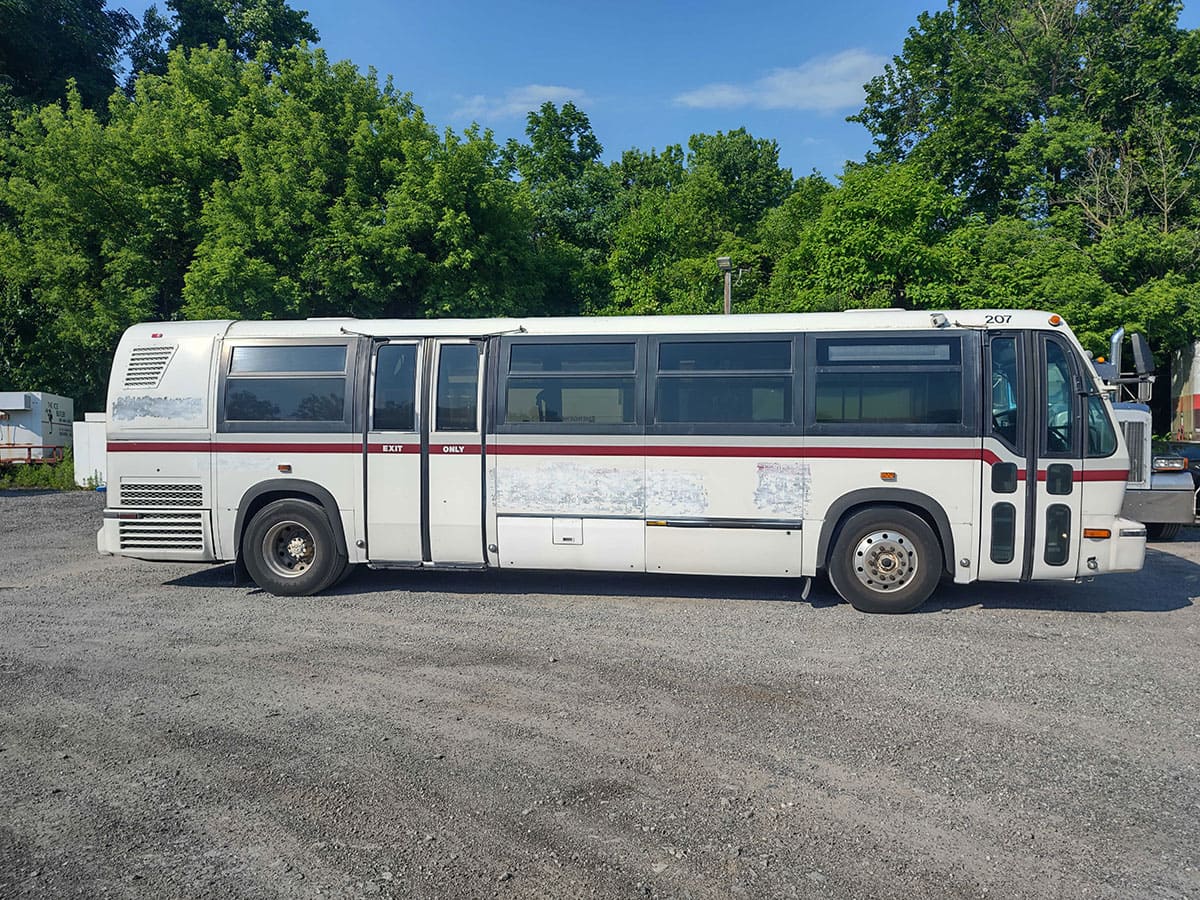
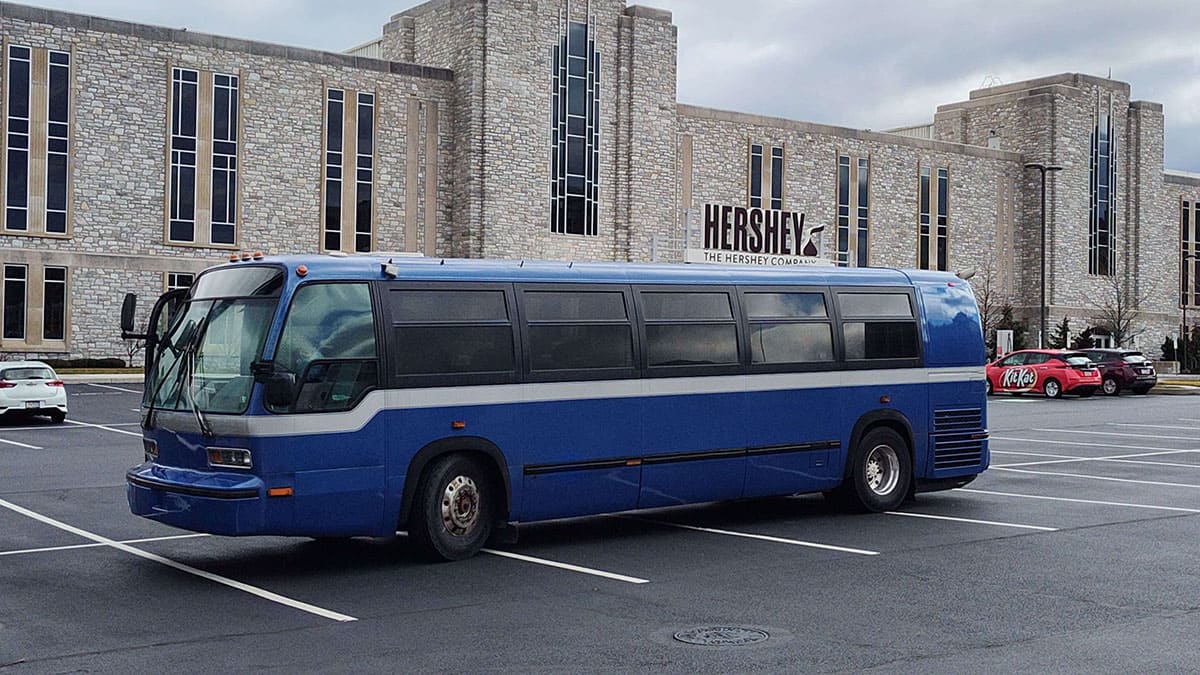
For the most part, transit buses are bland. They serve a function and are usually just painted white with possibly a stripe or two. Now I was content with this type of paint scheme, but the previous owner of the bus had decals that needed to be removed when they sold it.
To do this as quickly as possible, somebody decided to use a grinder on the decals to remove them. This destroyed the painted finish, making it uneven and did not look good at all. I decided to have it done properly and went looking for a paint shop that could handle such a large vehicle.
This was easier said than done, but I was able to get four different quotes, which all greatly varied in the final cost. All of them mentioned how it would be a lot of work to get the paint repaired. They all suggested the same solution: body filler would be used to take care of the damaged sections, and then sanded and painted. Since much of the cost was for labor, I decided to get rid of a white colored bus and pick a color that I liked. After two months in the body shop and paint booth, it was finished.
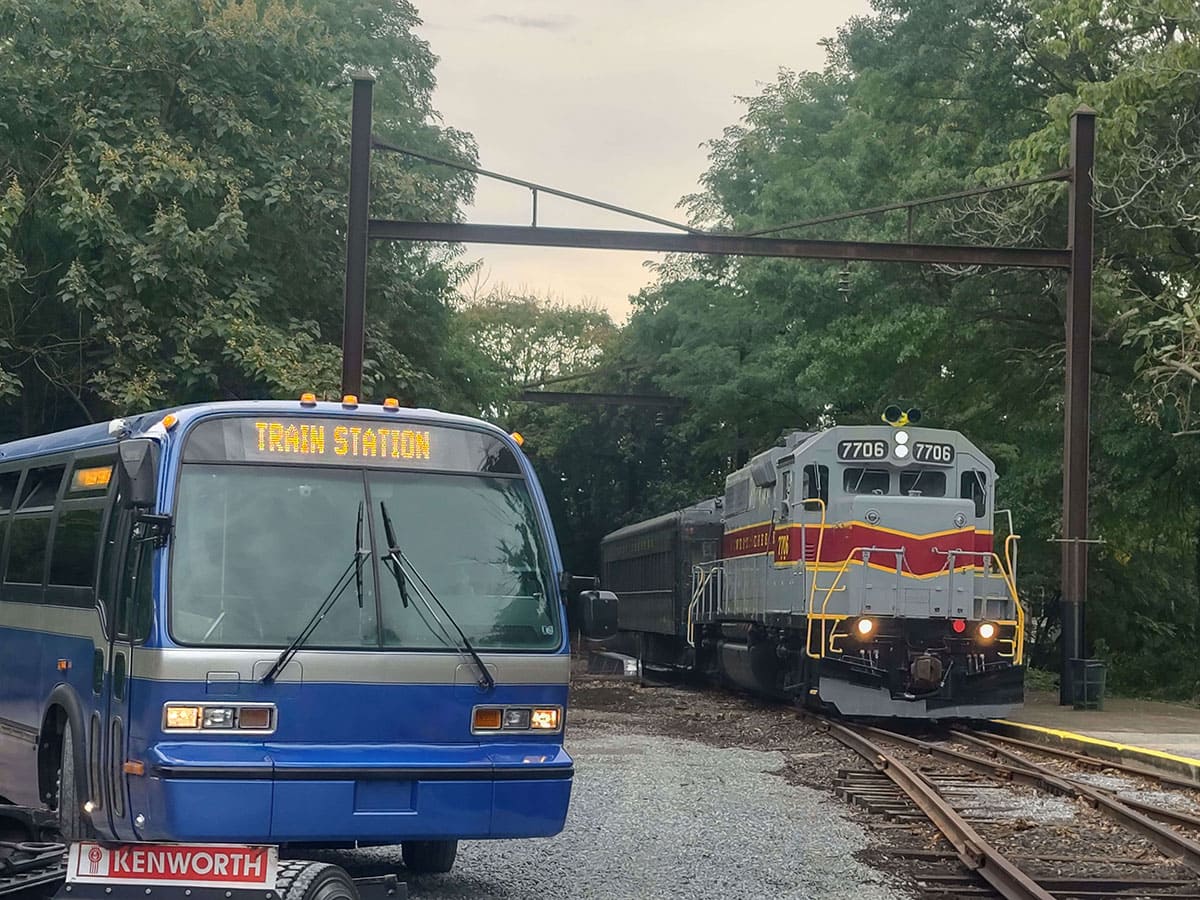
So now what? (Also, known as, Is it ever really finished?)
There is always something more to do. After all, the bus is 21 years old. There is plenty of maintenance and upkeep to be done. I have been traveling about 5,000 miles a year, and other than the big Florida trip, it has mainly been short weekend or day trips.
The regular use sure beats it sitting parked for months at a time. We also found that even though the windows are tinted, when the sun shines directly in them it is still quite blinding. So, I added curtains to the windows.
Then, there are those tasks that are going to seem simple but most likely end up being a bit of a challenge: Installing a television and getting the audio system working, as well as getting the exterior cameras operational and recording just in case of an accident. They were disconnected when the bus was sold, but I wanted to get them working.
As a tribute to its service time at Texas A&M, I made a custom vanity plate highlighting its service, and unit number, along with the names of the routes in their bus system. I would also like to add an end table and a few other small items. I am sure that the more I use it, the more things I will think of to add to it.
In Conclusion
What may look like a basic transit bus on the outside is something special on the inside. It will be used for family trips in many years to come.
Bus Specifications
| General | |
| Year | 2002 |
| Manufacturer | Nova Bus |
| Model | RTS 72VN |
| Miles per Gallon | 7.75 |
| Engine | Detroit Diesel Series 50 275 hp |
| Transmission | ZF 5HP592C |
| Overall Length | 35 feet |
| Overall Width | 102 inches |
| Internal Equipment | |
| Portable Toilet | |
| Two OEM roof vents/emergency exits | |
| Beds | 2 bunk beds, 32"x75" |
| custom built | |
| Dinette | Qualitex Monterey |
| Seating | 8 Freedman Eqsuire |
| Armrests | |
| Reclining (6) | |
| 3-point lap belts | |
| CRS-225 hooks | |
| Driver's Seat | Recaro Ergo-M |
| Interior | |
| Walls | OEM w/carpet squares |
| Floor | Reinforced plywood |
| w/carpet squares | |
| Insulation | OEM |
| Window Coverings | Blackout drapes |
| Lighting | OEM fluorescent tubes |
| Miscellaneous | |
| How long have you owned your bus? | 3 years, since 2/2021 |
| Did you do the conversion yourself? | Yes |
| How long did it take? | 11 months (interior); 15 months including paint |
| How much did you spend on your bus and conversion to complete it? | Around $45,000 |
| What would you do differently next time? | 40ft bus; it would depend on my needs at the time |
| Notable features: | It's still a bus and not an RV. |
Article written by Ron Stevens
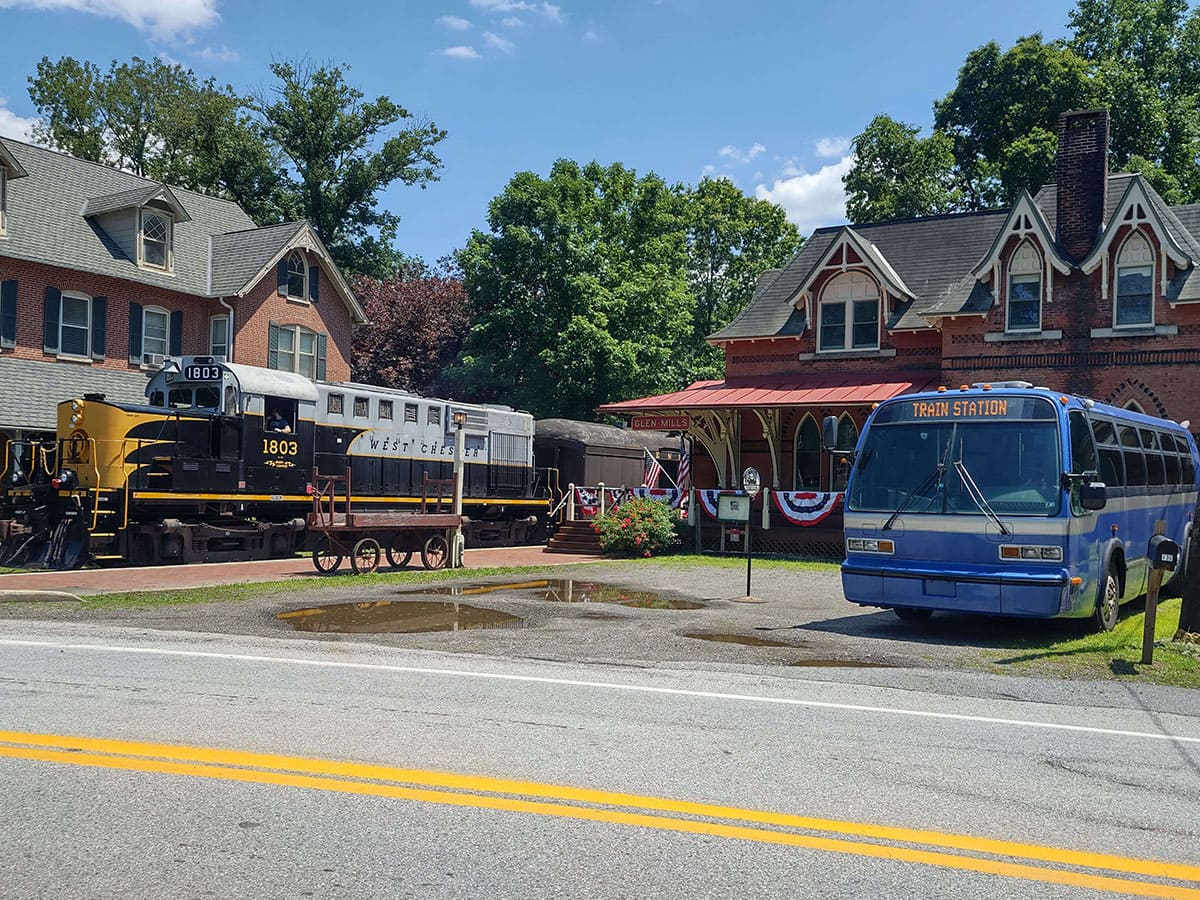
Ron grew up in Lancaster, Pennsylvania and developed a love of buses and trains. After obtaining his Commercial Driver’s License, Ron had the intention of driving coach buses, but ended up driving tractor-trailer for twenty-nine years. He is currently retired from driving and has been working in the dispatch office for a company that specializes in the disposal of hazardous waste since May of 2022.From 2014 to 2021 Ron had been a volunteer with the West Chester Railroad Heritage Association; a non-profit organization that operates a tourist railroad line in West Chester, Pennsylvania. He had become a licensed conductor, as well as serving on the Board for several years before stepping away to spend more time with his grandchildren.Ron purchased his 2002 Nova RTS in February of 2021. Although initially he planned on very few changes, as he and his wife Becky discussed their needs the bus plans changed as well. For them, it is a fantastic vehicle for family trips and weekend getaways. Ron’s granddaughters are always asking to go for a ride in “Pop-Pop’s Bus.”
Click HERE to read other articles by this AuthorYou can reach Ron via email: RonKStevens@gmail.com
To be the first to read all new articles and to read thousands of articles about conversions back to 1992, become a member of BCM.
Click HERE to become a Member now!Click on any image in this column
to open the company's website.
to open the company's website.