


No products in the cart.

Meredith McCain
February 8, 2025
173 views
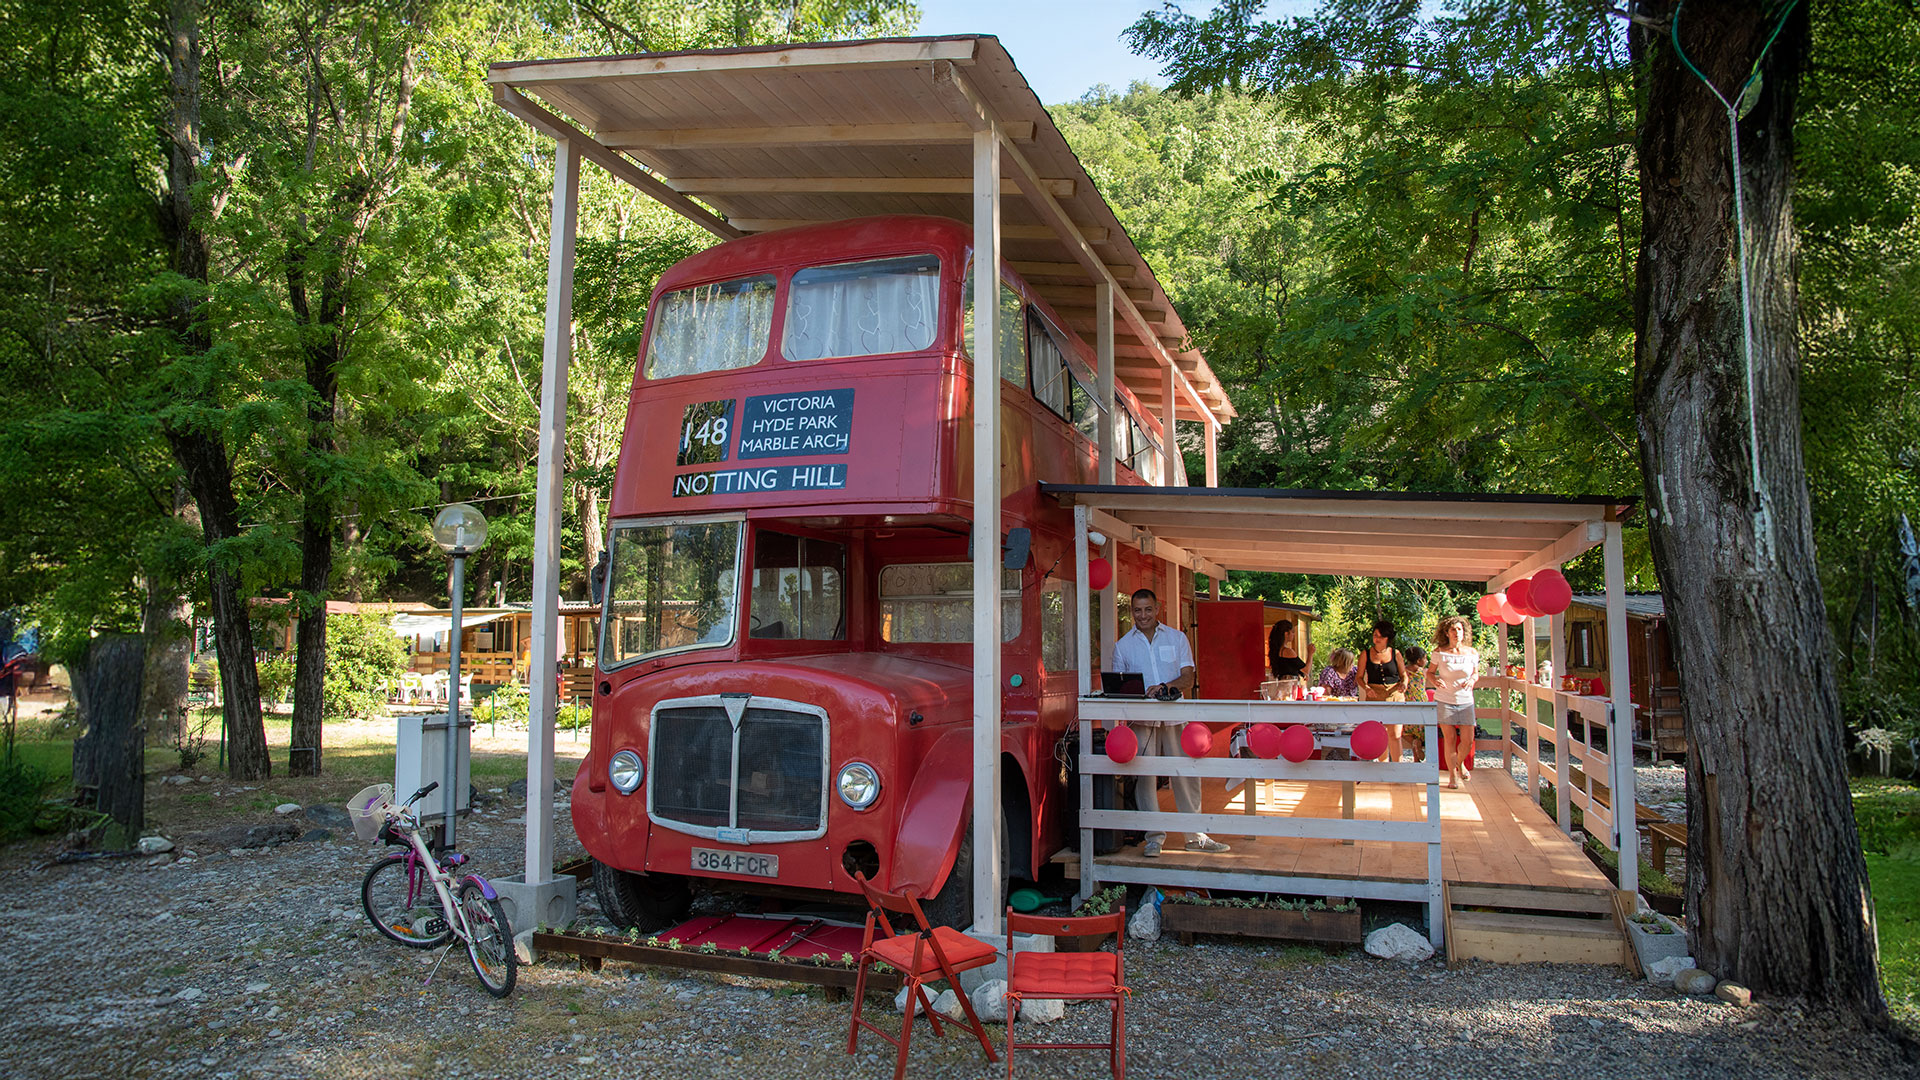
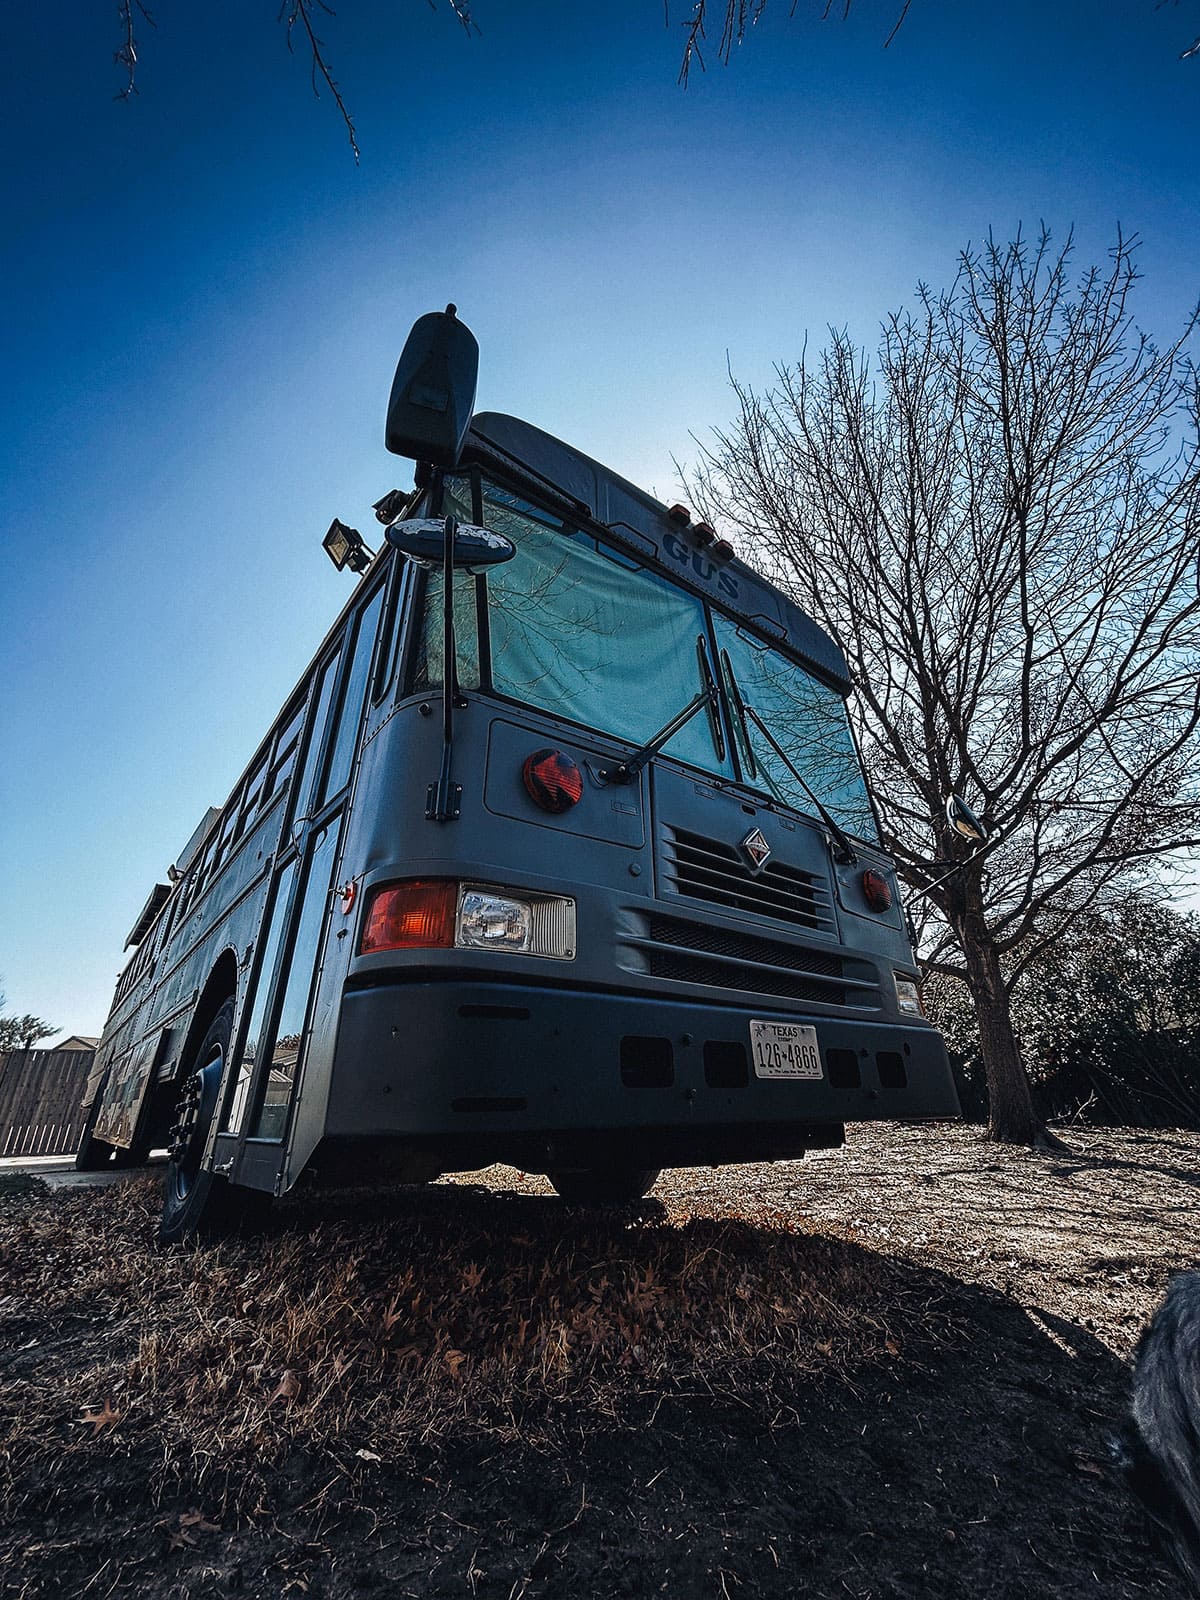
Gus – A 2002 International Skoolie
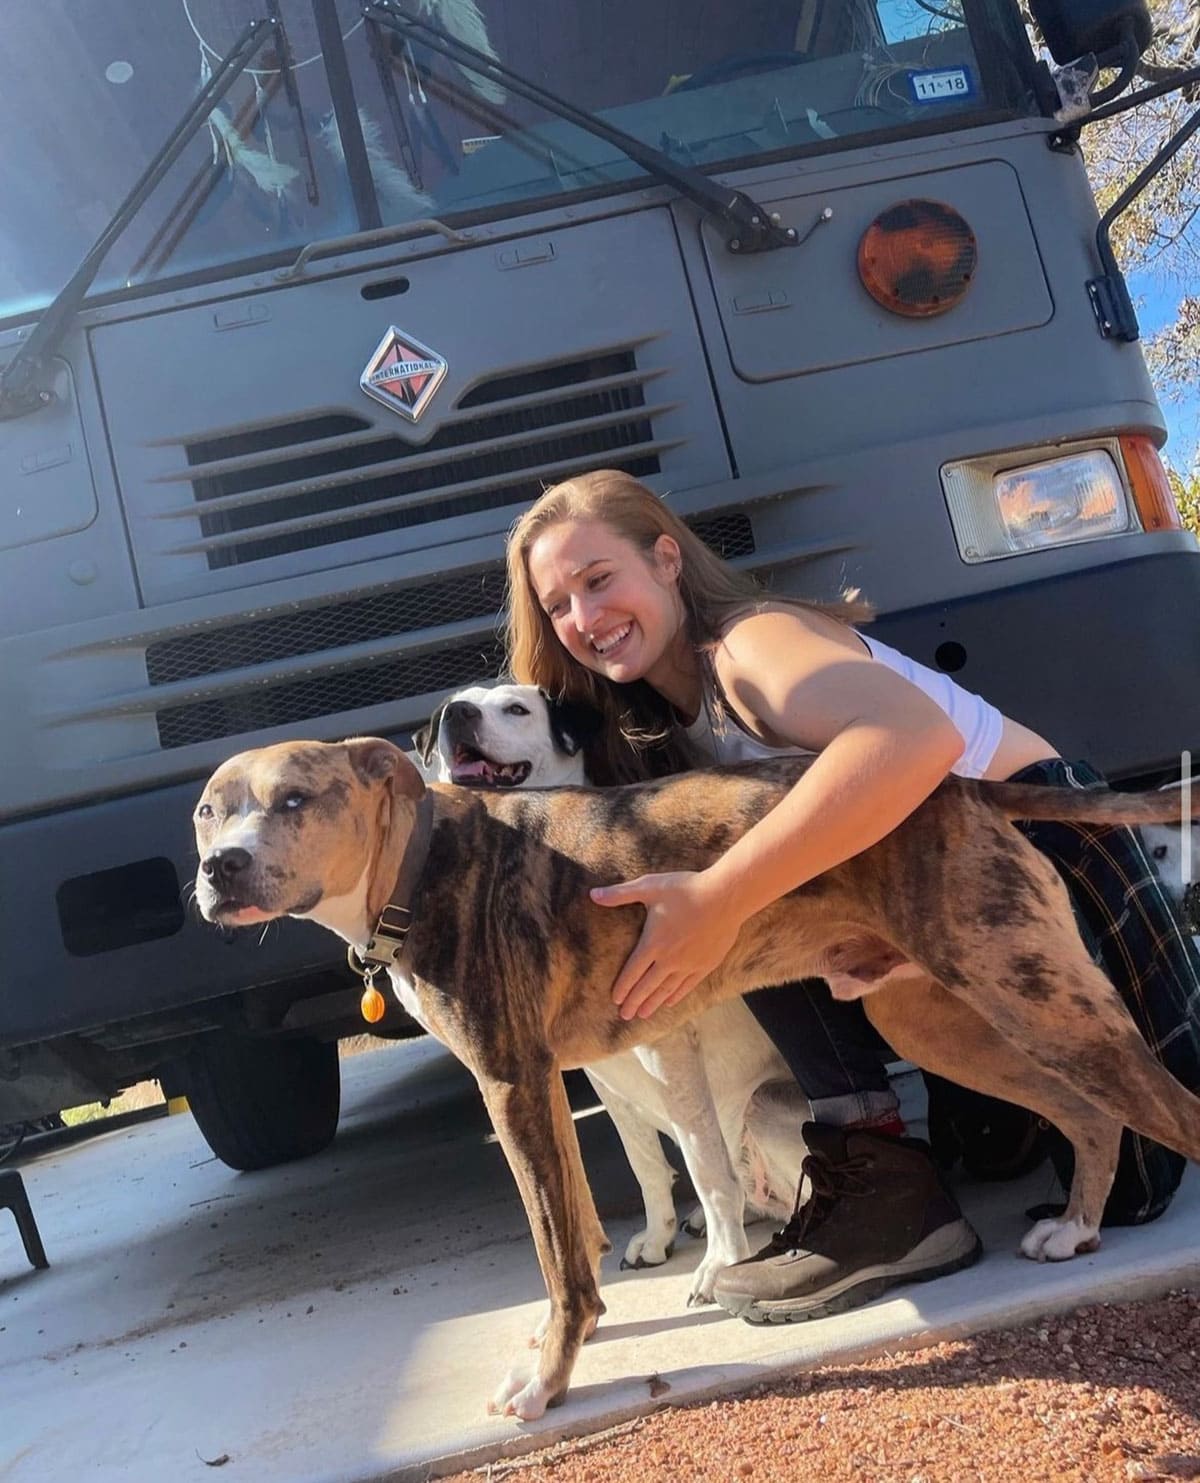
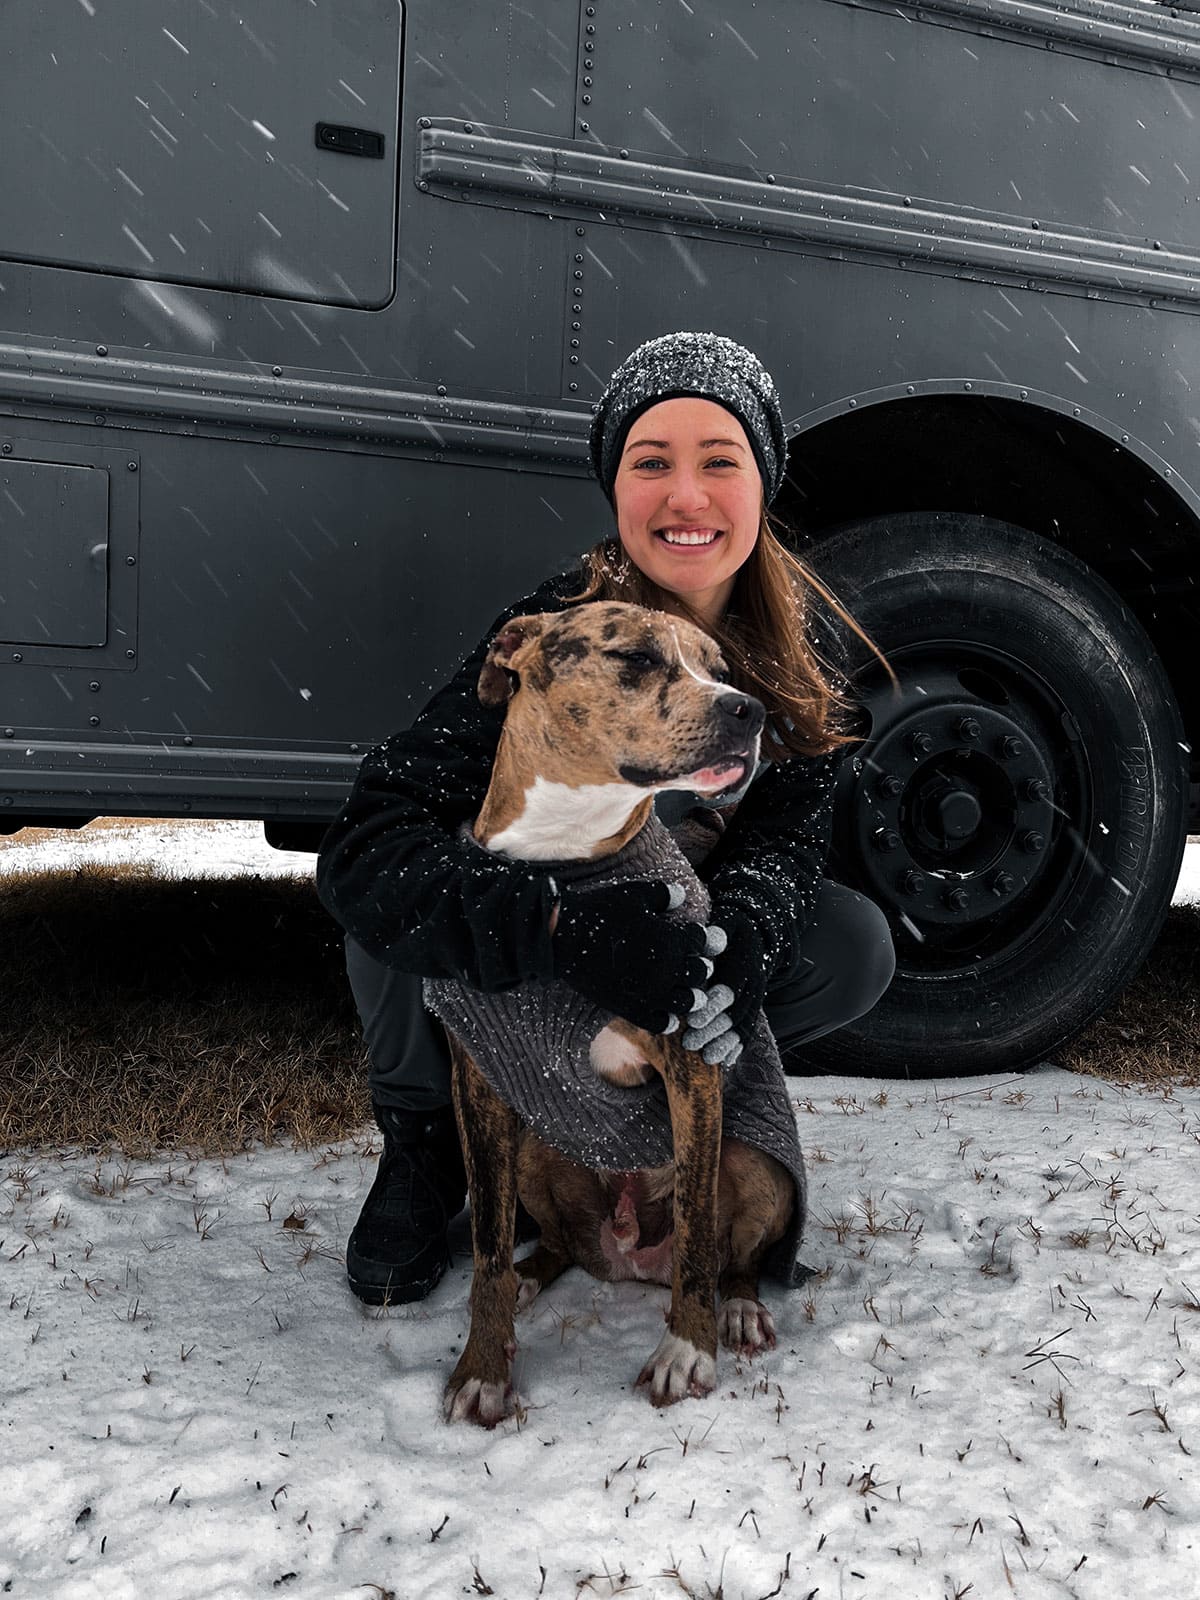
Hello! My name is Meredith and I converted a 40-foot school bus into a tiny home. This is Gus and he has been quite the struggle bus, but I wouldn’t have it any other way. I have always been passionate about traveling, creating, building, and taking the path less traveled. When all those passions match up, you are constantly looking for ways to explore them.
I discovered Skoolies back in 2016 and was immediately hooked. The opportunity to build and create your own home, and then travel the world having experiences that not many people get the chance to, with something I couldn’t pass up at least trying.
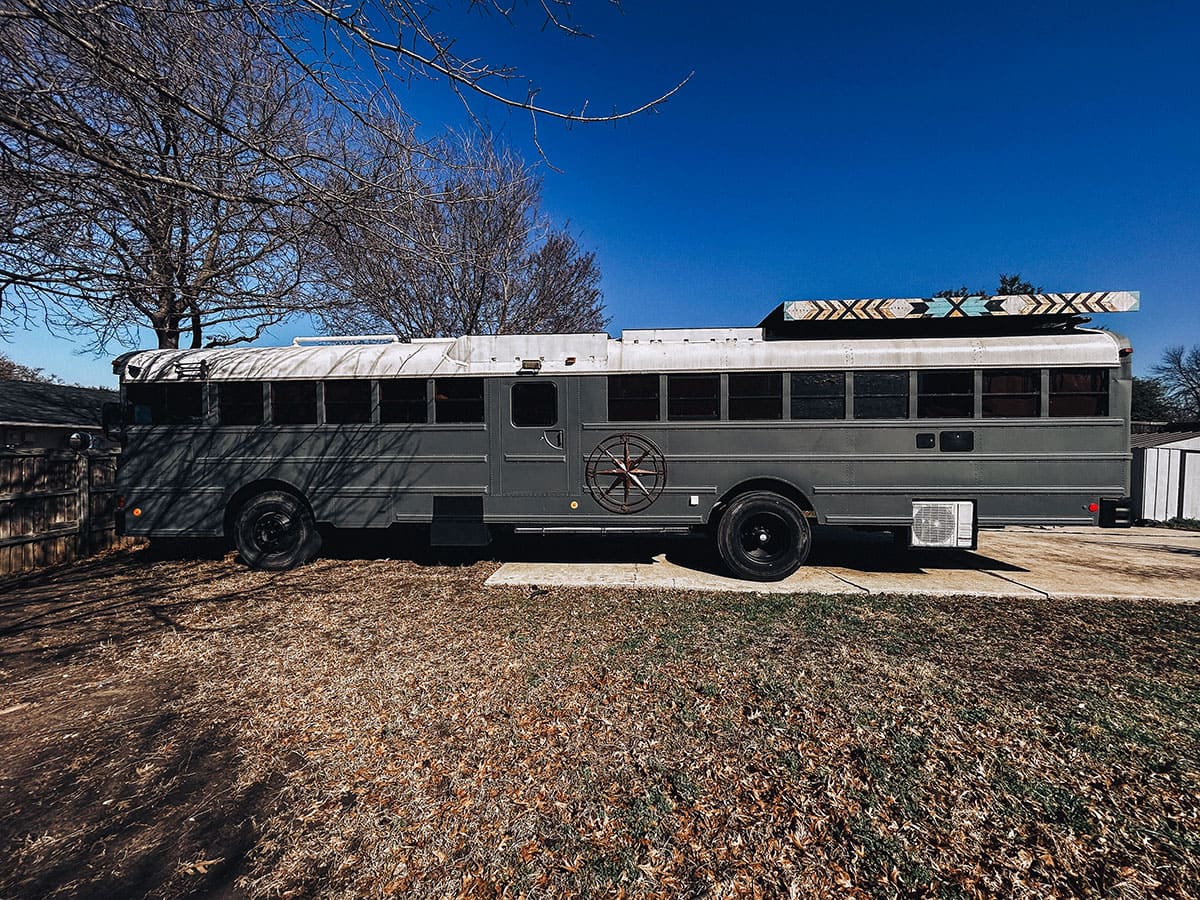
Gus is a 40-foot flat-nosed DT 466 school bus. I chose the school bus over a camper van and RV after doing quite a bit of research. RVs didn’t seem reliable and were extremely flimsy and at the time I had planned on doing full-time bus life with family, so I wanted a bigger build. I found Gus on an auction website where school districts auction off their buses whenever they upgrade to a new one. That helped me know that the bus has been well taken care of and driven regularly.
Although I went into this journey, bright-eyed and bushy-tailed, I was looking for a bus with a roof raise as well. All I was thinking is the bigger the better, the more comfortable, and the more likely we would travel full-time. I learned quickly that those buses are rare, extremely expensive, and hard to insure. Thankfully after visiting the Travis school district grounds and touring the bus in person, I knew it was the one. After a very stressful bidding process, I was able to secure Gus for $6,000!
The drive home was definitely a wake-up call and I always suggest people looking to get into the school bus life, to go test out and drive one first. Especially if you were looking for a larger bus and have never driven something that large before. The next thing that you need to think about is where you’re going to convert the Skoolie. Some city ordinances prevent you from doing that type of work on your own land.
I am lucky enough to have awesome grandparents with a little bit of land close by, so I was able to park it there and work on it on the weekends. Being introduced to past life struggles early, right when I got to my grandparent's house the first thing that happened was Gus got stuck in the mud trying to drive back to where I was able to park it. That was definitely an interesting start to the journey, but it couldn’t stop me or deter me.
Each build is different, and they take a different amount of time. It depends on your budget if you’re in a time crunch how detailed you want the build to be and your building abilities. Gus took me about four years to finish and that was on a small income, a busy schedule and mostly only working on the weekends.
It’s a passion project for sure and takes a specific kind of person with a lot of determination. Although I’ve been creating and building things for quite a while, I would still definitely say this was a novice build. So, I completely believe that if I can do it, anybody can!
The very first thing I did with this build was to gut the inside. Although it has only been used by the school district for a few years and is a 2002, it was still pretty gross in there. Having friends with tools, or the ability to improvise is a necessity. There are quite a few things that I did not have the correct tools for and made it work but I will say that just buying the right thing or finding somebody to let you borrow the proper tools could be beneficial. The first thing I did, was to remove everything on the inside.
Fourteen rows of seats with two seats in each row, two old AC units that I could have left in but the research I did said that leaving old bus ACs in isn't the most convenient. They tend to leak a lot, make a lot of noise, and it would only be able to be used when the bus was running. Then I took out the walls and ceiling and removed the old insulation. I then ripped up the rubber flooring and then treated the entire floor with Naval Jelly.
Navel Jelly helps get rid of rust and works wonders. Looking out for rust and damage from any spots is definitely something you’re going to want to consider. I got extremely lucky and did not have a lot of rust in this bus. The floor had most of the rust but the Naval Jelly removed almost 100% of it.
I sold the seats at a pawn shop to get any money back that I could. I saved the walls and ceiling material, and I reused pretty much all of it in the building. Those metal sheets helped me build the storage boxes mounted underneath the bus, the propane box mounted underneath the bus, and wind deflectors for the solar panels on the bus's roof.
Like I said, every build is completely different and it can get overwhelming to figure out what to do first. Planning out your build and your floor plan after you buy the bus is something you want to spend quite a bit of time on. Some things you have to figure out along the way, but knowing where you would like outlets, lights, and switches will be a huge plus later. While working on the outside improvements and figuring out the wiring, I taped out my floor plan on the bus floor.
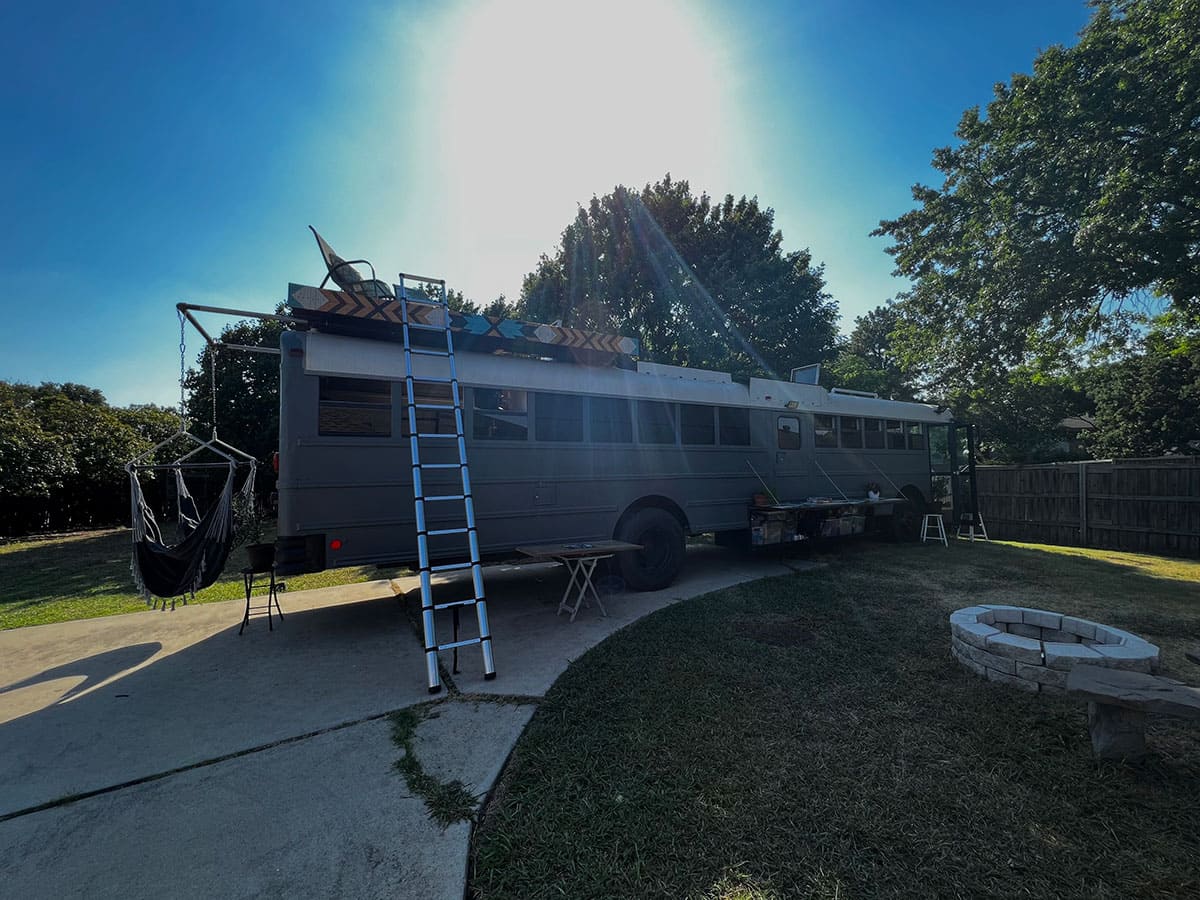
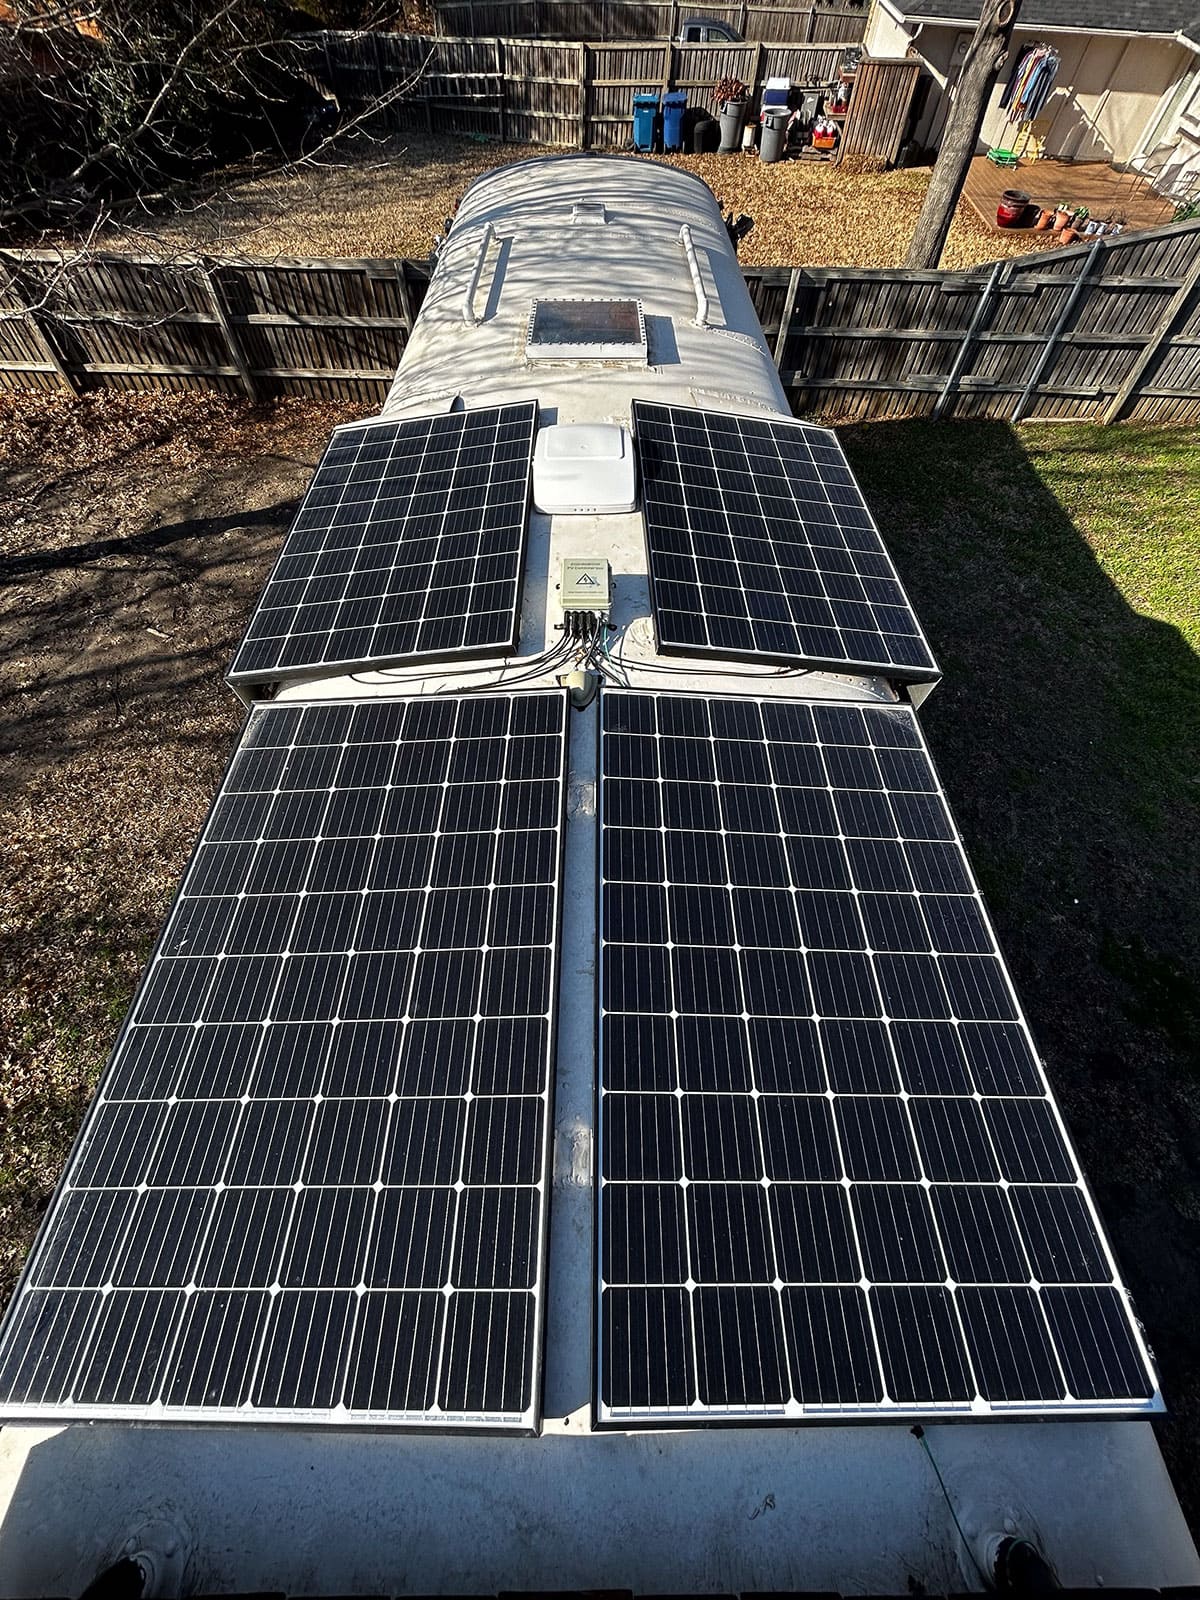
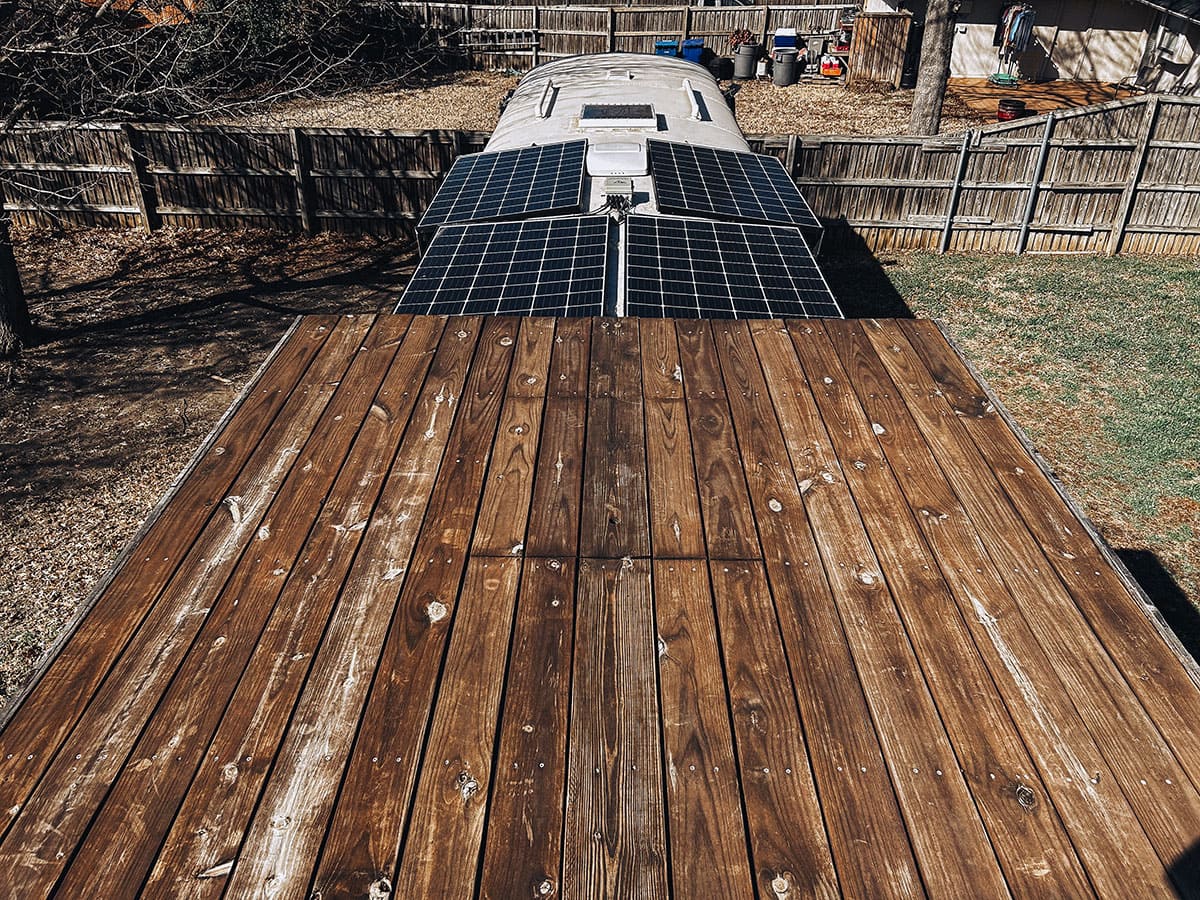
This helped give me a good idea of how to use the space and if that floor plan would work for me. I decided to start with the outside of the bus first so anything that needed to be mounted through the walls or through the ceiling could be sealed and dealt with before putting wiring and insulation on the inside. This included the storage boxes and everything mounted underneath, including two roof racks on the roof, solar panels, and a deck!
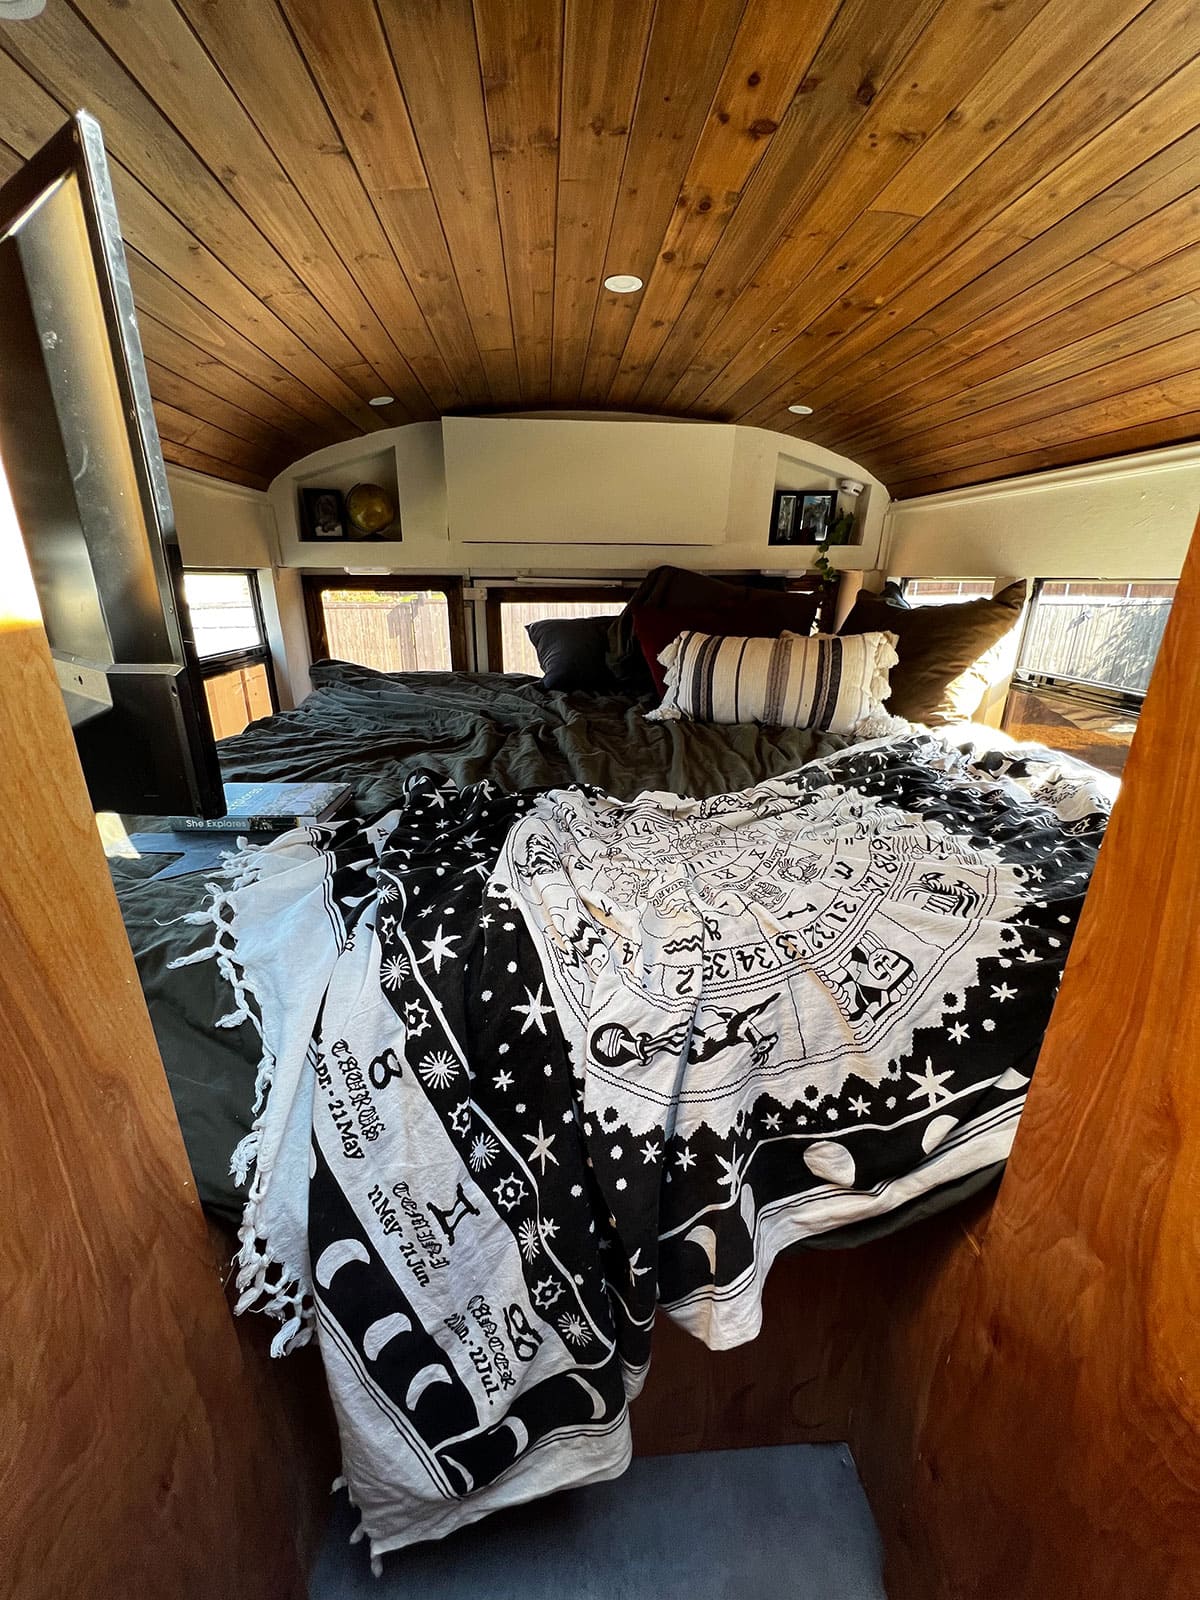
I will say I am extremely proud of the inside and very happy with how it turned out. The roof of the bus is one of my favorite spots. I left in the emergency hatches and turned them into skylights that opened up. This lets me access the roof anytime and easily climb up onto the deck for a cup of coffee, or to take in the views with a good yoga session.
If you check out the specs, you can see everything the outside includes, but I made sure to build this bus for off-grid long-term trips. There are 25-foot storage boxes mounted underneath the bus on the curb side. These can hold all your tools and regular day equipment that can be stored outside and easily able to get to. I also made the doors of the storage boxes fold up and hook to the side of the bus for an outdoor table.
On the street side of the bus, I made this the utility side. The outside unit of the A/C is mounted on the side as well as the gray water tank. There is an outdoor shower and the water intake for the freshwater tank that is inside under the bed. The propane box is also mounted on the side as well as the box that houses the bus battery and electrical panel. I added lights and cameras to all sides of the bus for easy driving and security, and those have helped out tremendously!
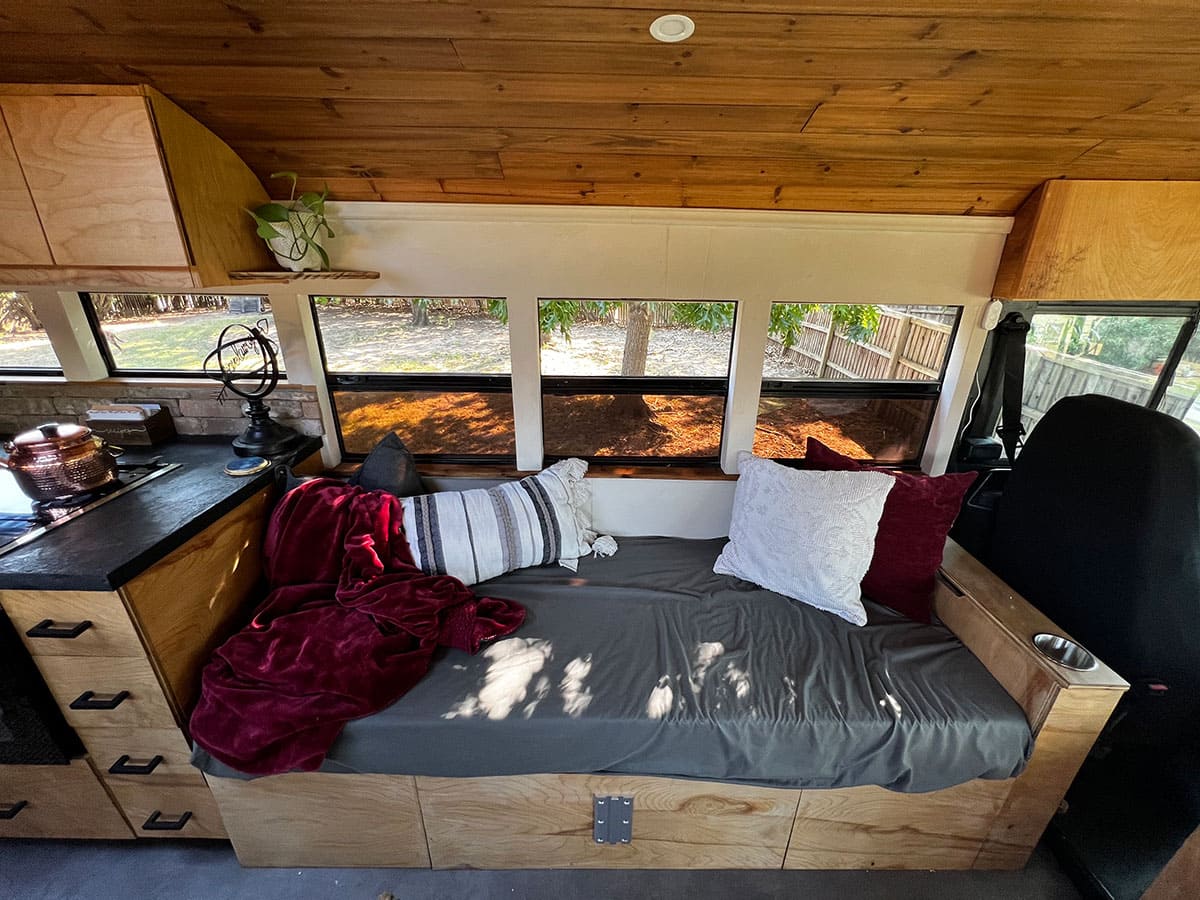
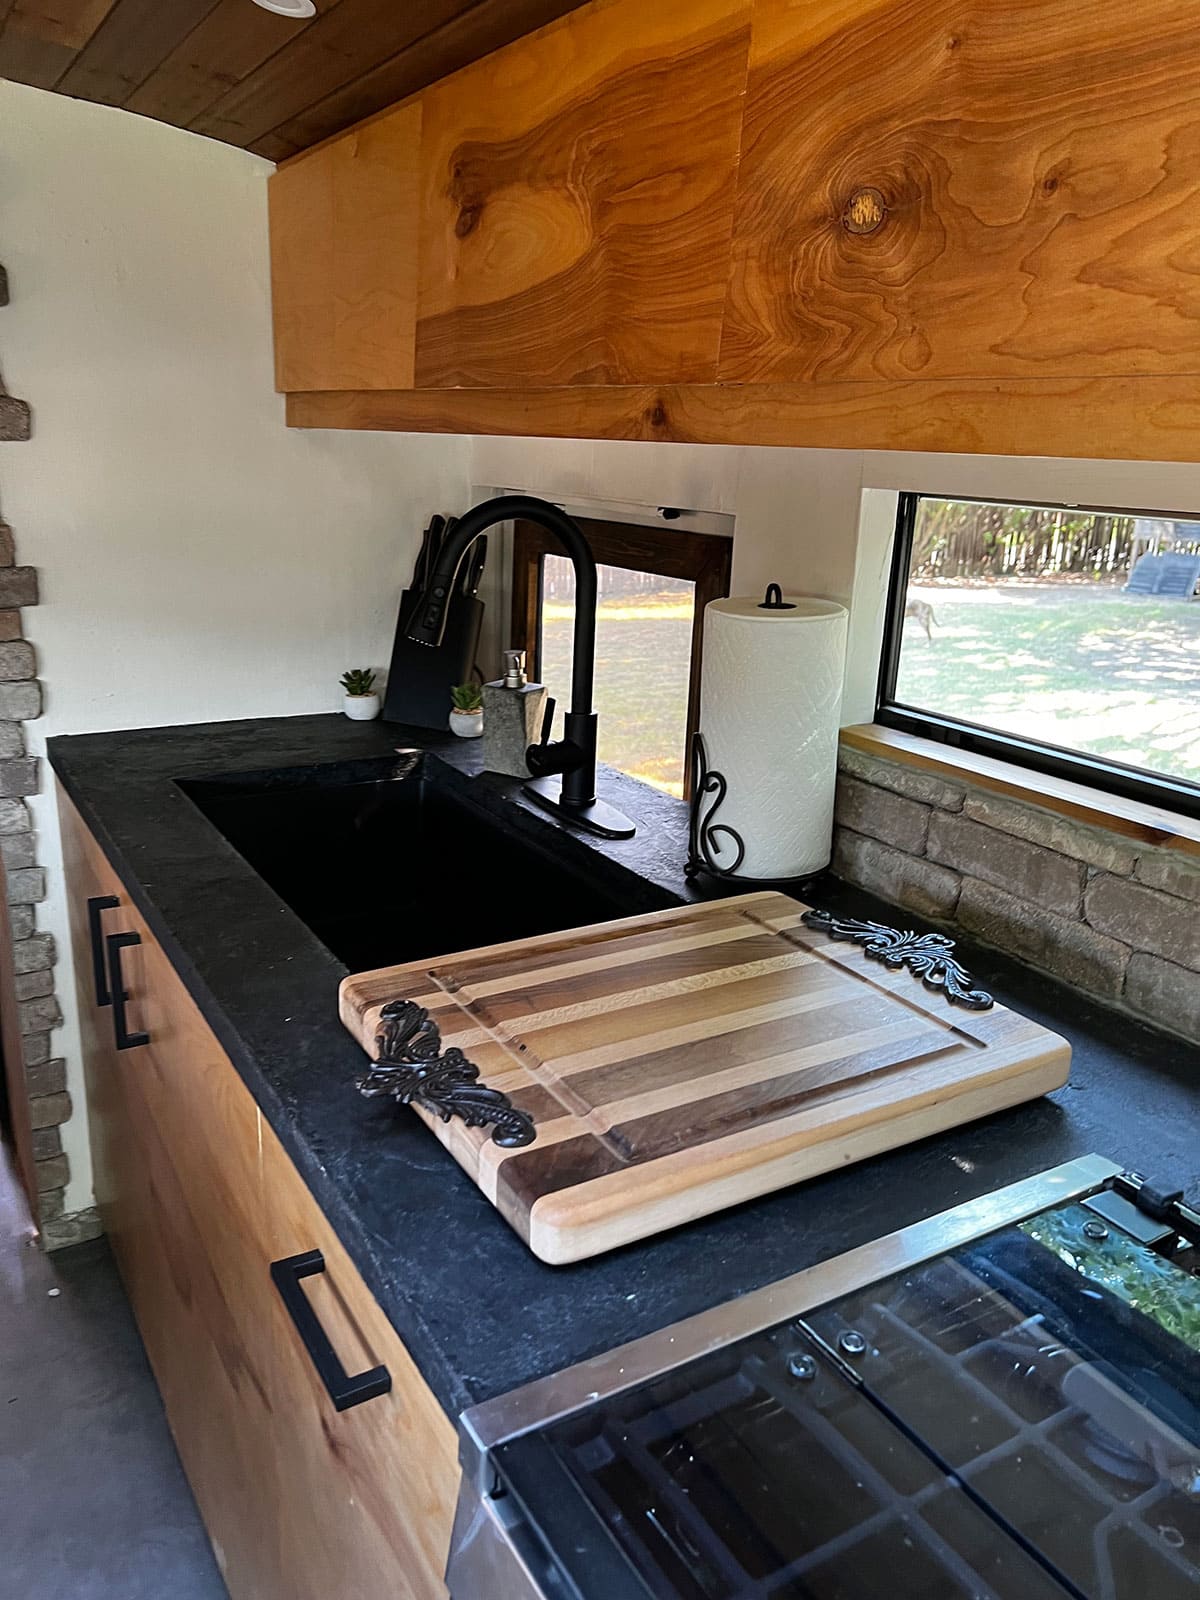
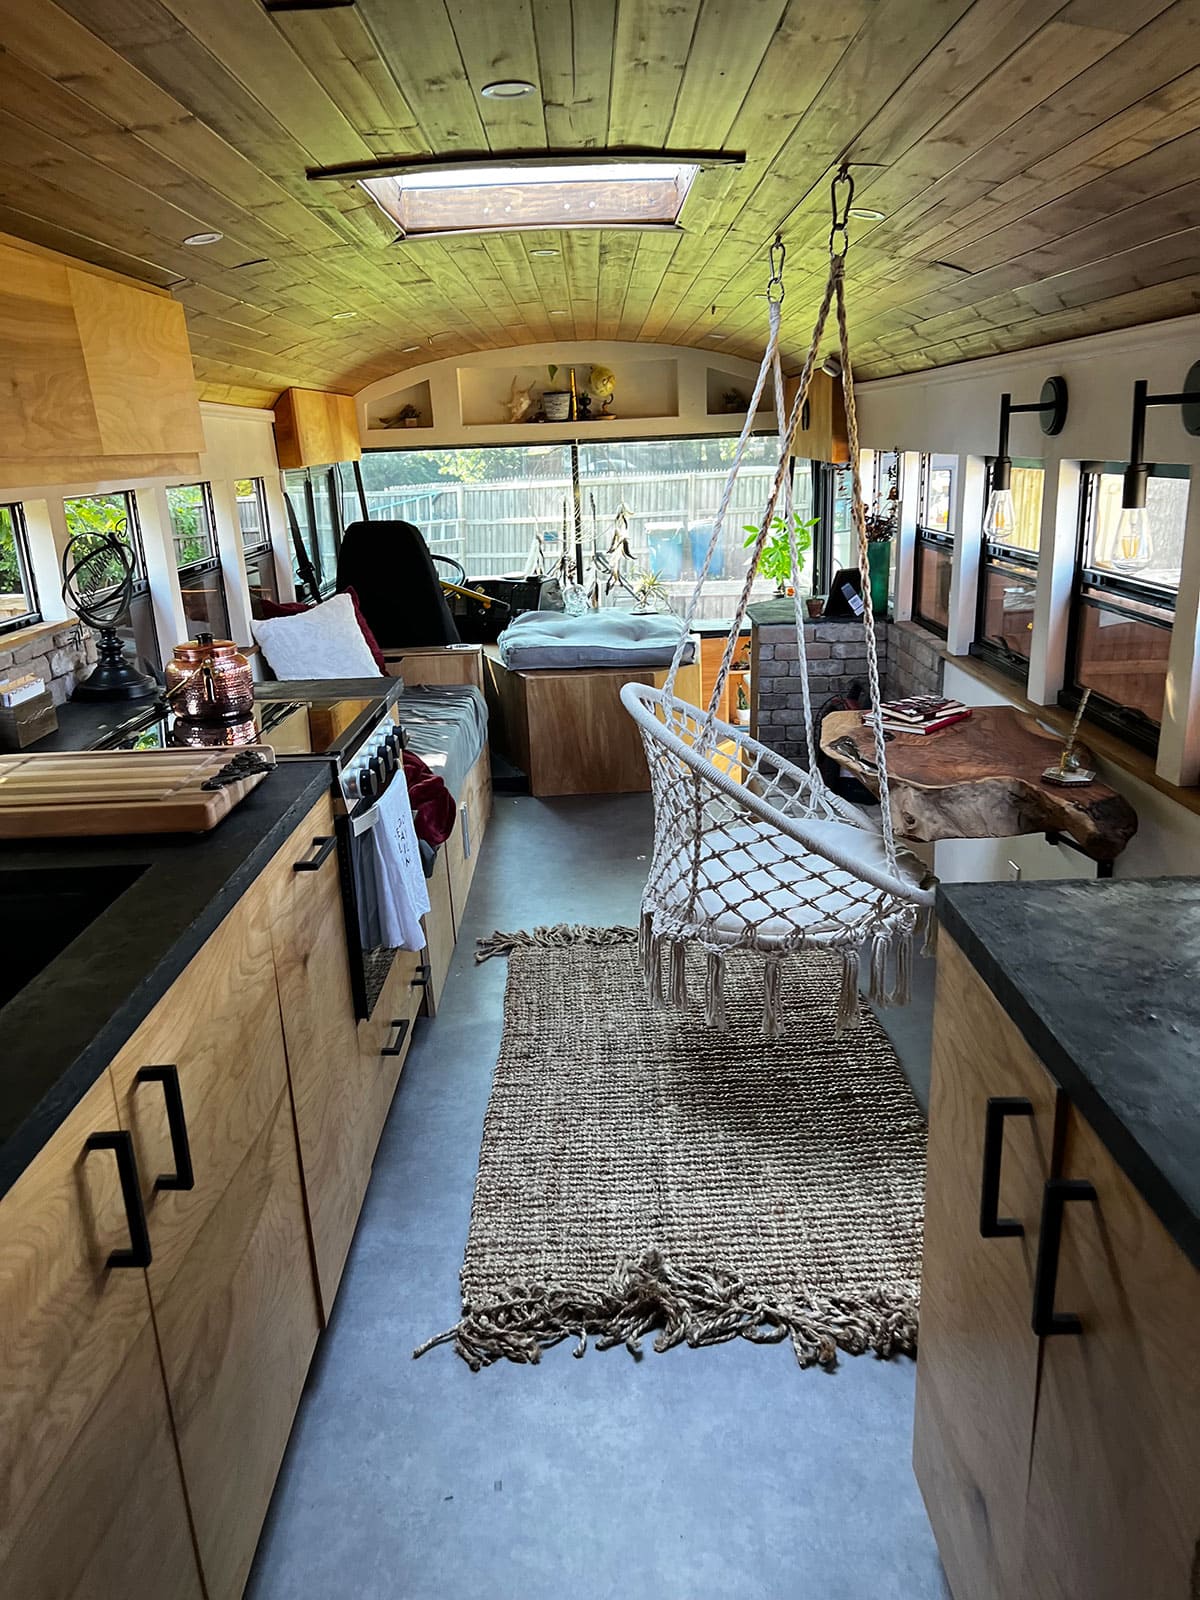
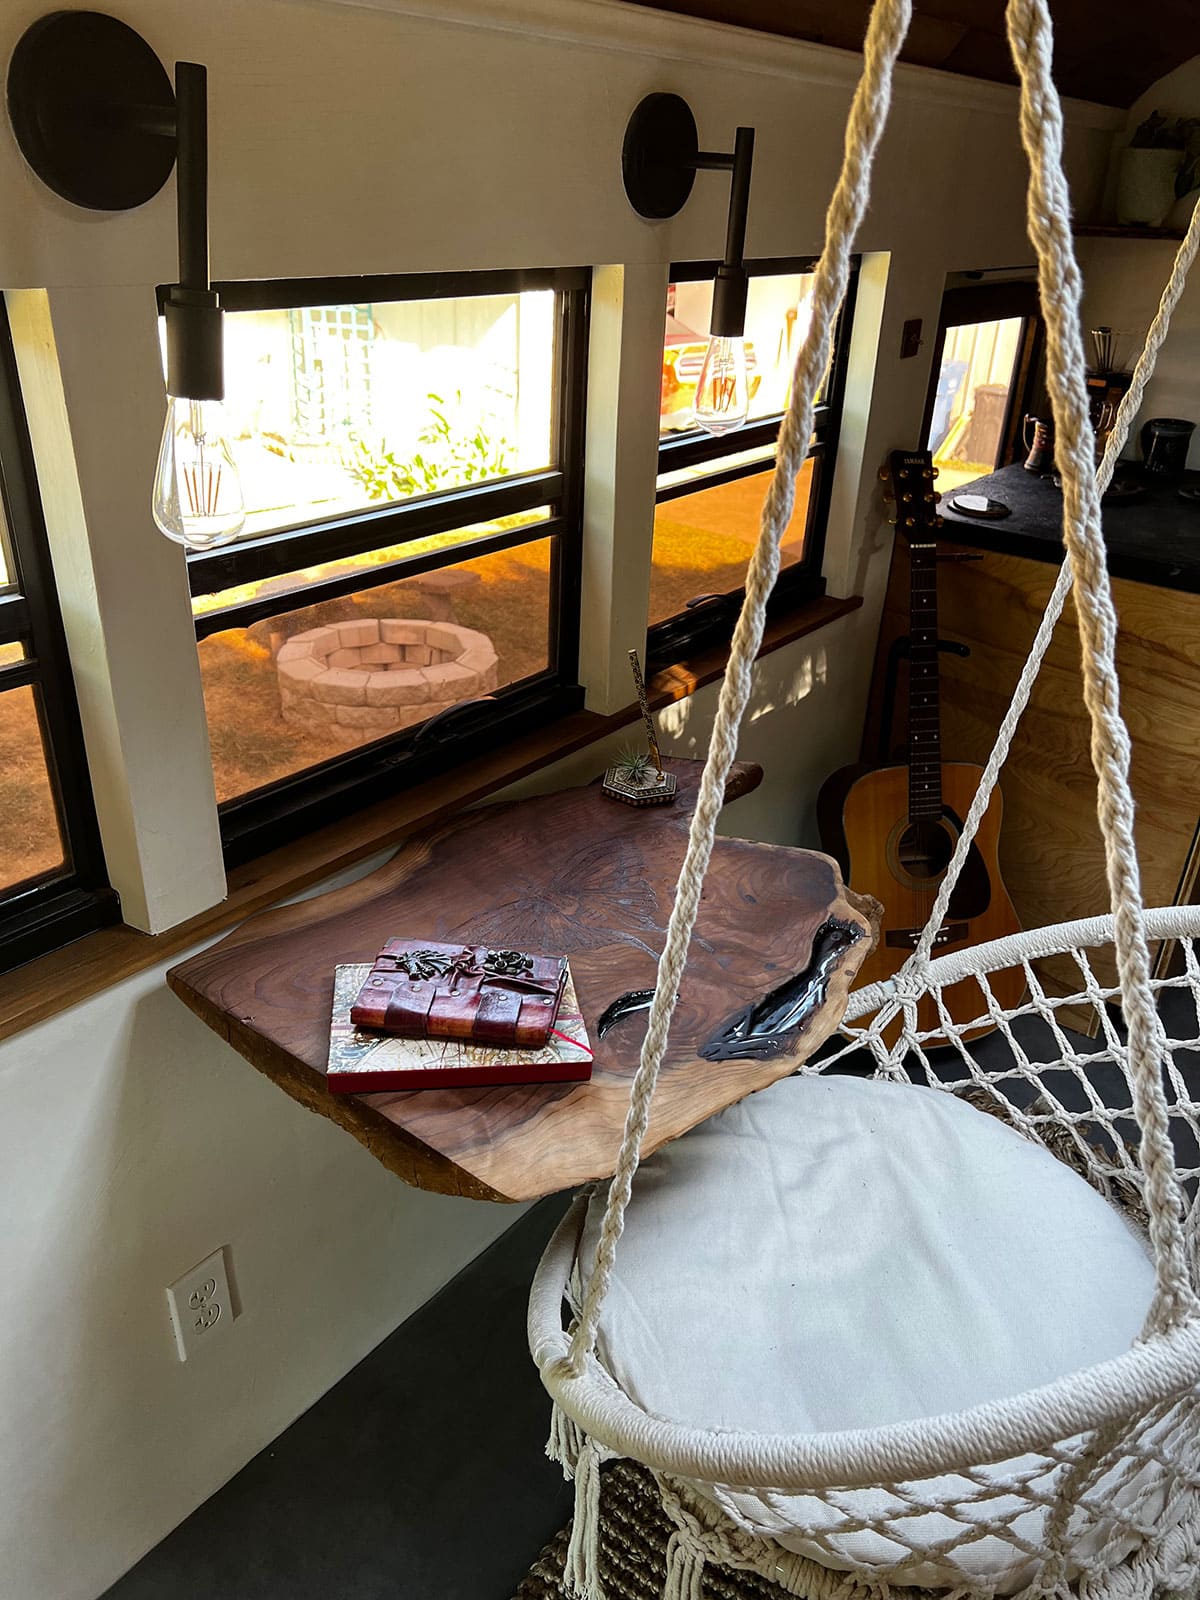
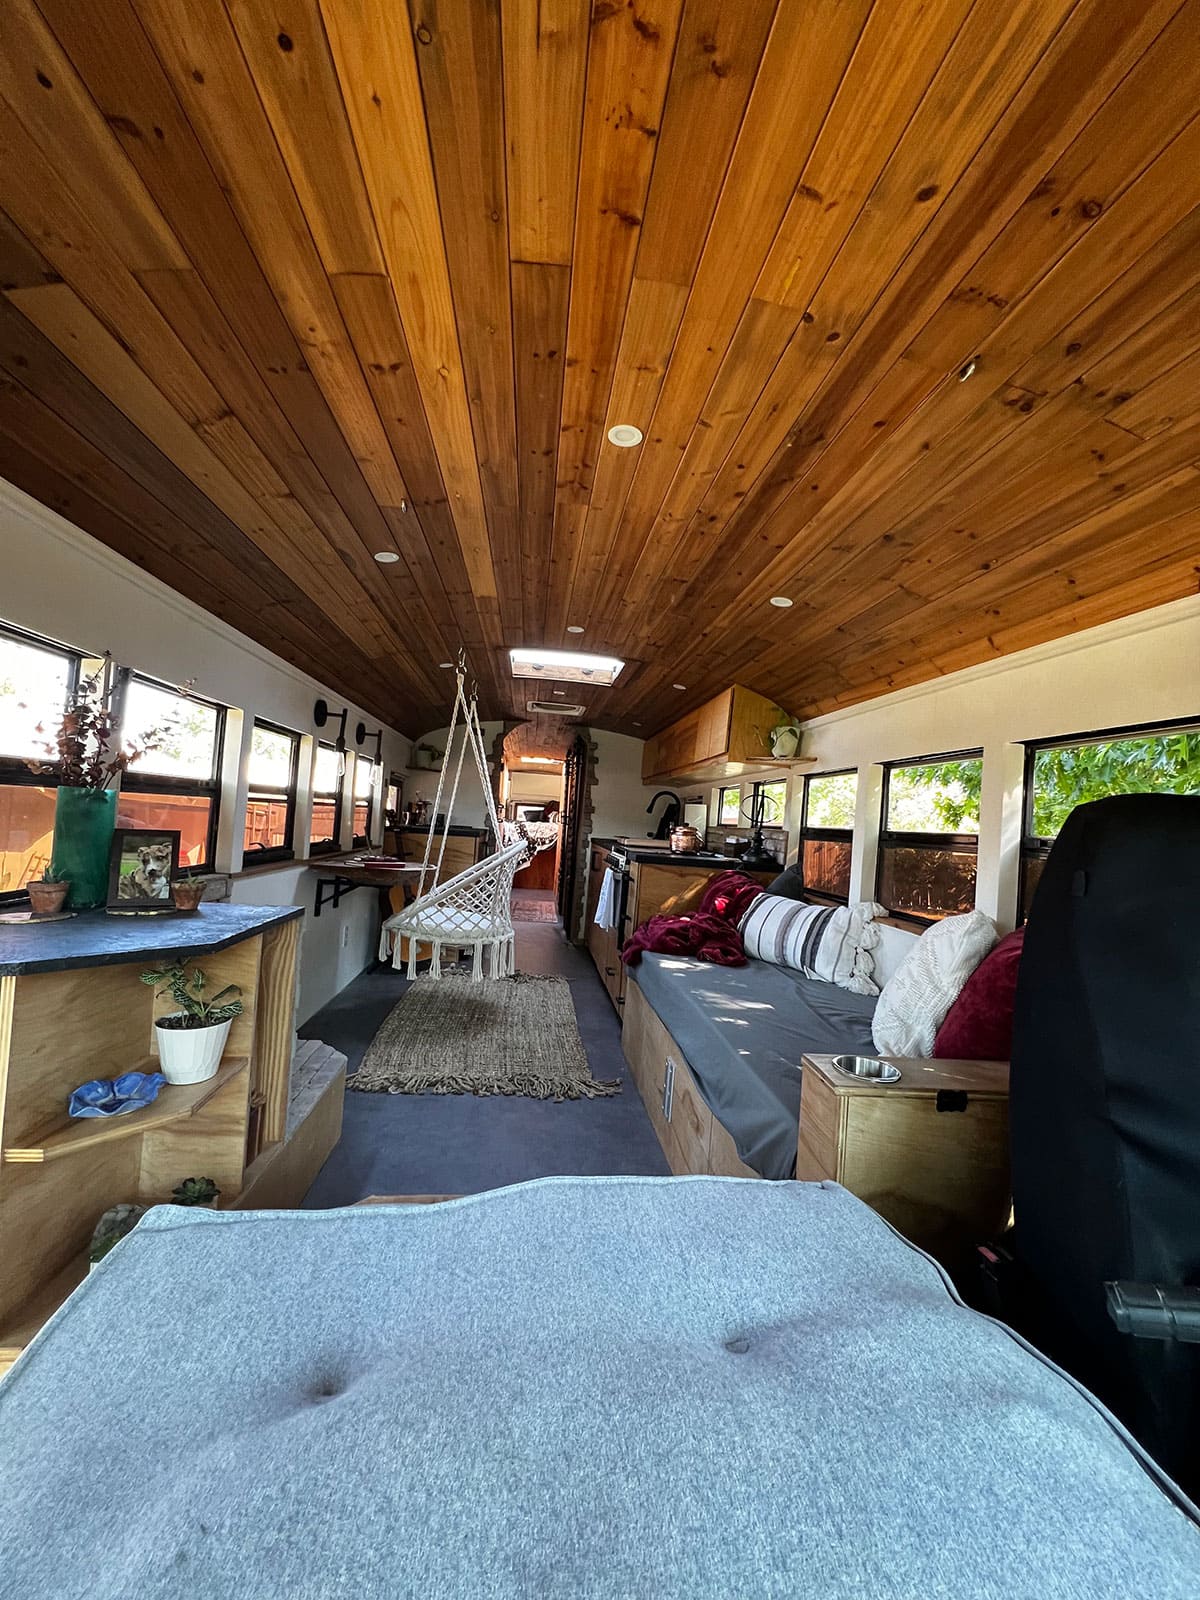
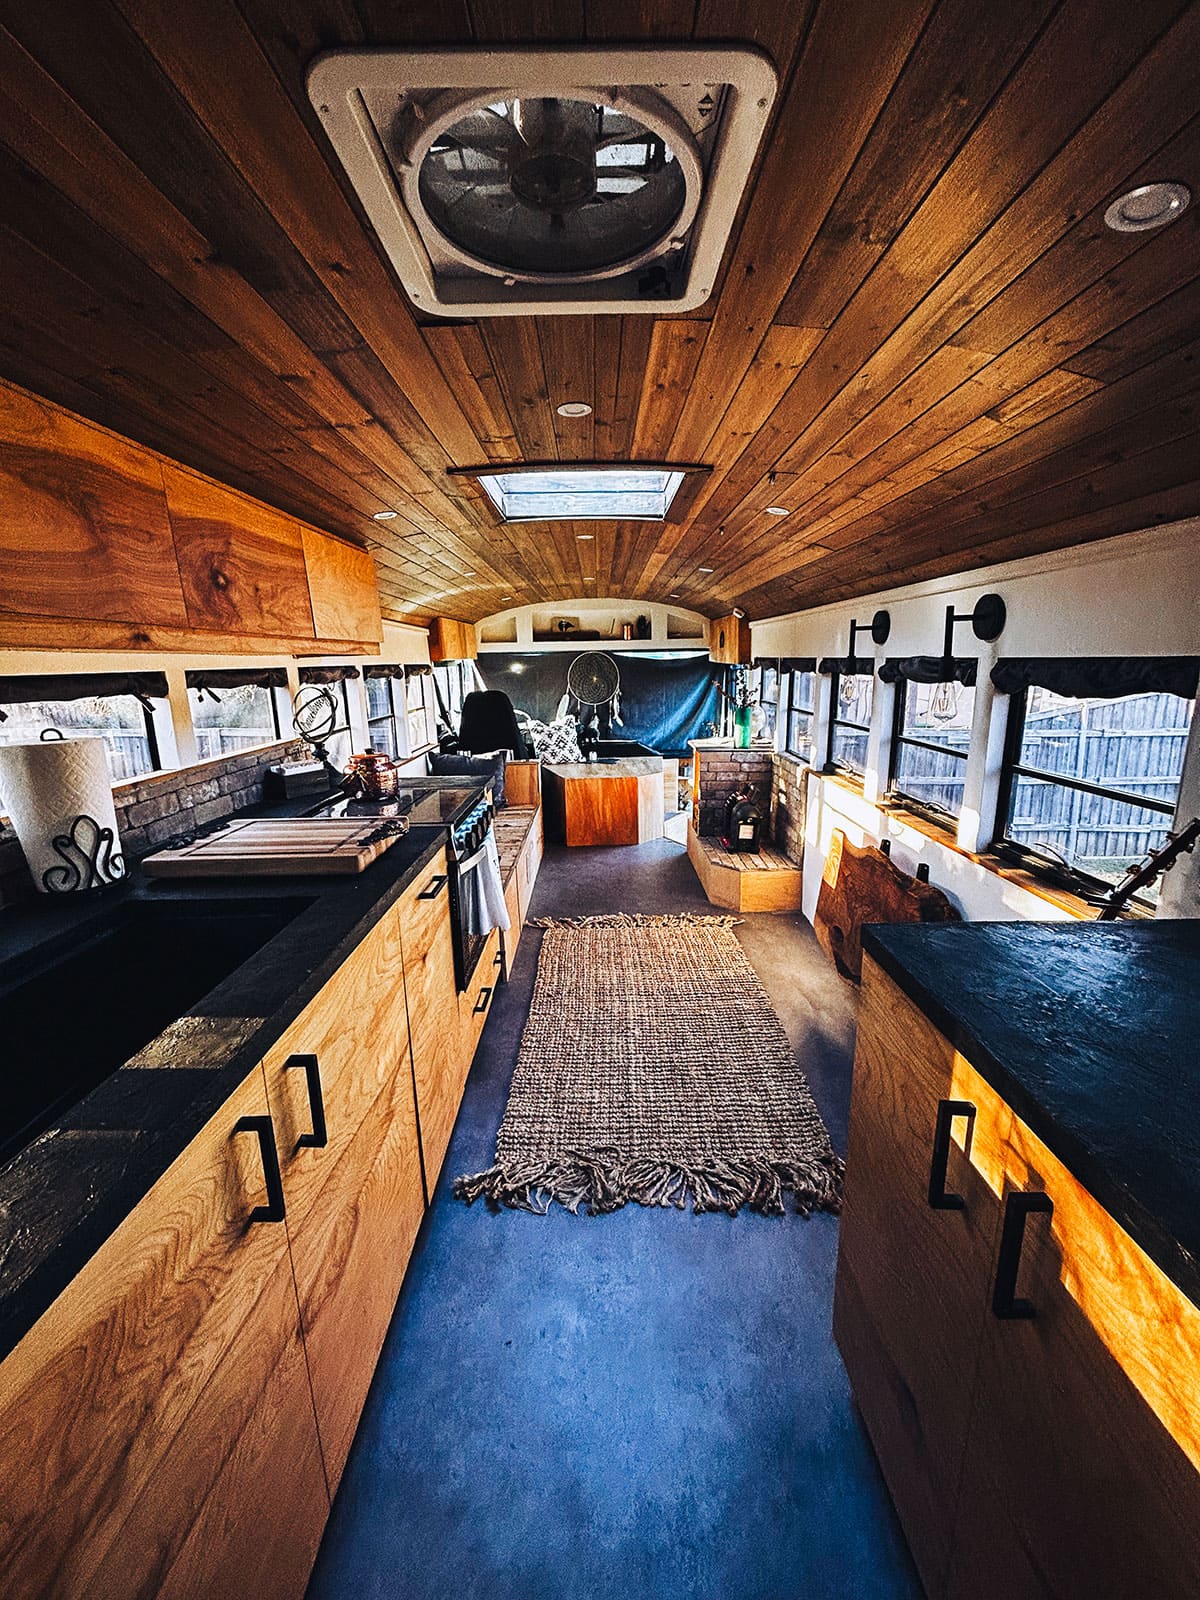
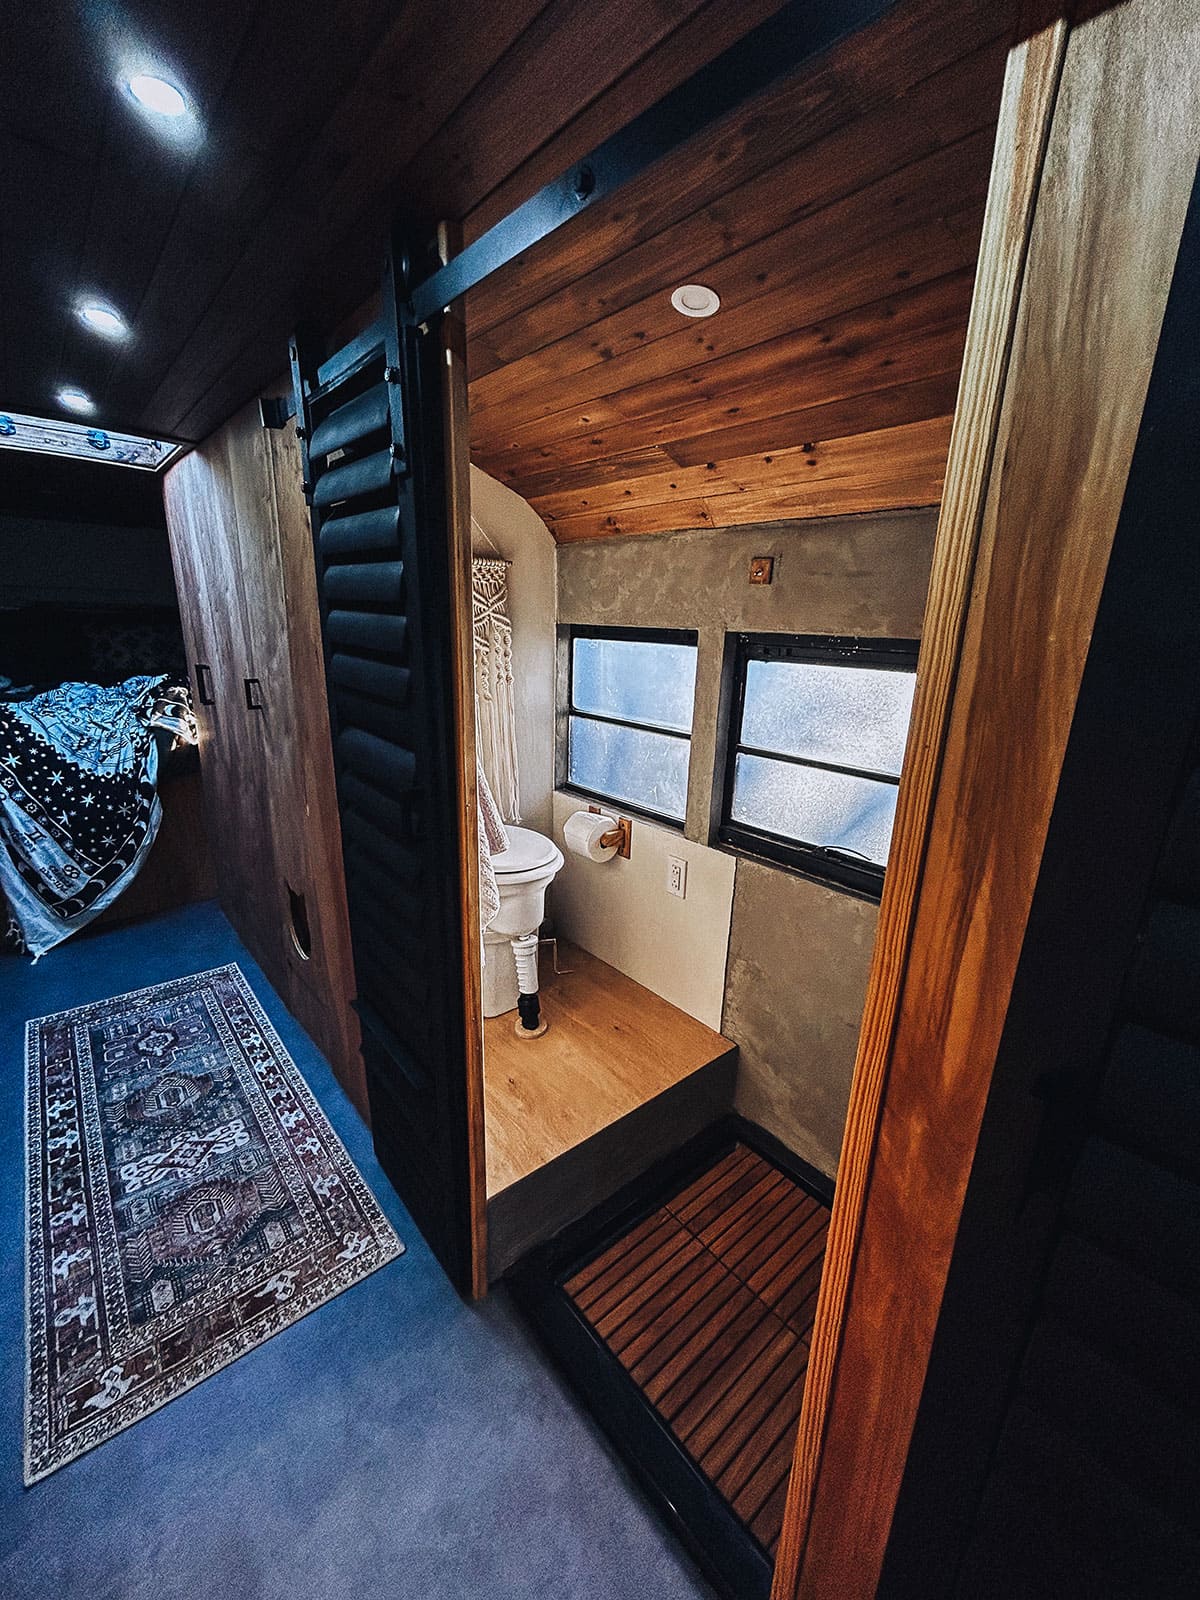
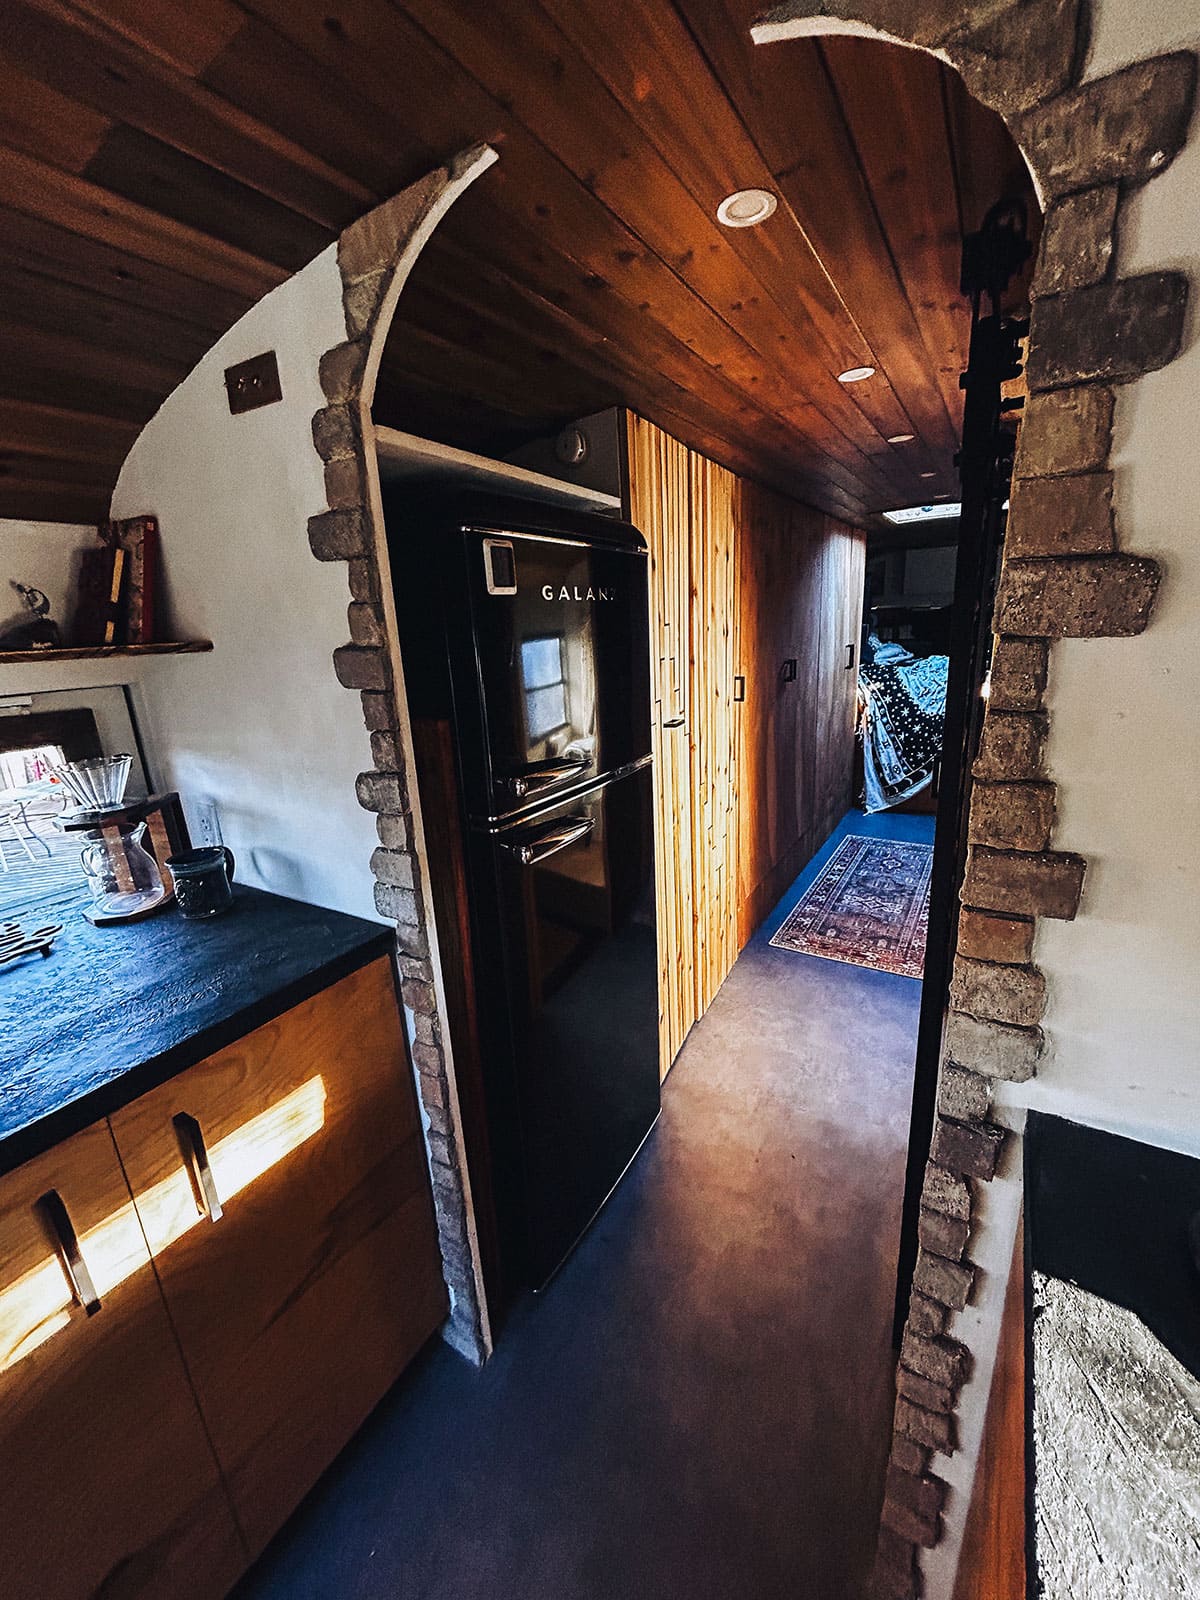
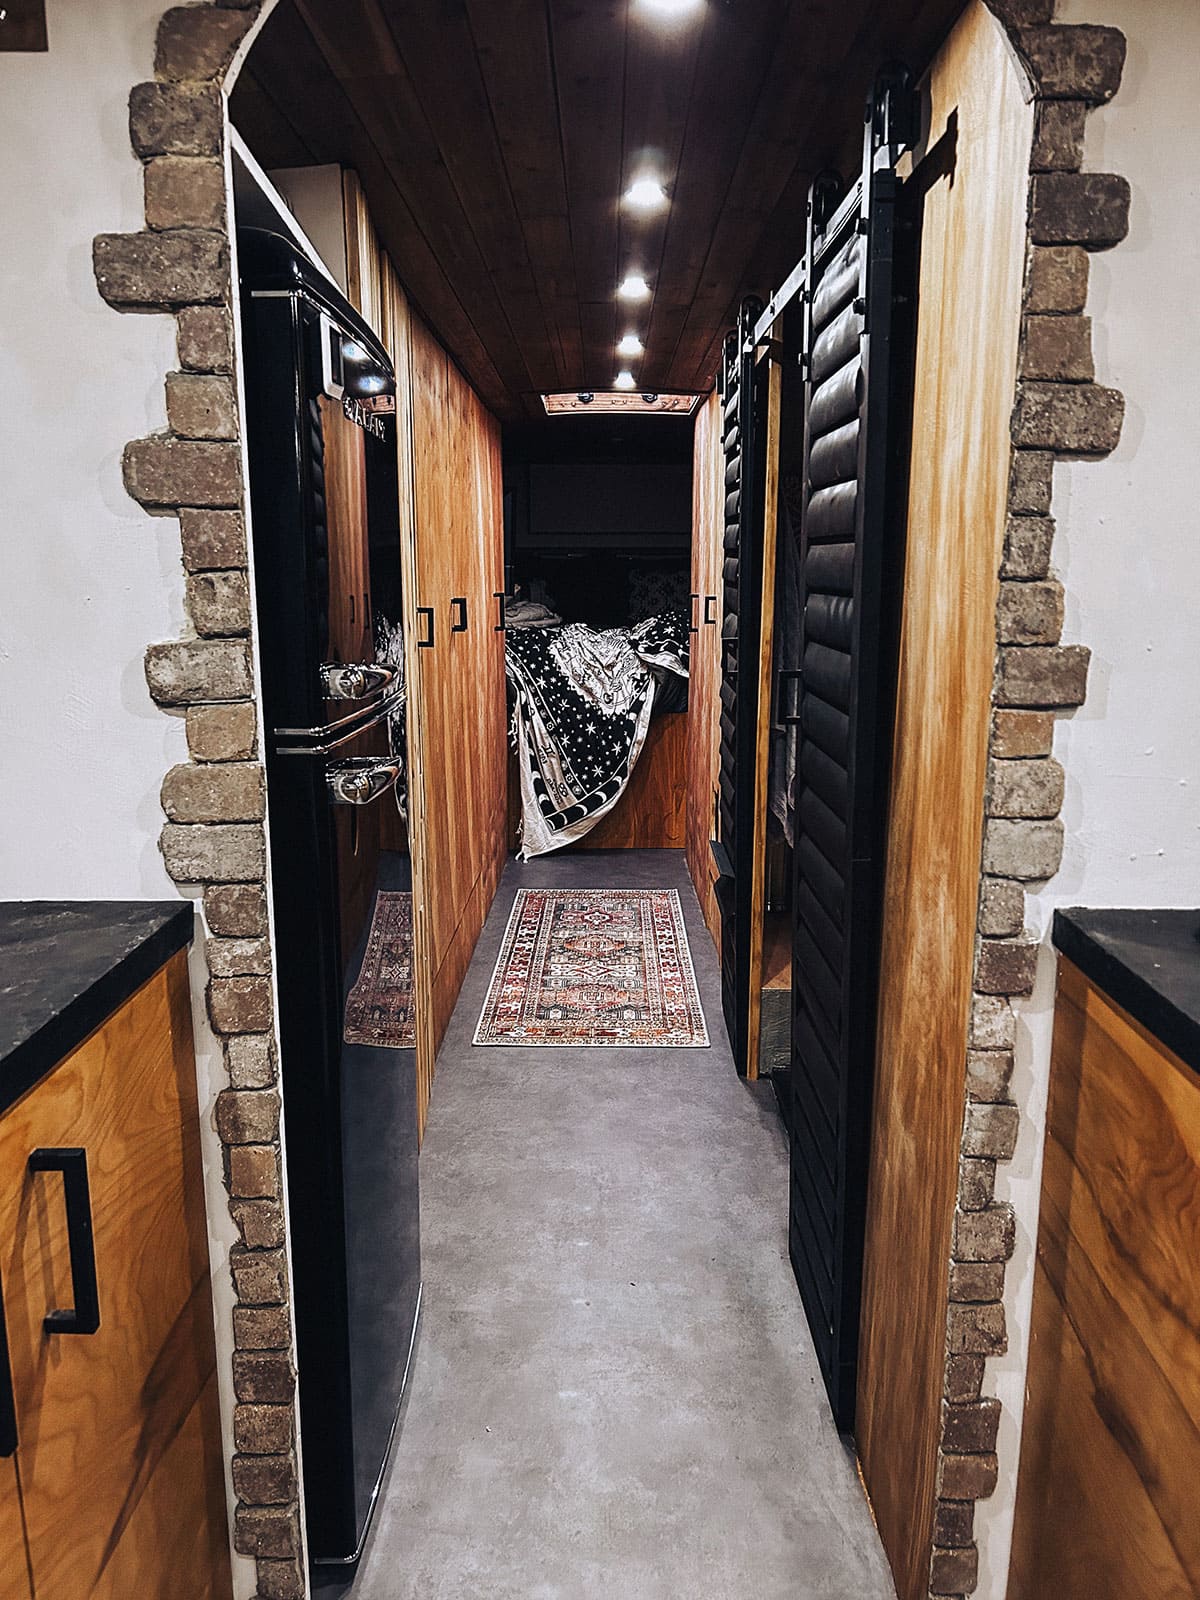
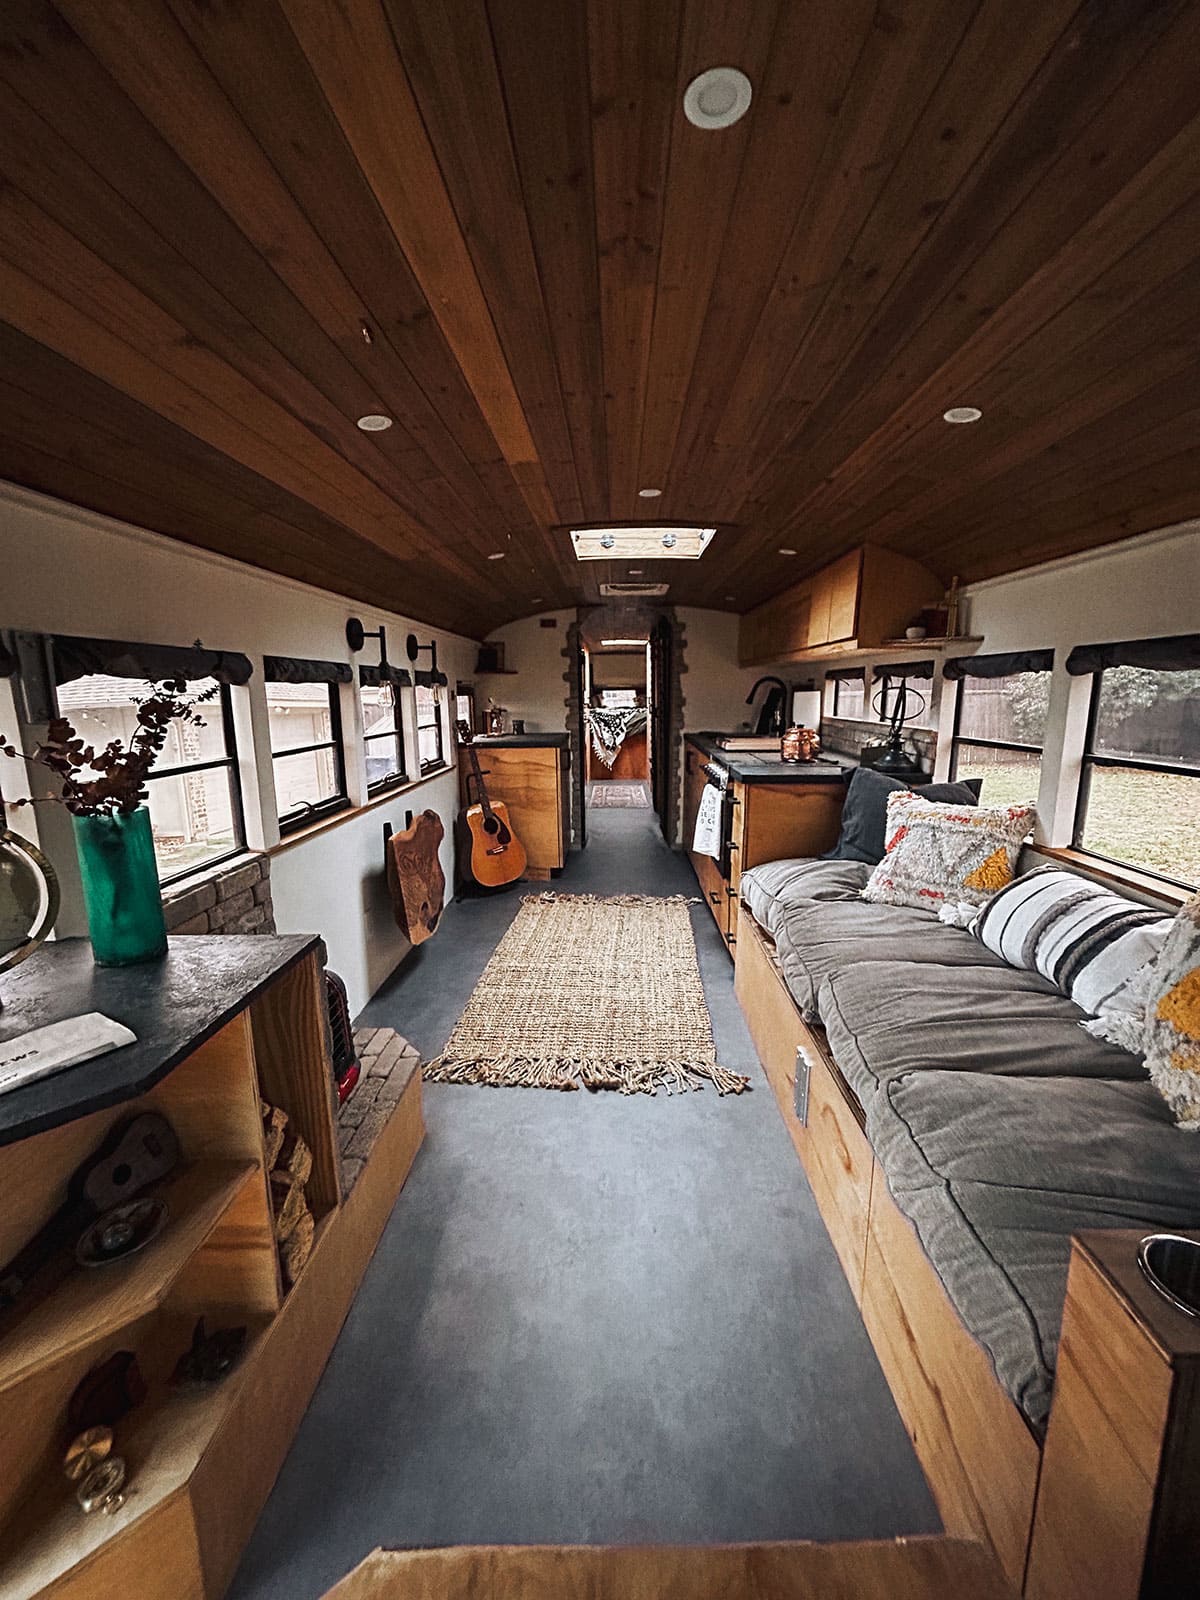
The inside of the bus took quite a bit of research. I am very happy with the way that it turned out. I chose a hallway that goes down the center with rooms on each side. There’s plenty of storage and it flows really easily as well. Everything has multiple functions for a good use of space. I wanted the space to be a blank canvas with natural tones so I could change the curtains, pillows, blankets, and such for each season.
This way I can dress up the bus to fit the mood of the season or how I’m feeling. The flooring has a layer of insulation, OSB board, corkboard, and then a roll of laminate that looks like concrete. I just love the industrial look, and it took me so long to find this flooring. The floor was definitely interesting. Thanks, Mom and Dad for the help.
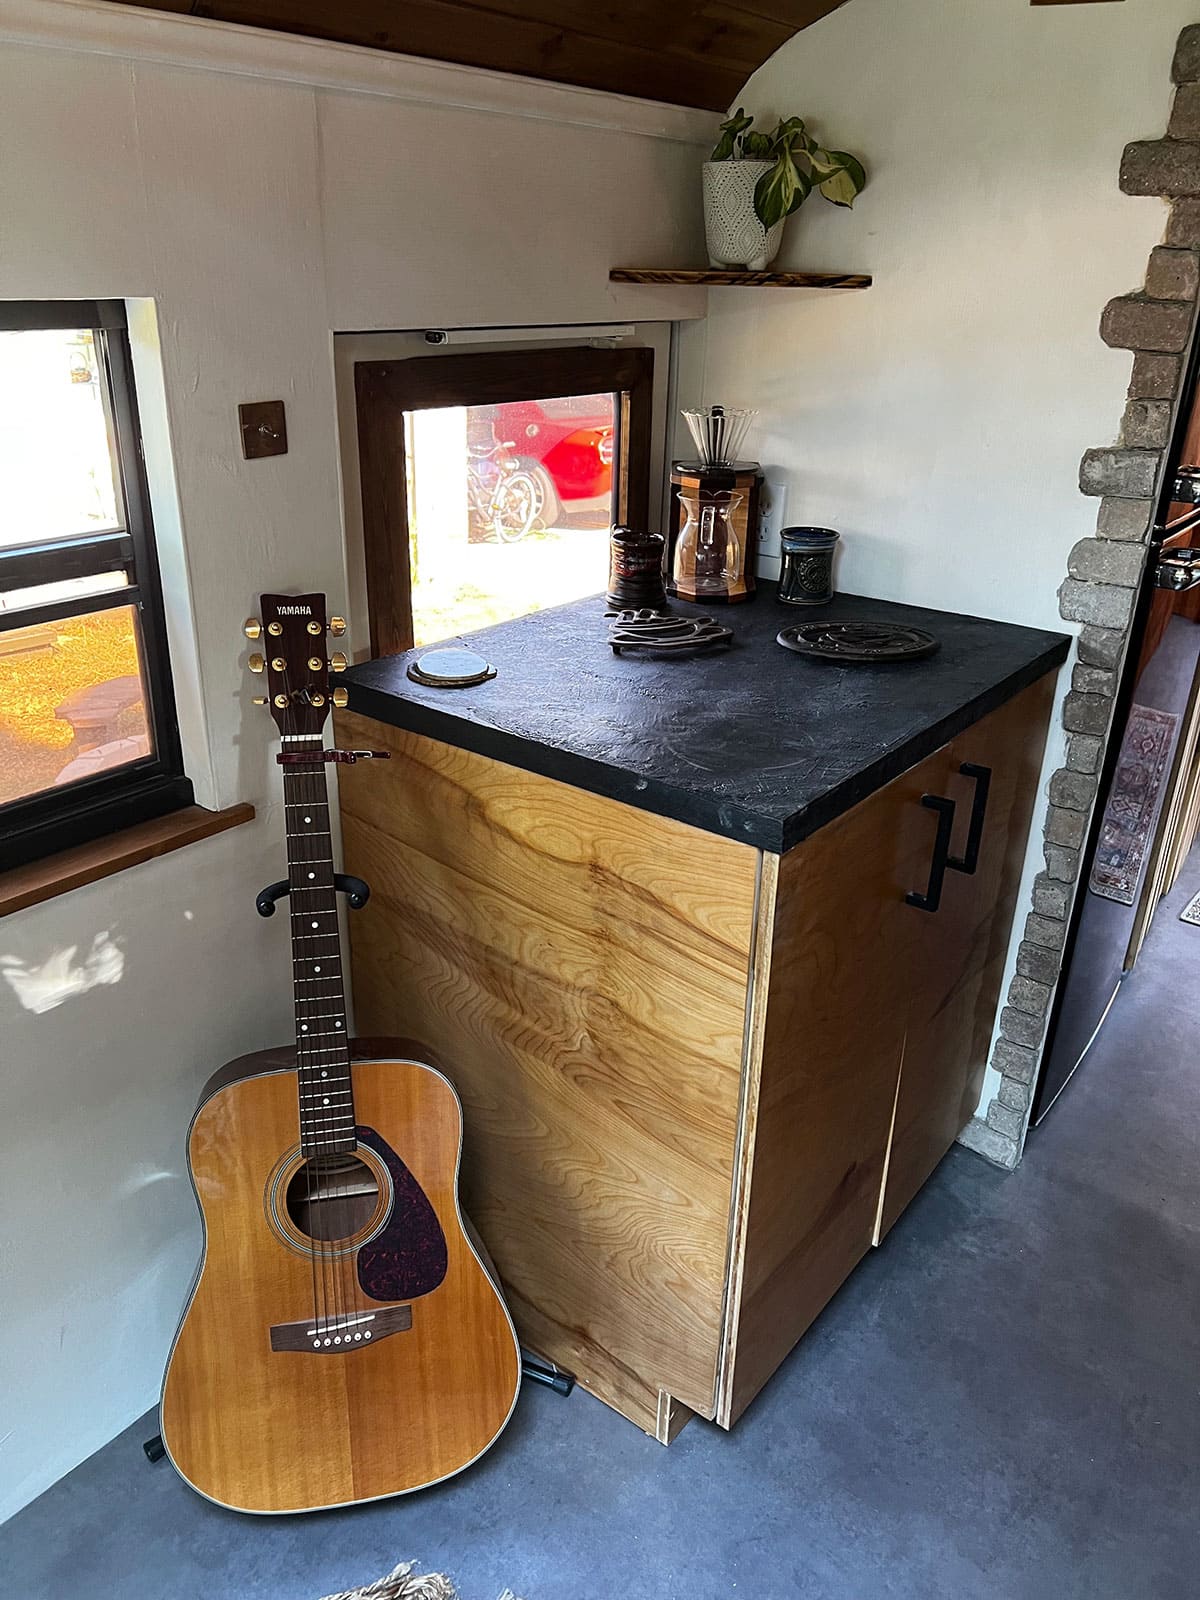
I’m still obsessed with natural wood. Birchwood was used for the cabinets and hallway doors. I coated it with a matte finish but left the natural wood colors in it. This collaborates really well with the cedar plank ceiling, which is tongue-and-groove. I found the tongue-and-groove worked best for the ceiling and helped me go with the curve quite easily.
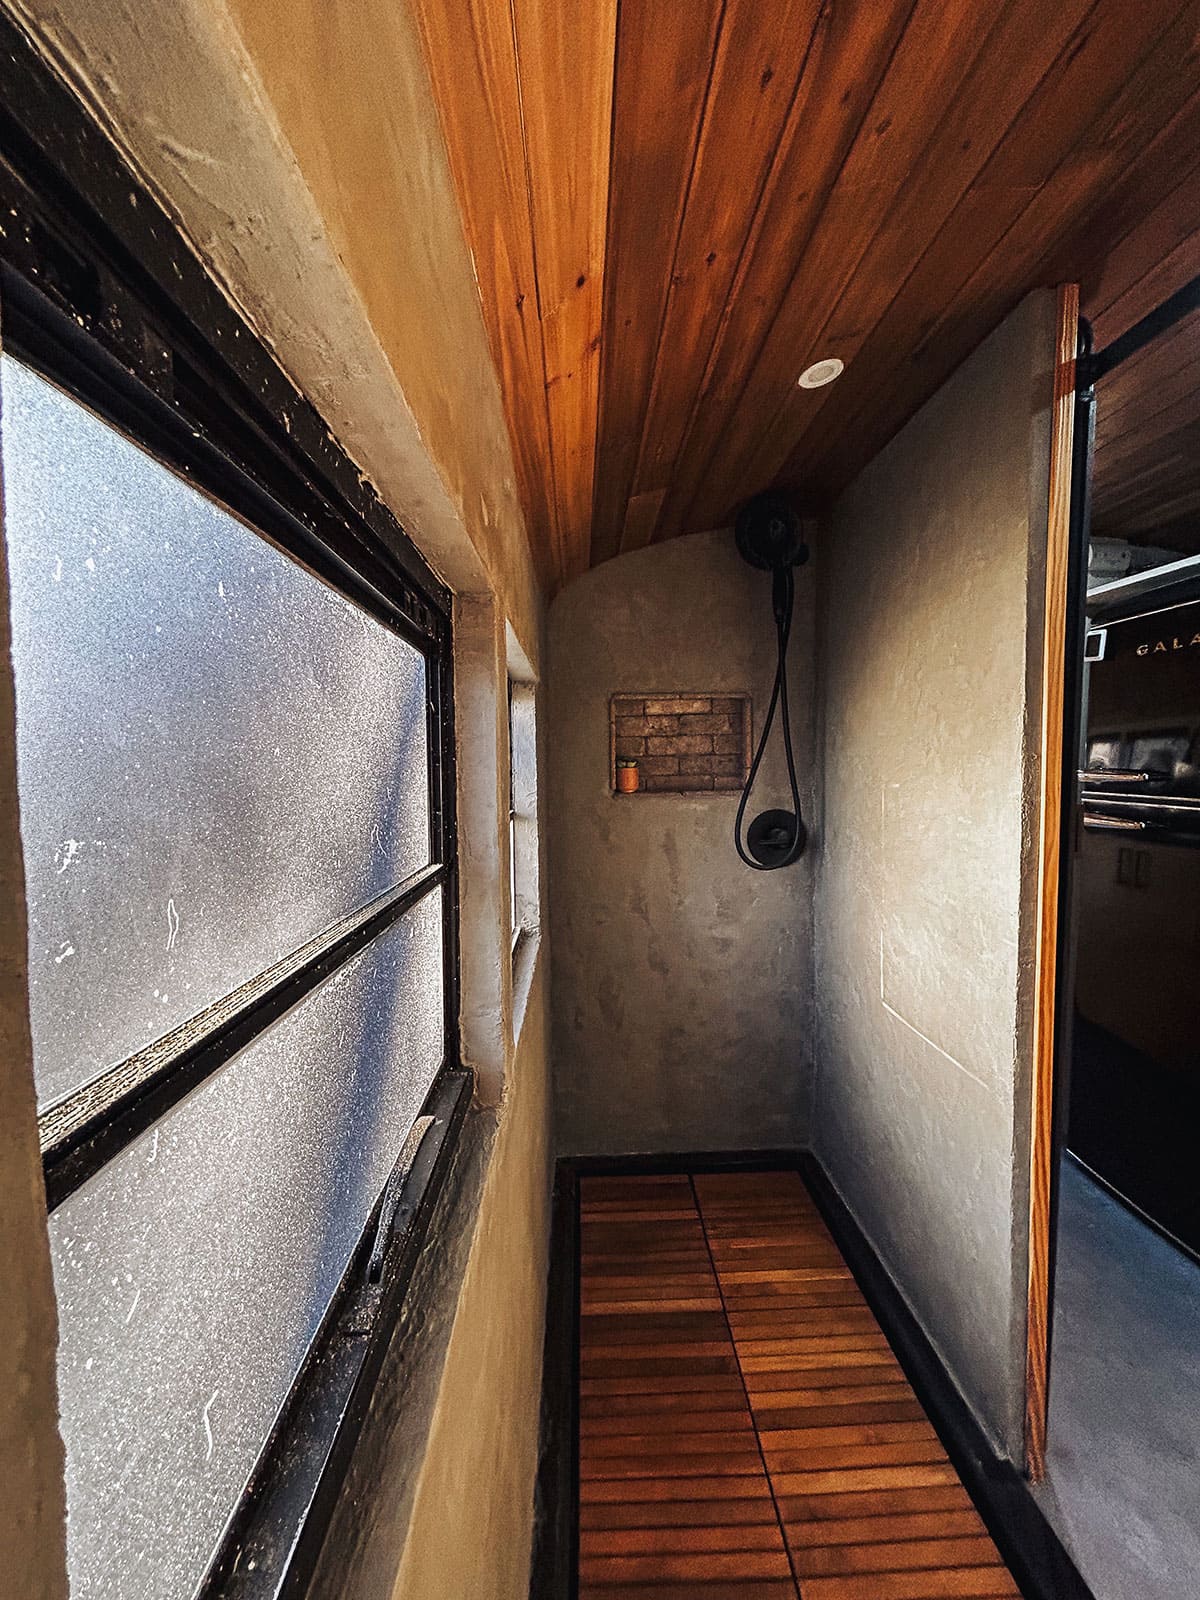
The walls were painted with a lime wash paint that I also looked for, for quite a while. I wanted the natural stone look but wasn’t sure how to achieve that in this paint did the job perfectly. I wanted this to collaborate with the countertops and bathroom. I used a concrete feather finish for these! The concrete comes powdered and you simply add water. For the countertops, I added a black dye.
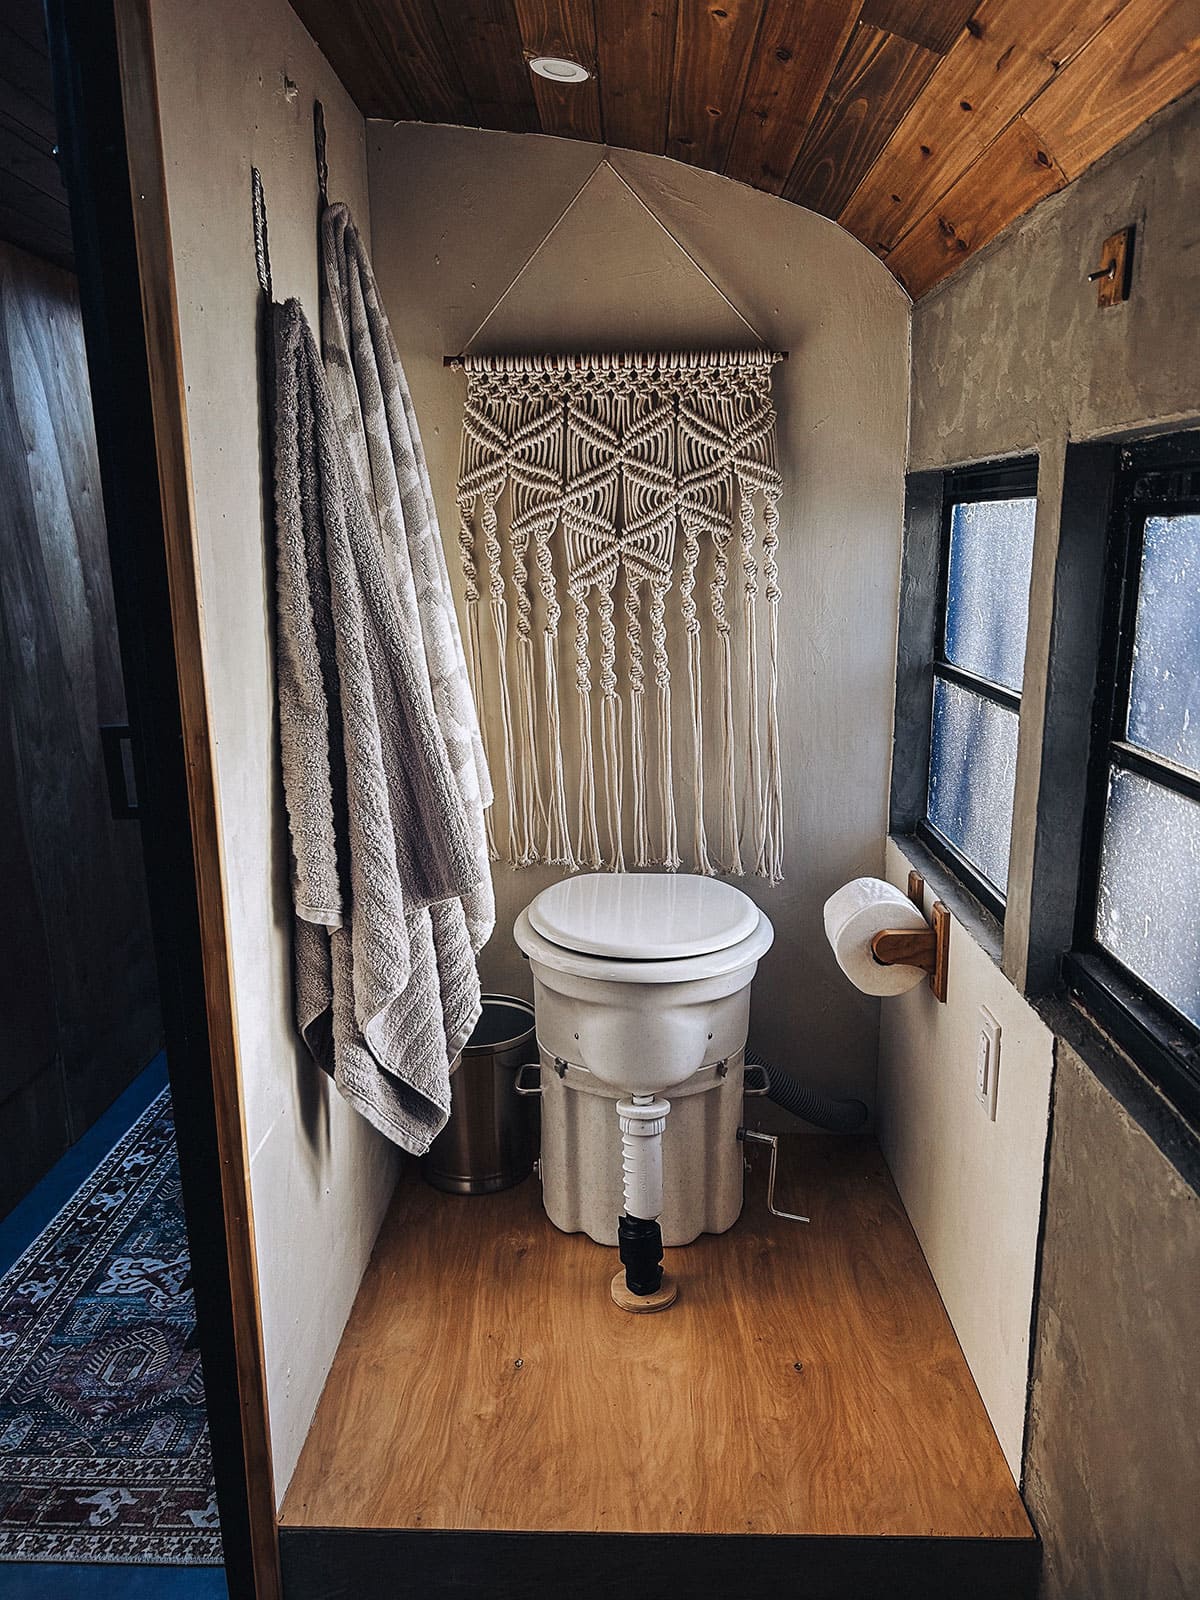
The bathroom I left raw concrete. Both of these took quite a while since its hand brushed on with many layers, and then sealed numerous times for protection.
I wanted this bus to be a place for community and memories with friends and family. I built this bus to have plenty of room for two people, two cats, and two dogs. There’s even a special spot made for a litter box.
I built the engine cover with insulation and soundproofing Kill Matt definitely helps keep the animals calm and the temperature down up front while driving.
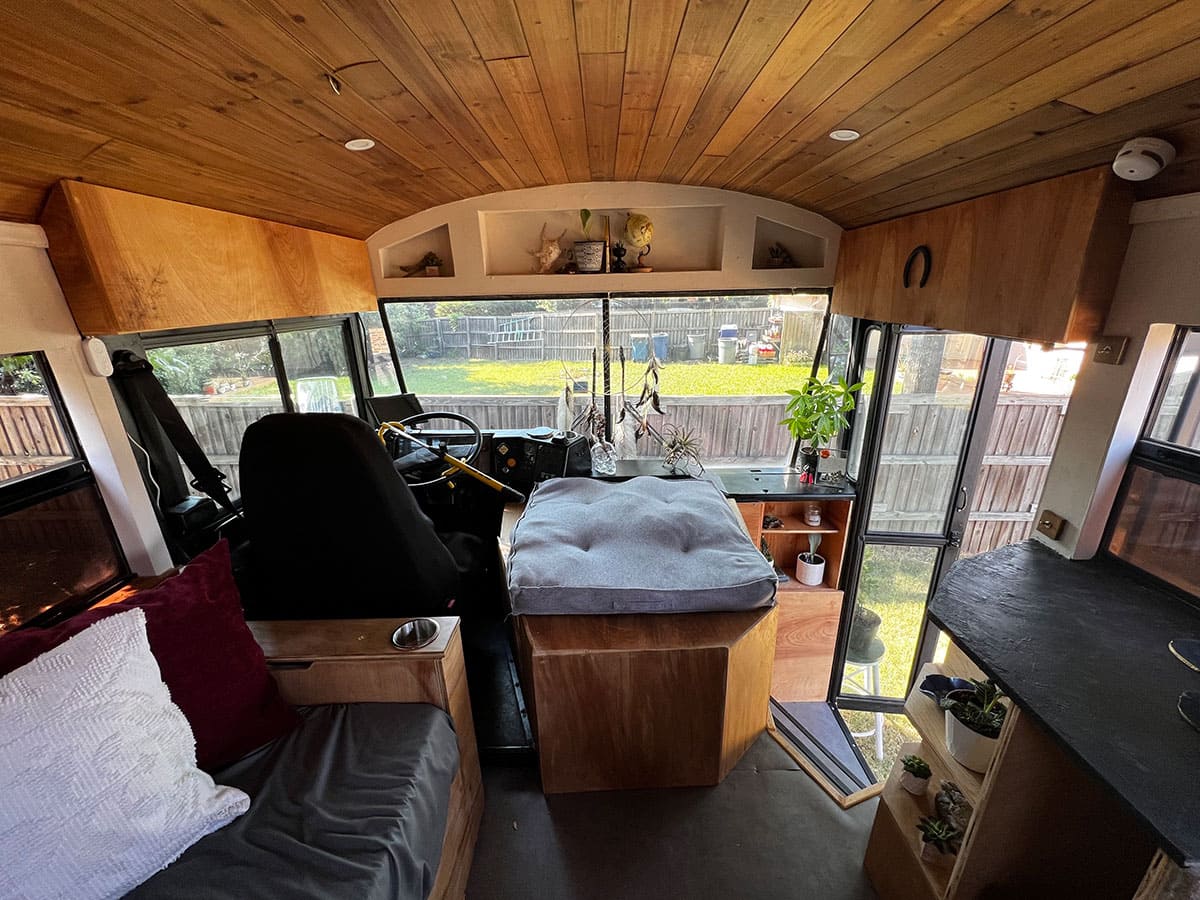
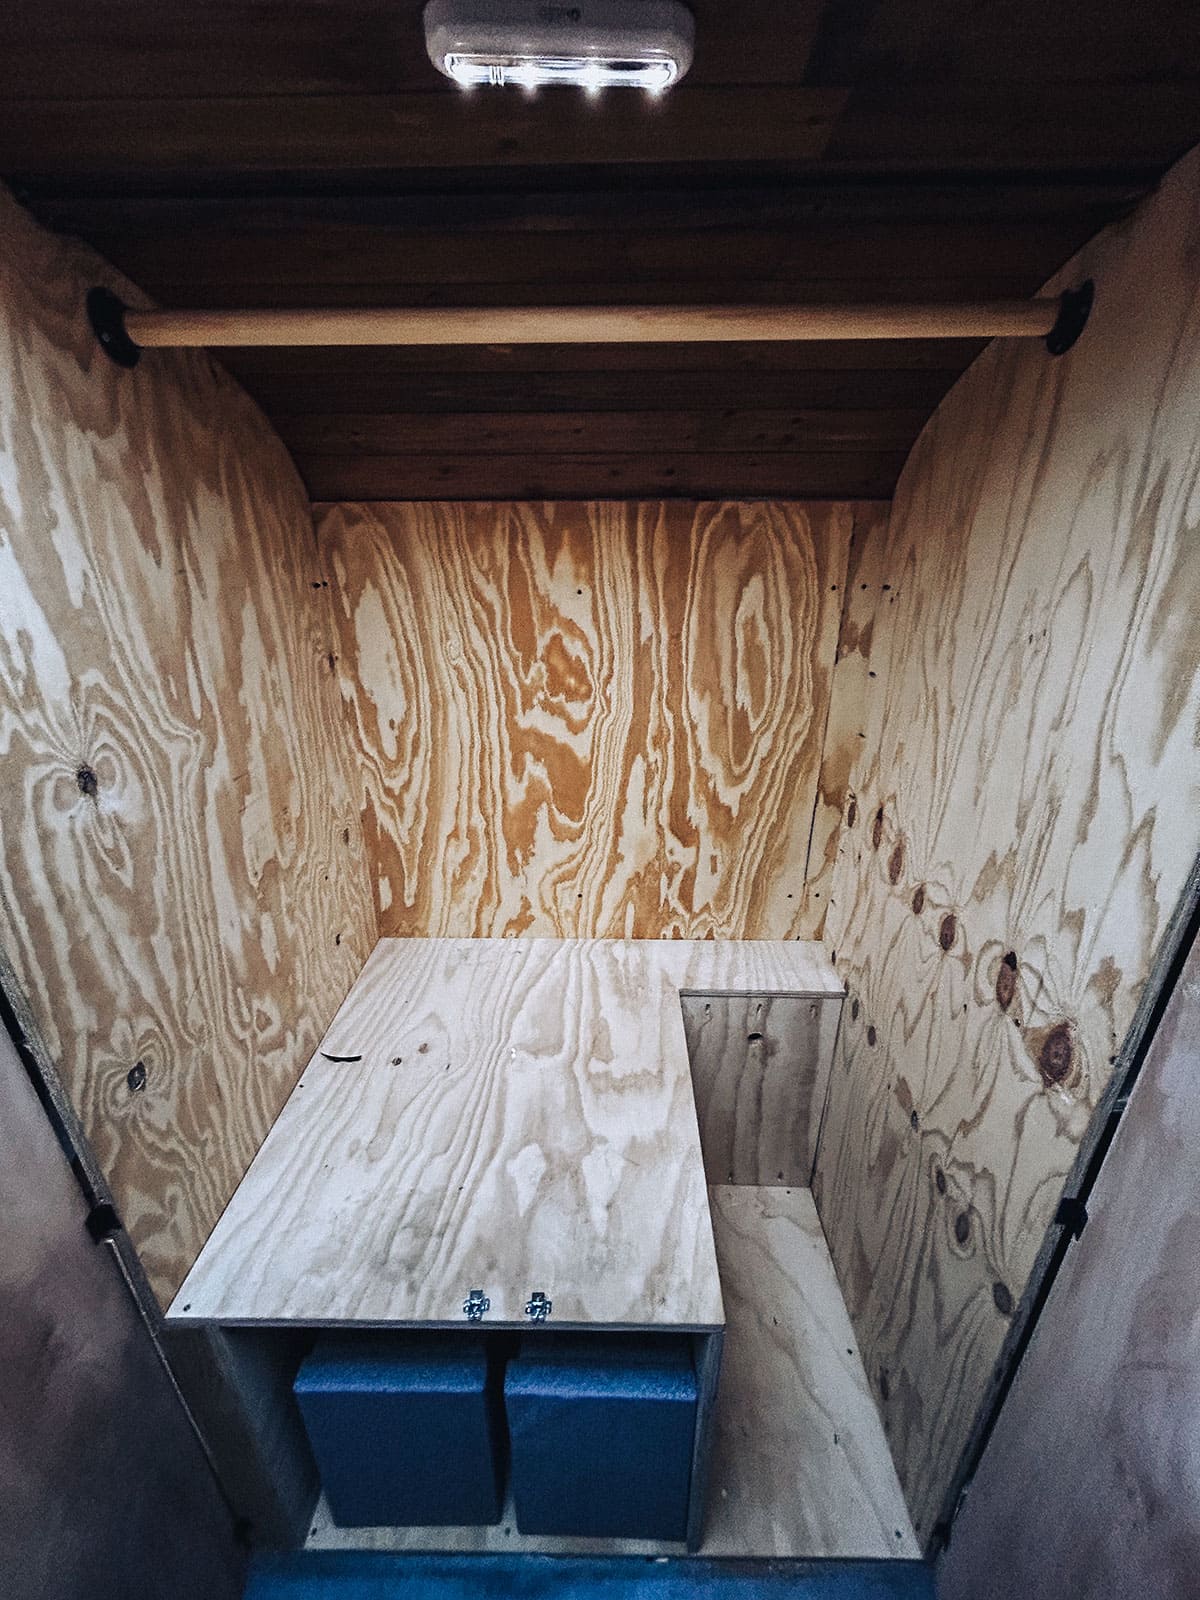
The couch pulls out to either make an L-shape couch on either side or a couch with a Lagun table in the middle for meals. The couch also pulls out a full-size bed for guests!
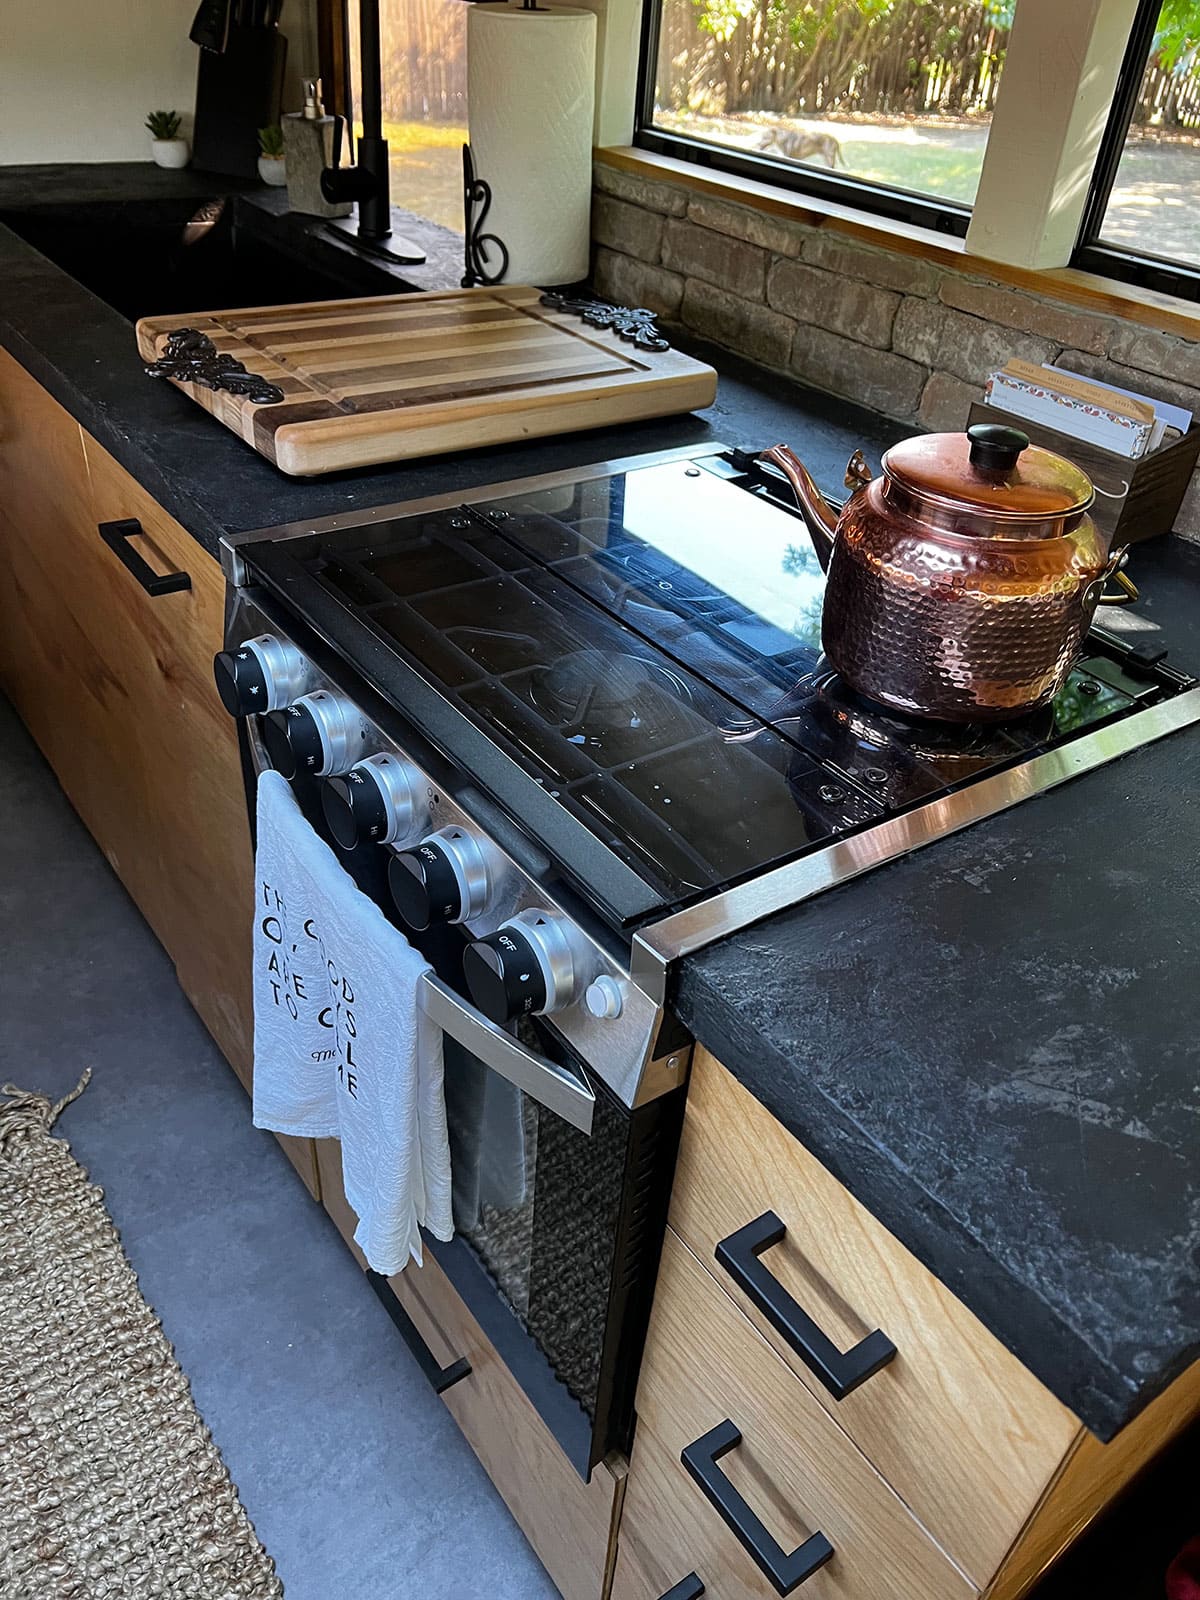
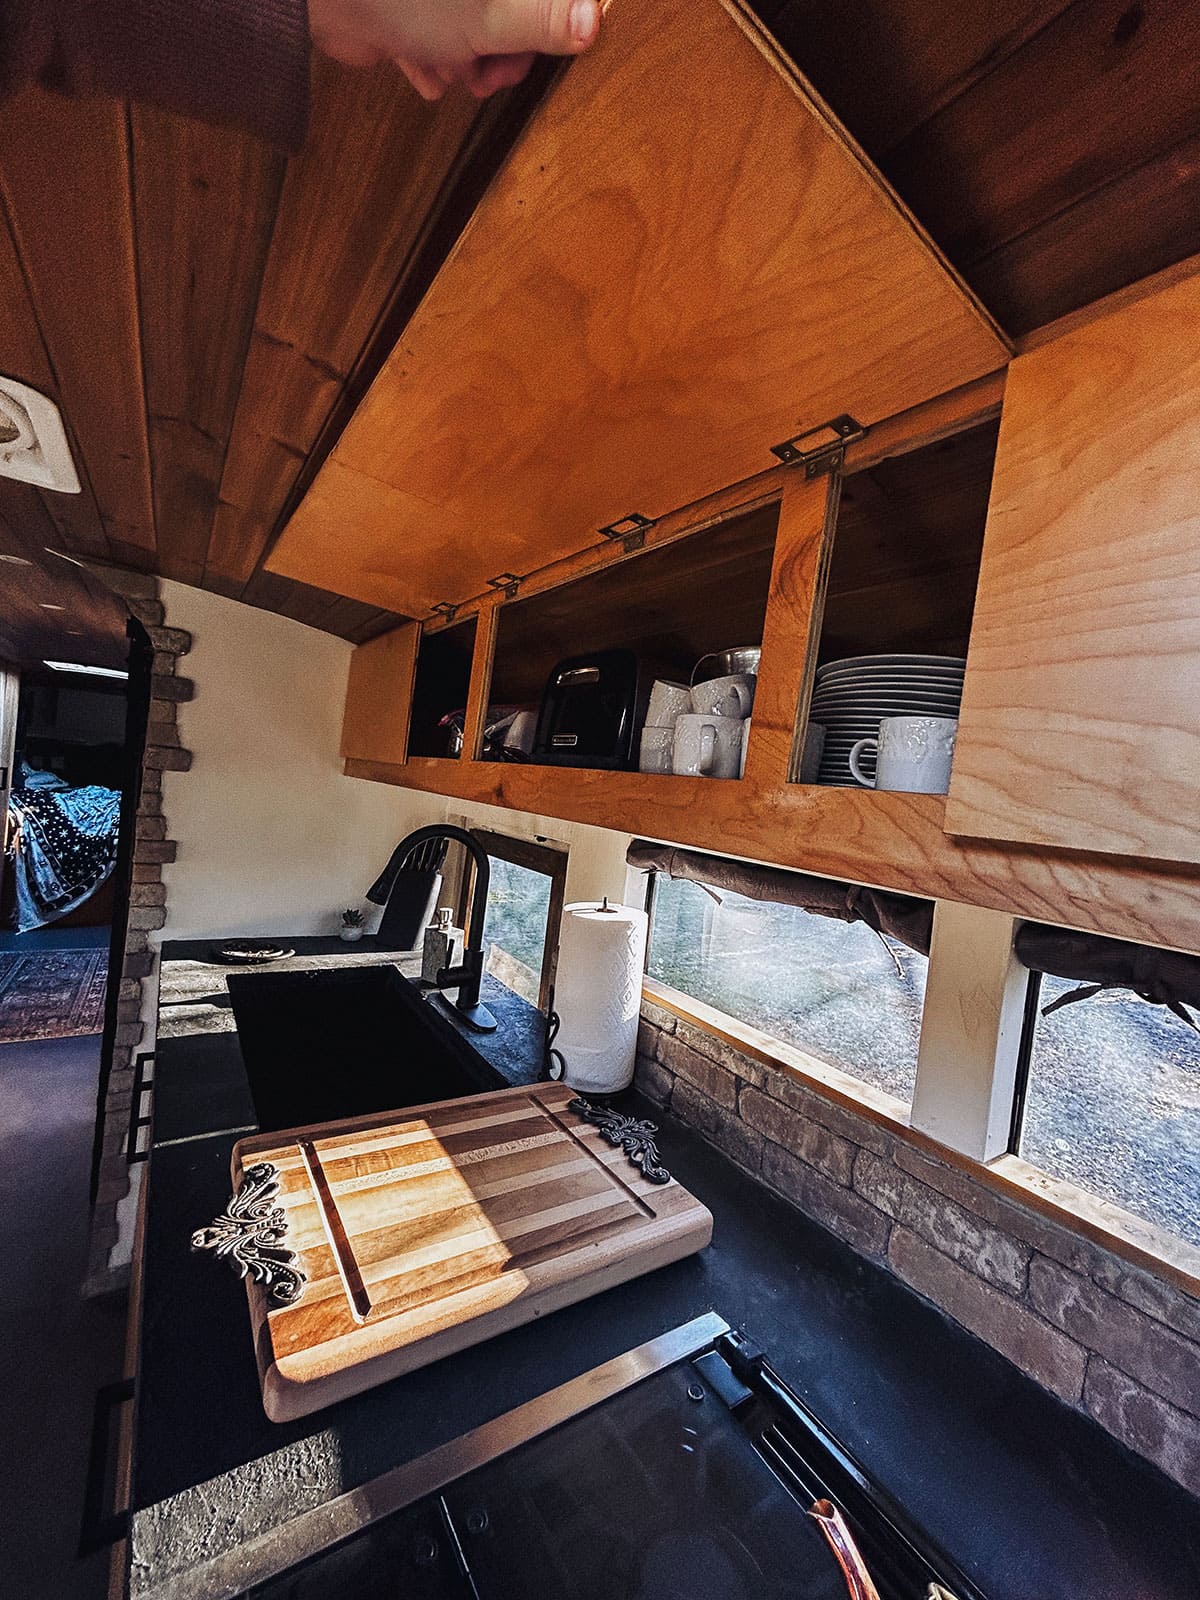
The kitchen has everything I need to make a delicious meal and a movable cabinet in front of the other emergency door for extra counter space.
Don’t even get me started on the bathroom! The shower pan is 30” x 60” and is one of the biggest showers I’ve seen in a bus. I’m sure there’s a bigger one, but I’m sure proud of this one! Each spot had a ton of care and hidden details built into it.
Everything has a spot and a function, usually more than one, and I’m not sure if I could do it all over again if I would change anything. I’m extremely happy with the way that this build turned out, and I think it fits this bus great. After a few weekend trips around Texas, it’s definitely a full-time off-grid machine!
Thank you so much for reading about my bus and my journey. I can talk about it for days, but if you want to know more, I have all the information listed below. My plan is to downsize and go for a van conversion this time, so stay tuned for more adventures!
I documented the entire build and have great more photos and Videos here if you would like to check it out! The best way to support other tiny housers is to like, follow and share!
Youtube: https://www.youtube.com/@GustheStruggleBus
Bus Specifications
- Year: 2002
- Make: International
- Engine: DT466 (Flat Nose, Front Engine)
- Transmission: Allison
- Overall Length: 40 ft.
- Overall Width: 8 ft.
- Overall Height: 10 ft. (6 ft. of Headroom on the Inside)
- Raised Roof: None
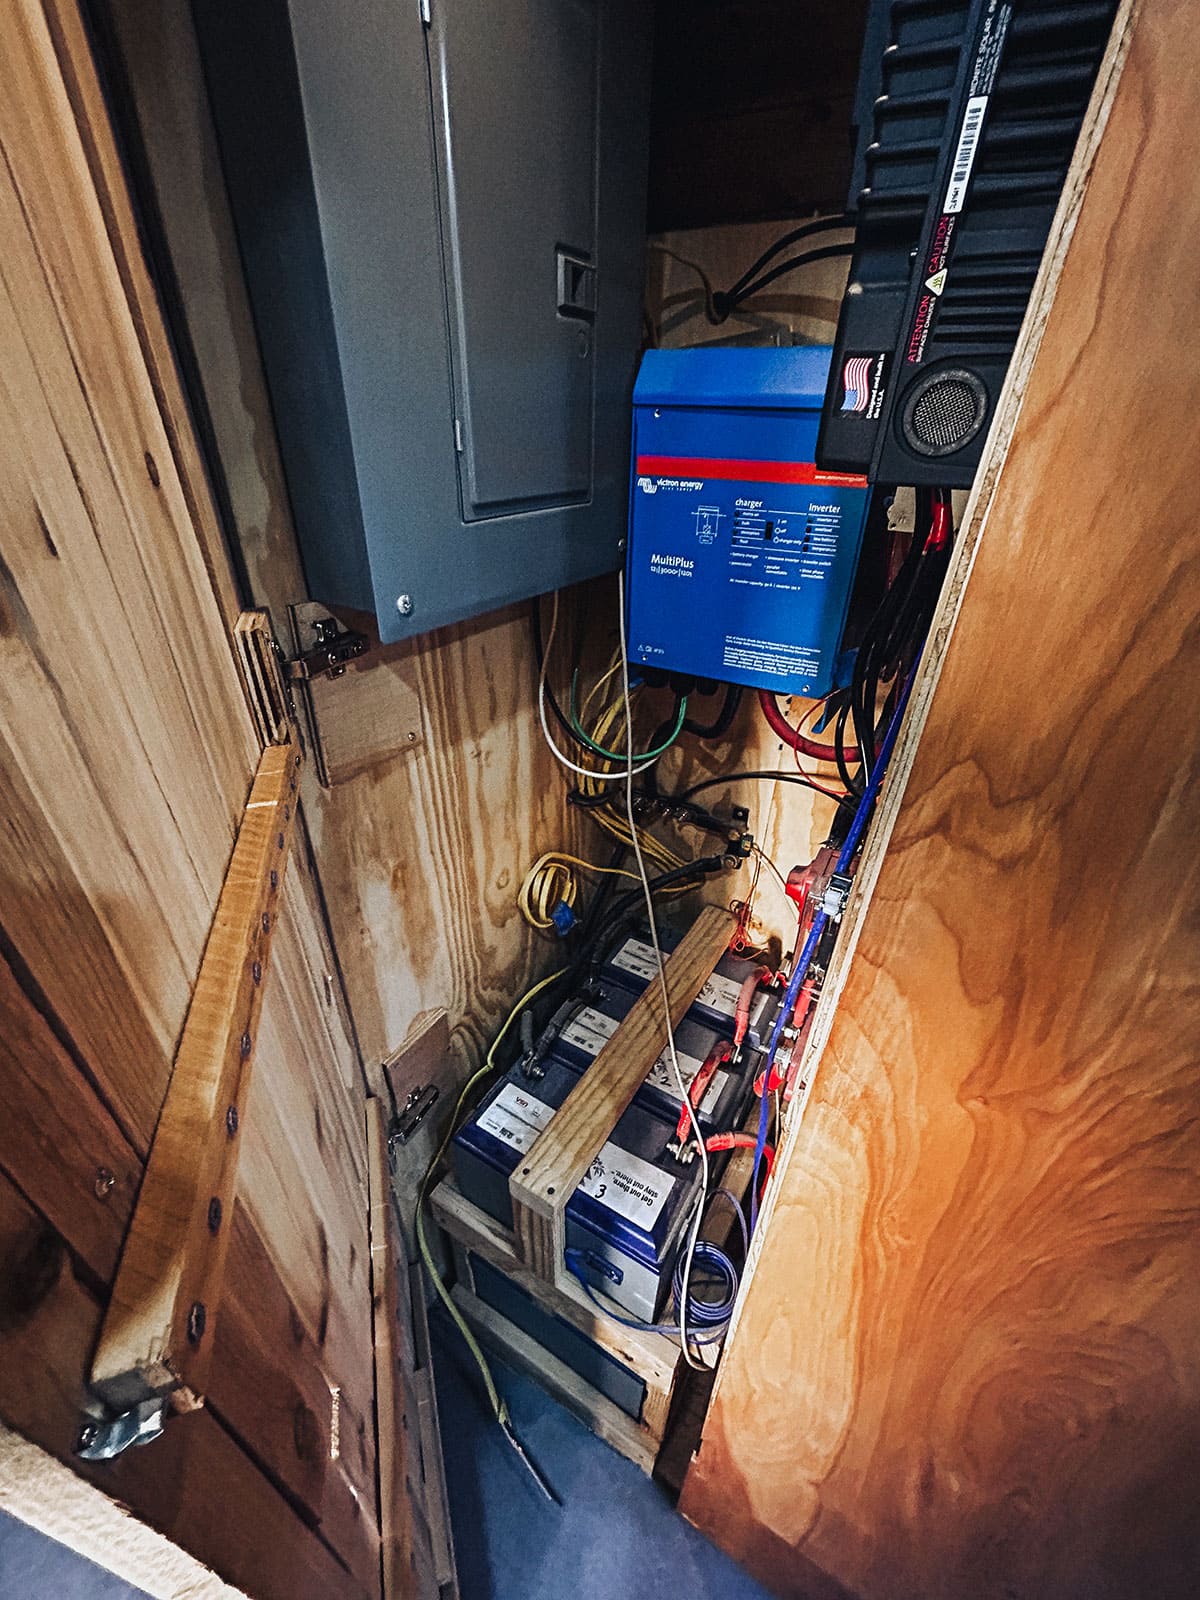
- Solar Power: Solar and off-grid details: There are four 300-watt Renogy solar panels, an Ecoworthy combiner box mounted on the roof, six 12-volt lithium batteries set up in parallel, a Midnite charge controller, a Victron 12-volt/3000va/120-amp inverter (can run lights, plugs, and fridge with no problem.
- Electrical System: Breaker Box, 12-volt lighting, 120-volt plugs, LED lighting, 50-amp shore power with a 30-amp converter cord, backup, front, and side cameras with monitor by the driver's seat. extra side flood lights and a motion-sensor front door light.
External Equipment
- Fresh Water Tank Capacity: 100 Gallons with hose or hookup fill options.
- Black Water Tank Capacity: N/A Nature’s Head Composting Toilet
- Grey Water Tank Capacity: 100 Gallons
- Tank Material: Plastic
- Water Heater Type: Tankless
- Plumbing Materials Used: PEX & Sharkbite
Features
- Five Seat Belts. One for the driver seat and four for the couch
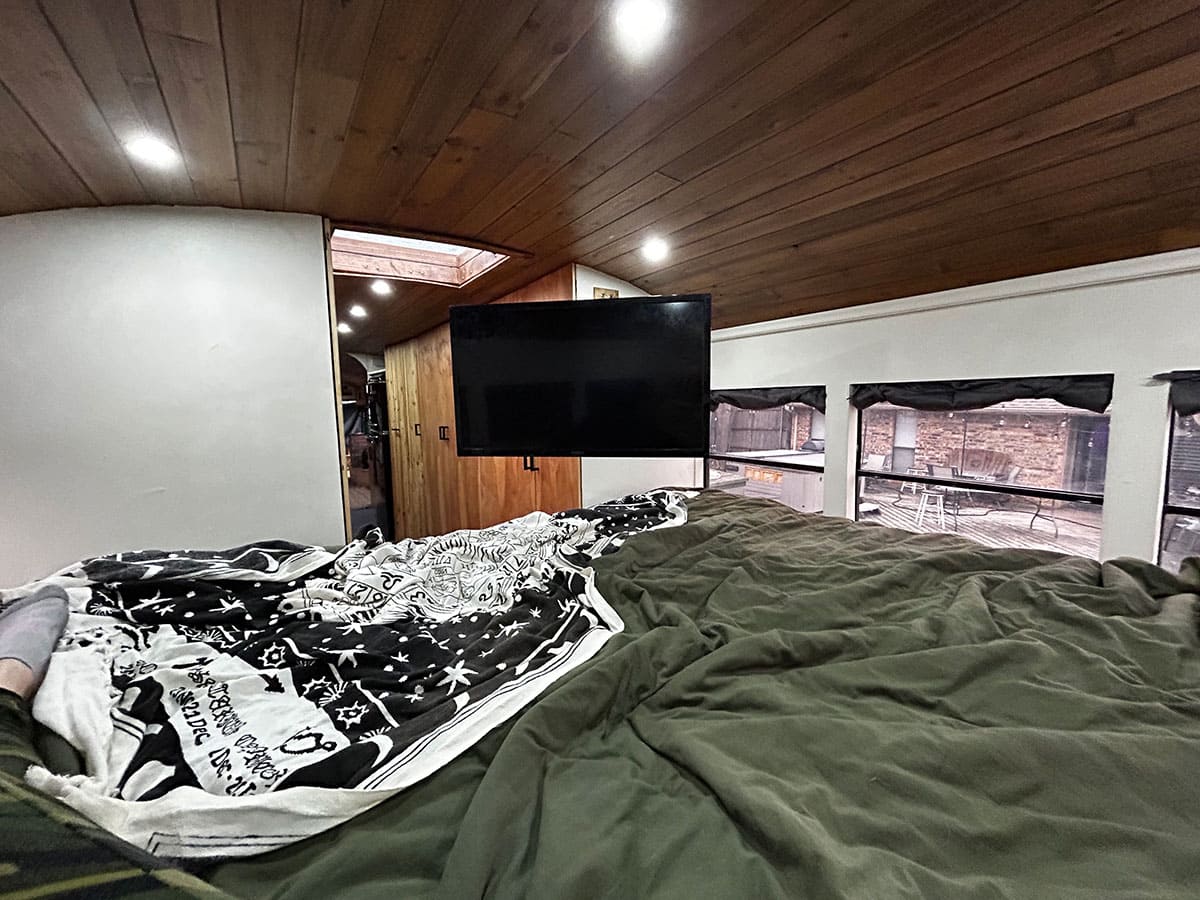
- Bedrooms/sleeping areas: Two, easily sleeps four and plenty more room. King and full or twin (couch pulls out)
- One Bathroom with Nature's Head composting toilet
- An outdoor shower
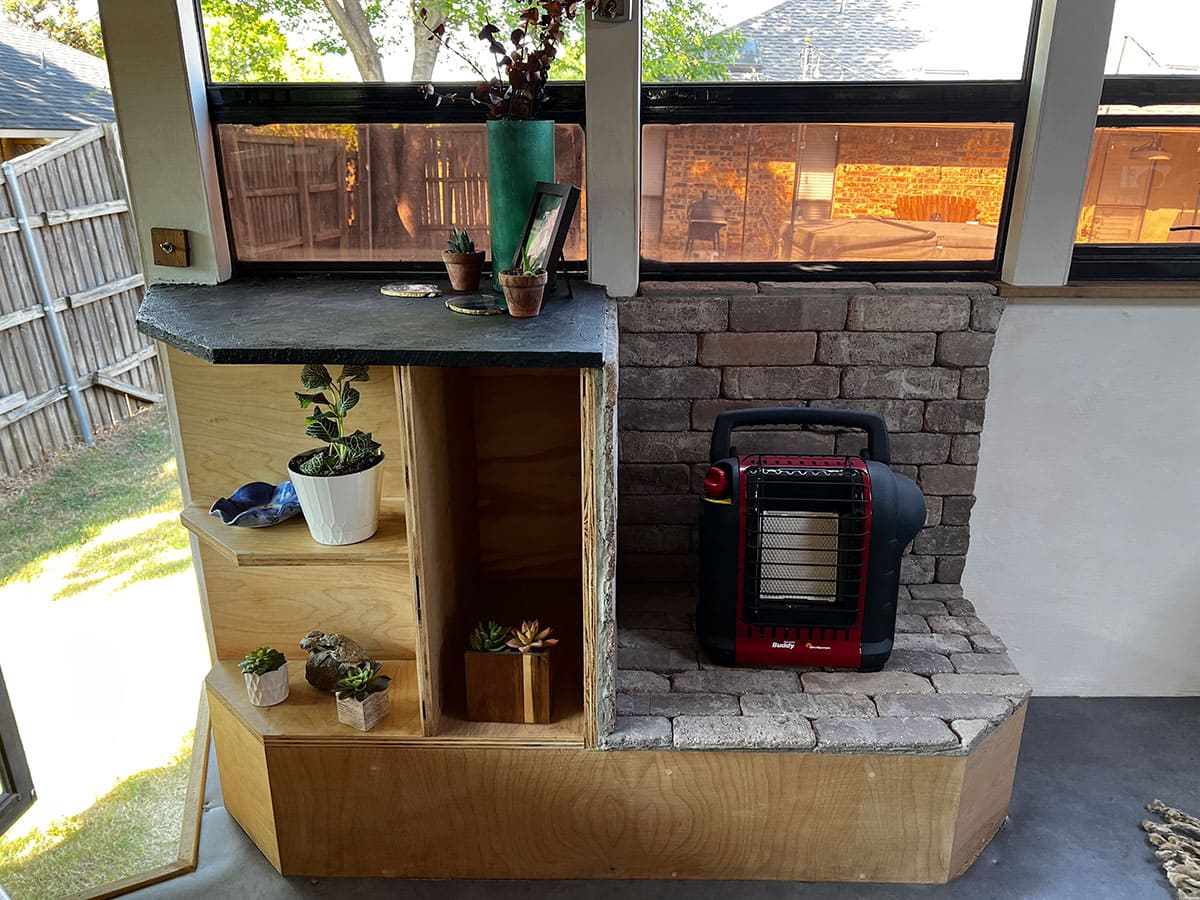
- Appliances: Large sink, propane oven and 4-burner stove top by Recpro, Galanz fridge, Pioneer mini-split, separate portable propane heater that I use on the brick fireplace (set up to eventually add a wood burning stove), indoor huge shower, outdoor shower, MaxxAir fan
- Mini-split or another system for heat and air: Pioneer® Diamante Series 12,000 BTU 20 SEER 115V Ductless Mini-Split Air Conditioner Heat Pump
- Shore power plug Amps: 50 amps but there is a 30-amp converter as well
- Insulation: Two inches of closed-cell spray foam insulation on the ceiling and walls. Foam board on the floor with OSB, then a layer of cork, and then the industrial-grade laminate flooring
- Finishes: Natural earth tones, cedar plank tongue and groove ceiling, birch natural wood stain cabinets and walls, concrete feathering countertops (black and gray)
- Upper cabinets and plenty of storage, side storage on couch and bed with outlets inside
- LED lighting that changes colors along the bus walls
- Lagun table for couch and fold out table in living room
- Front engine cover insulated
- Fireplace and storage
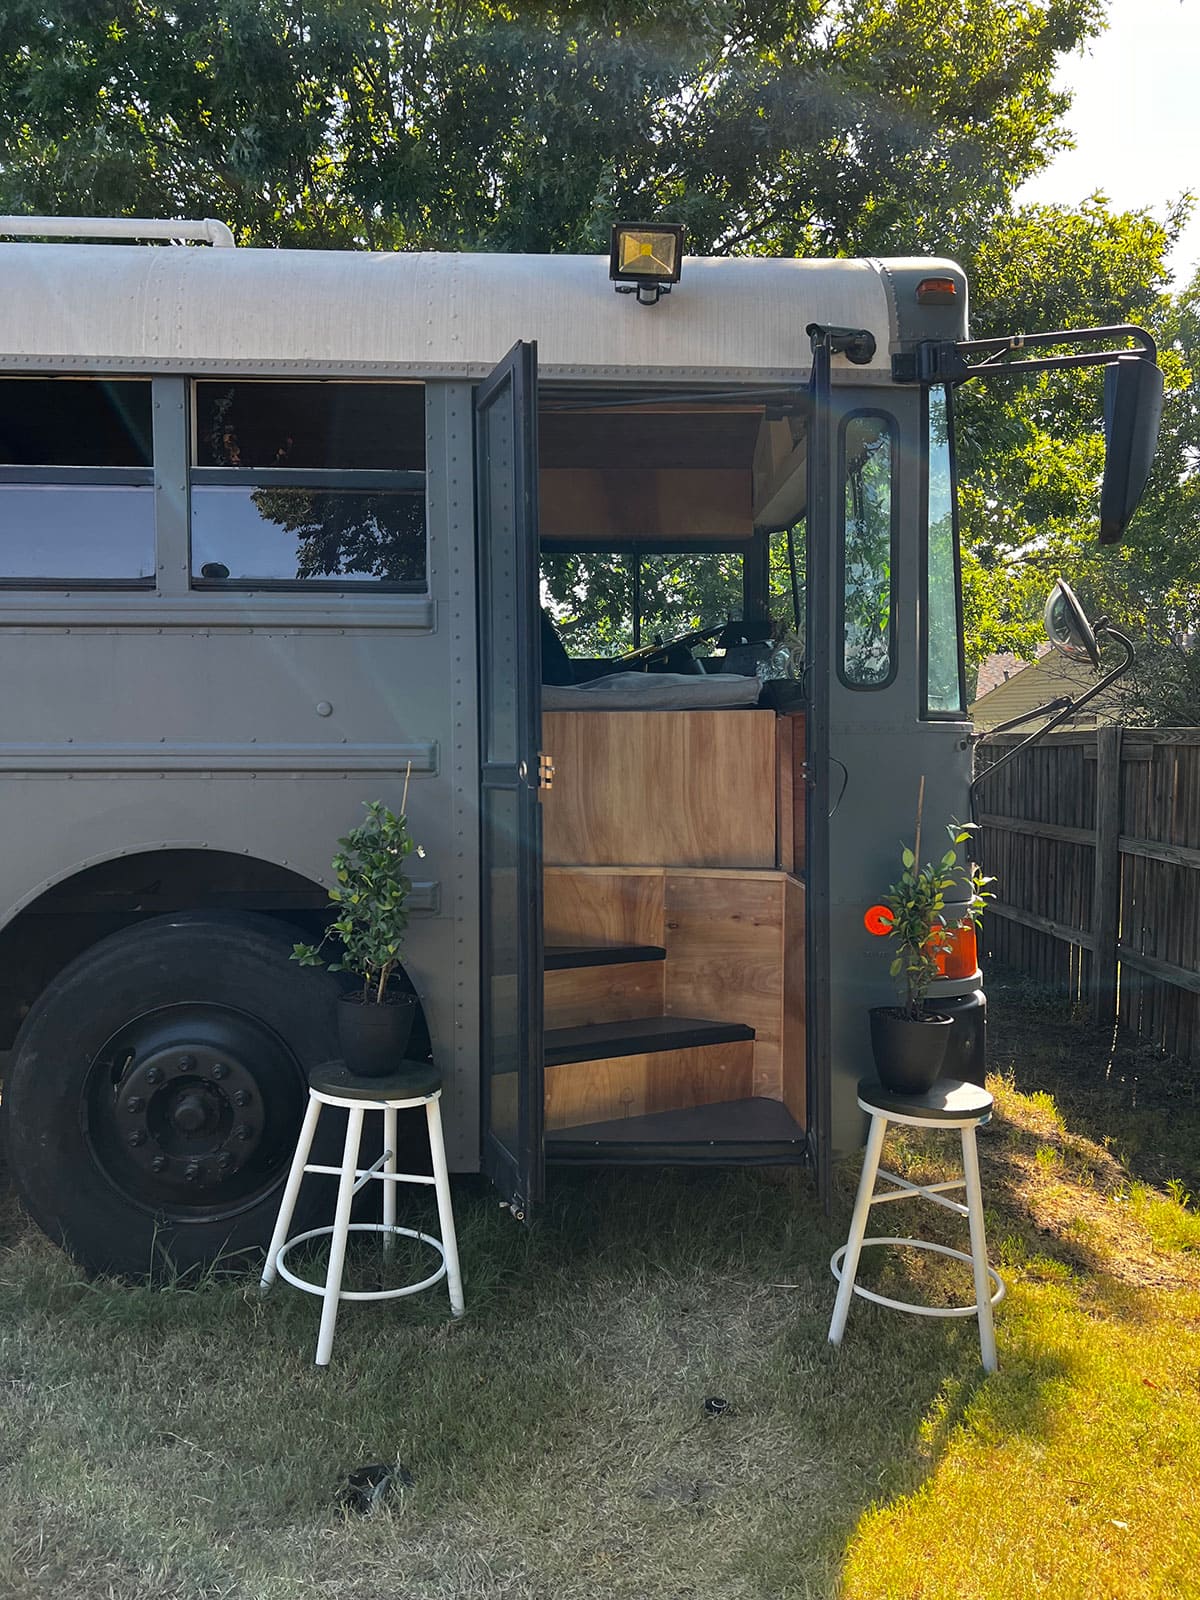
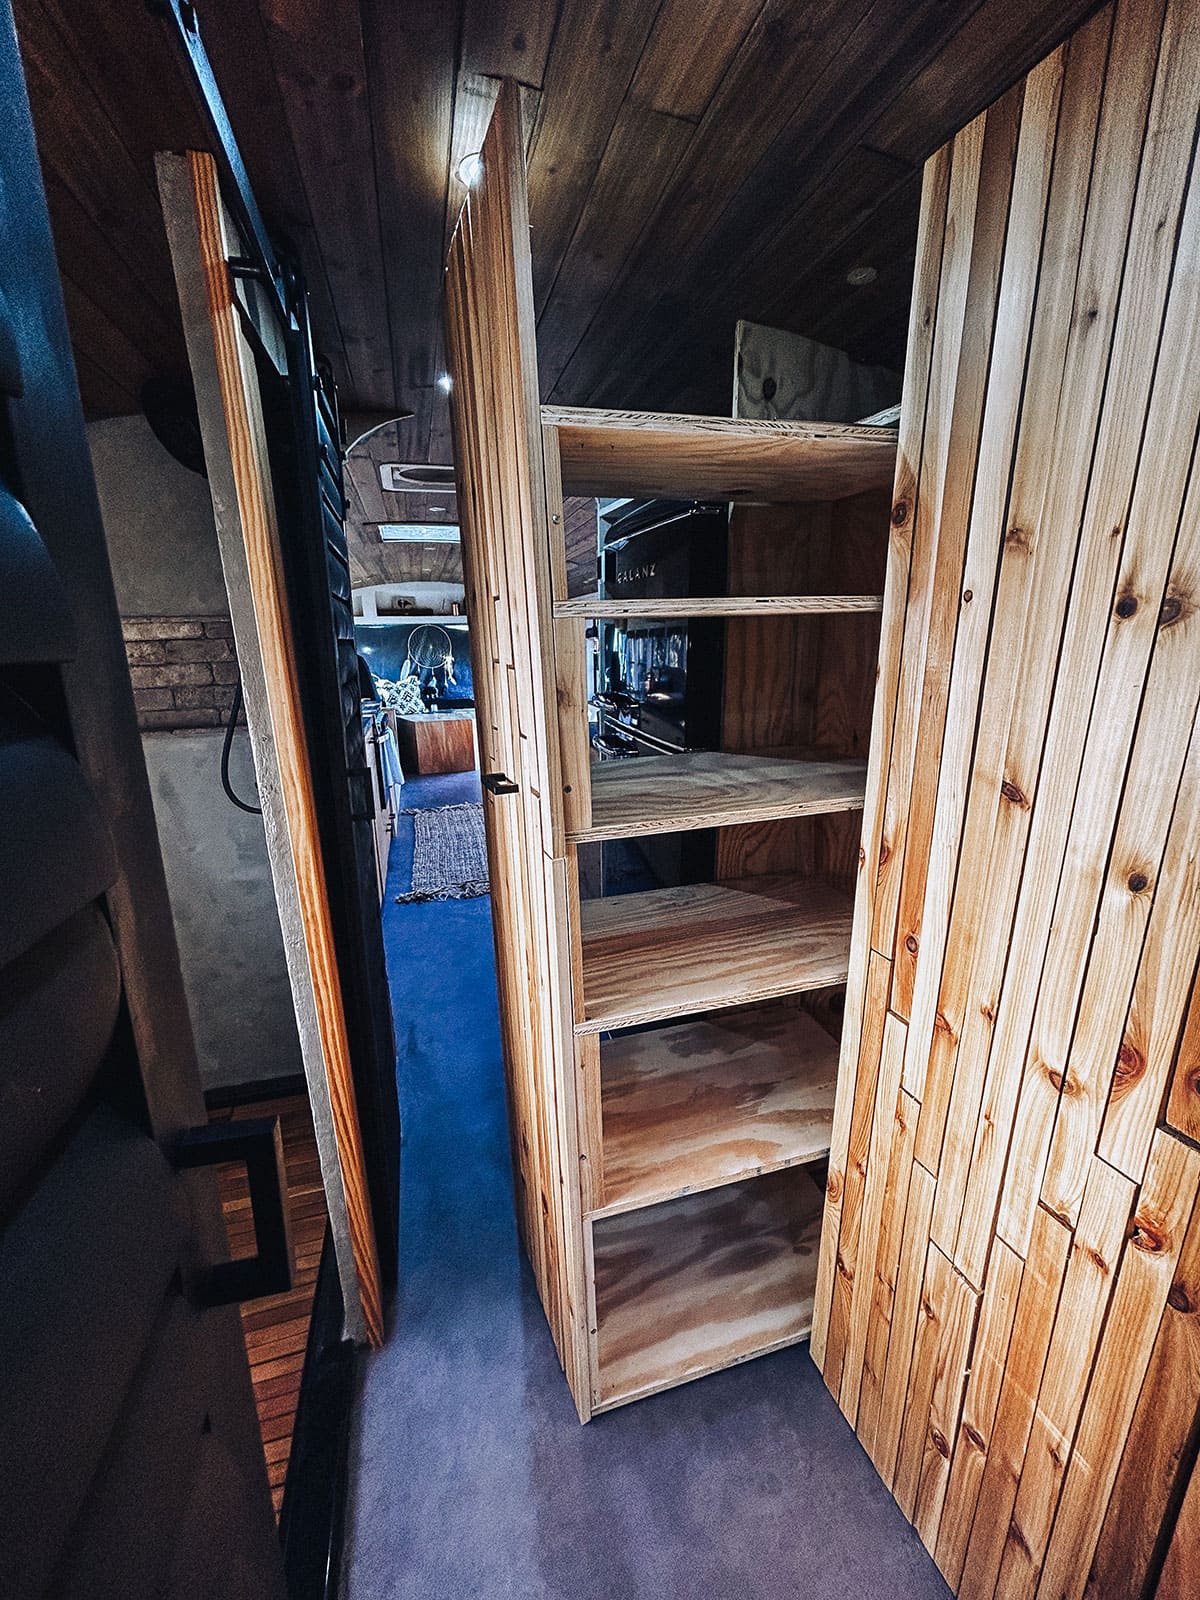
- Shoe storage right when you walk in
- Pull out couch that can make an L couch or U couch or larger bed
- Huge bathroom with sliding doors
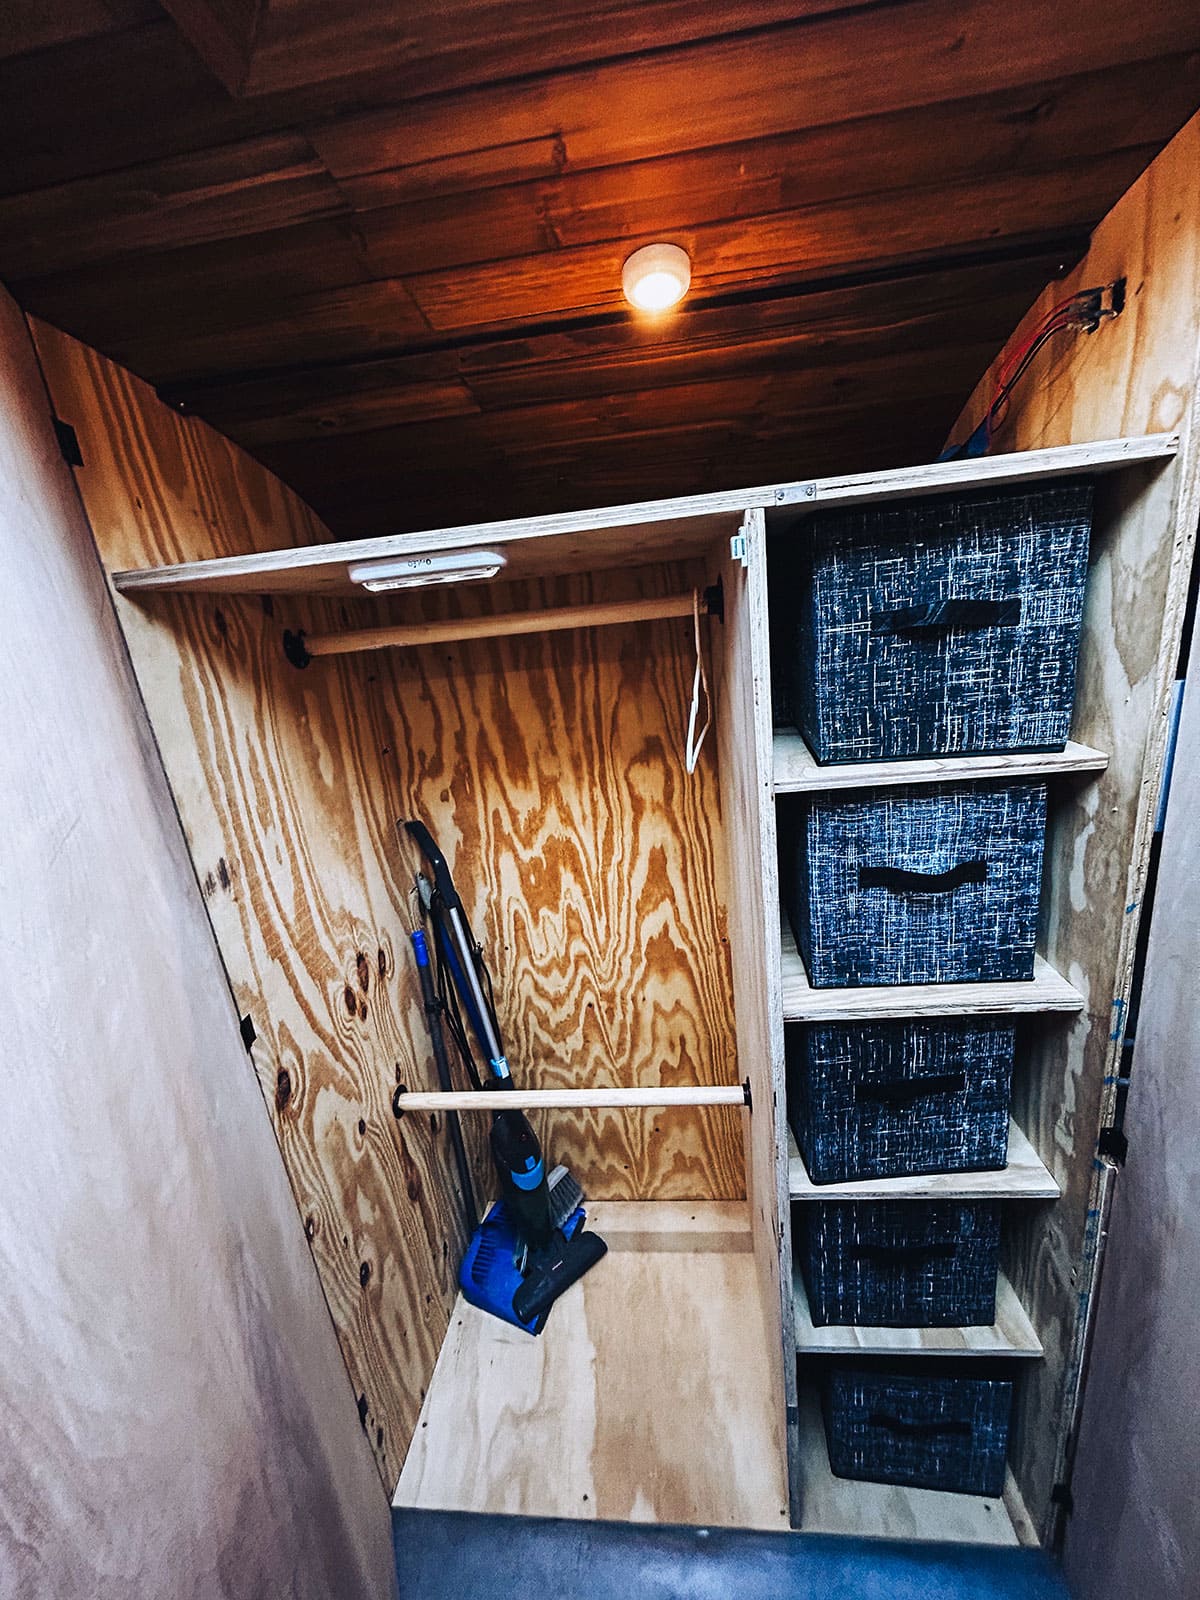
- Huge slide out pantry
- Three total storage closets with lights
- One bathroom closet with cat door cut out if they need to put a cat box in there
- Two skylights that open to roof
- Pull out mount for TV (mount to move TV in bedroom and living room)
- Huge rooftop deck and extendable ladder, also has a hatch cover if you want to block the sun or make deck "bigger"
- Two poles mounted on roof at the front of the bus for more tie down storage
- MaxxAir fan in kitchen
- Built in cup holders for driver/couch/and next to bed
- Small reading battery lights everywhere
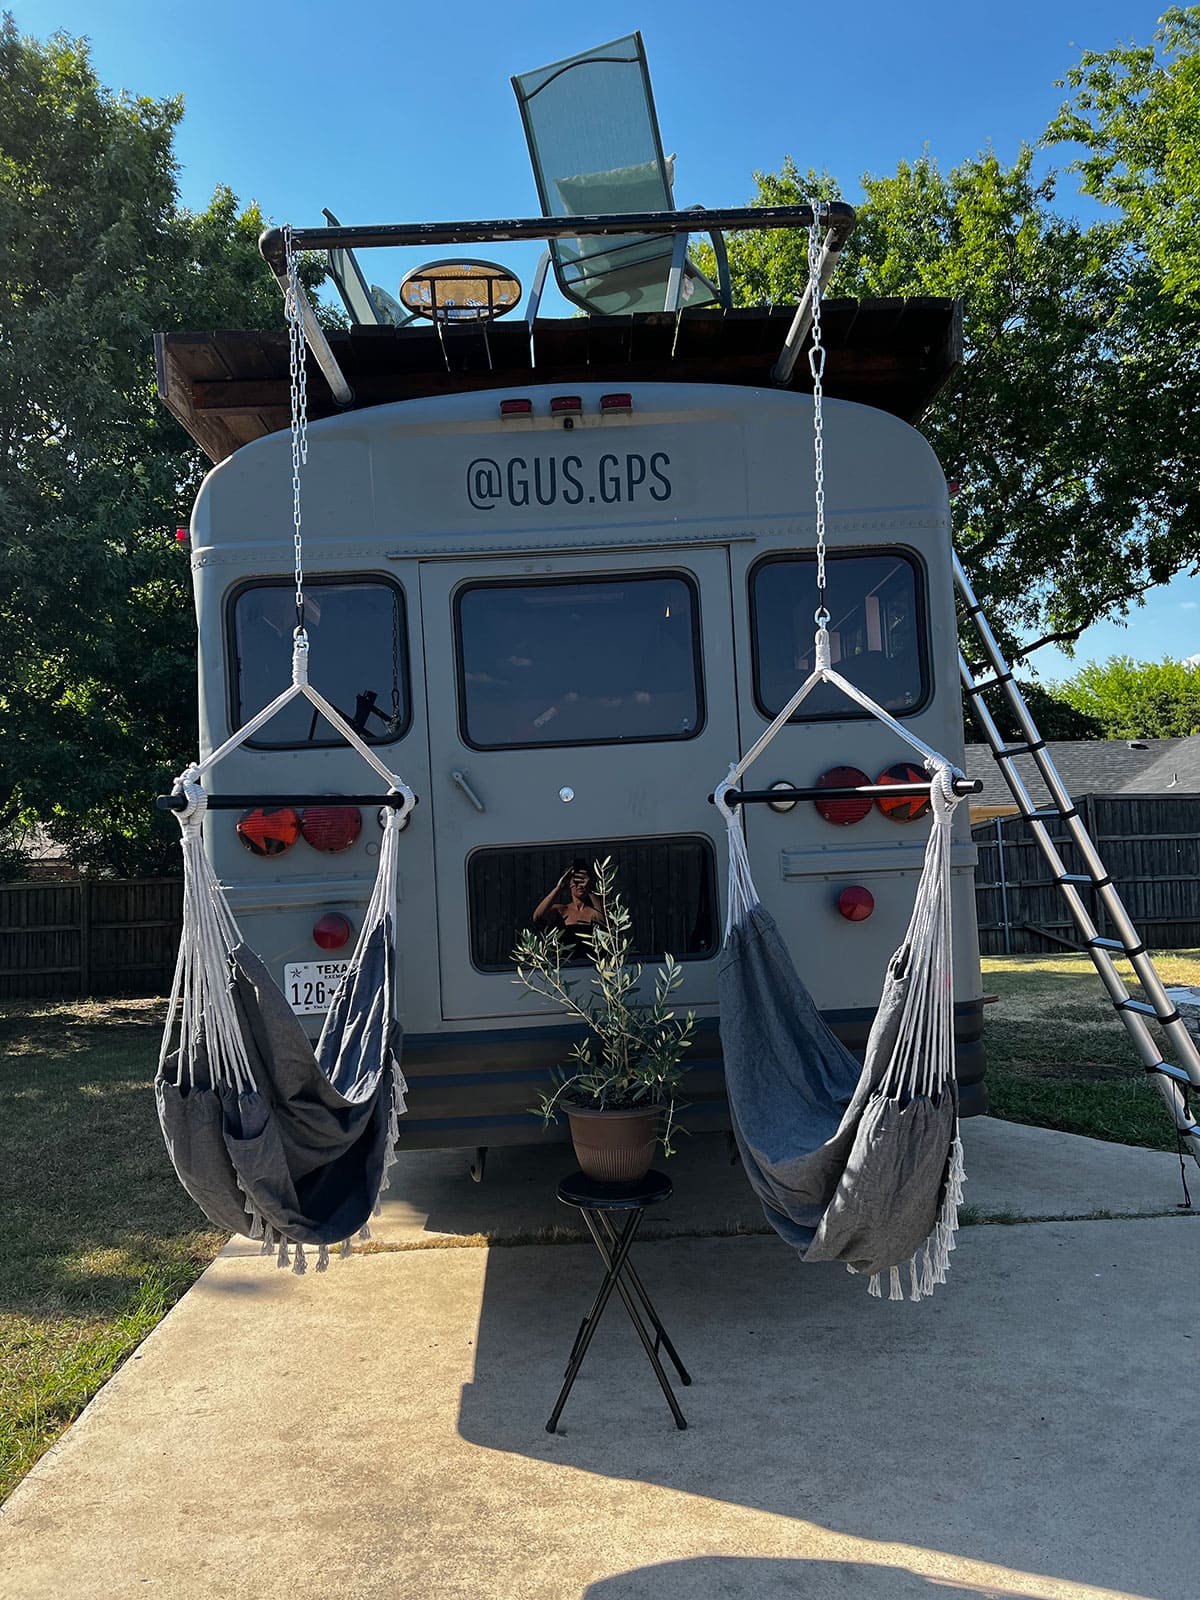
- Storage under the bed that lifts up on both sides and is accessible from the back door that opens
- Pull out bar under the deck so you can hang chairs from it or use it in multiple ways
- Two huge storage bins are mounted under the bus and the doors fold out with gas struts or you can hook them up with the chains and use them as outdoor table tops
- U-hooks mounted throughout the ceiling to hang a hanging chair or hammock inside
- Kitchen counter on the left side which moves and the side door still opens and has locks
- Three Smoke Detectors
- Carbon Monoxide Detector
- 12-volt lighting and separate room switches
- 120-volt outlets
- Multi colored party lights going along each wall
- Cost of build: I am not sure how much the entire build cost. I started to keep track of each purchase but after four years it just became about finishing a great bus. As I mentioned the bus itself was $6,000 and the solar system alone was around $10,000. I did my best to do everything myself and use as much recycled material as possible but my estimate is around $35,000 total. And that is not including building time.


To be the first to read all new articles and to read thousands of articles about conversions back to 1992, become a member of BCM.
Click HERE to become a Member now!Click on any image in this column
to open the company's website.
to open the company's website.